
评论面板
Parent page: System & Environment Panels

Add comments to a specific point or area in the active document using the Comments panel.
Summary
The Comments panel allows you to add comments to a defined area or point in the active document of a managed project. The panel allows all users who are working on the document to add comments and view all comments without actually modifying the document itself. This feature allows facilitation of strong collaboration processes and is invaluable when issues within the document need to be pointed out without receiving conflicts. The Comments panel essentially can be used to create a 'to do' list and as the design matures. the comments can be resolved and closed.
Panel Access
The panel is accessed from a managed project by performing one of the following then clicking in the document to define the point or area for the comment:
- Click Place » Comment for Area from the main menus.
- Click Place » Comment for Point from the main menus.
- Click Place » Freehand comment from the main menus.
- Click Place » Comment from the main menus.
- Right-click then select Place » Comment for Area.
- Right-click then select Place » Comment for Point.
- Right-click then select Place » Freehand comment.
- Right-click then select Place » Comment.
- On the Standard toolbar (View » Toolbars » Schematic Standard), click
 (to begin a new comment thread for an area),
  (to begin new comment thread for a point) button or
  (to enter freehand comment mode).
Display Settings
You can configure which comments are displayed in the panel as well as specify whether or not to display the comments on the schematic or PCB by clicking the  at the top right of the panel.
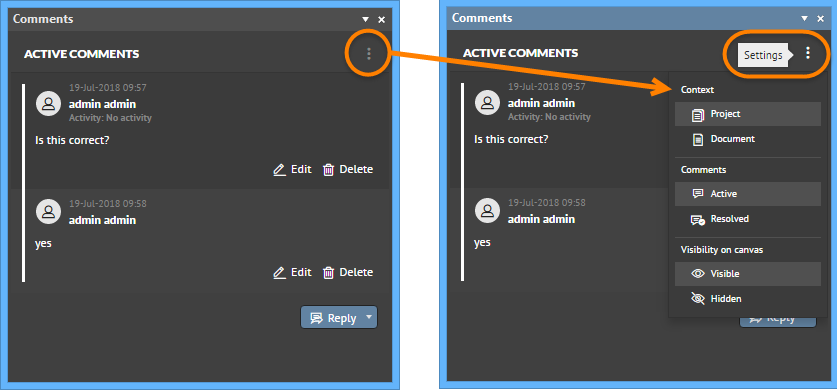
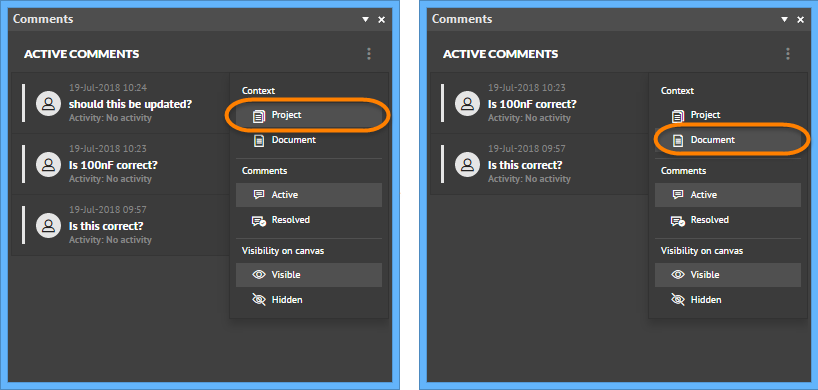
Use the Context region to switch between Project (view all comments across all source documents in the project) and Document (view all comments for the active document).
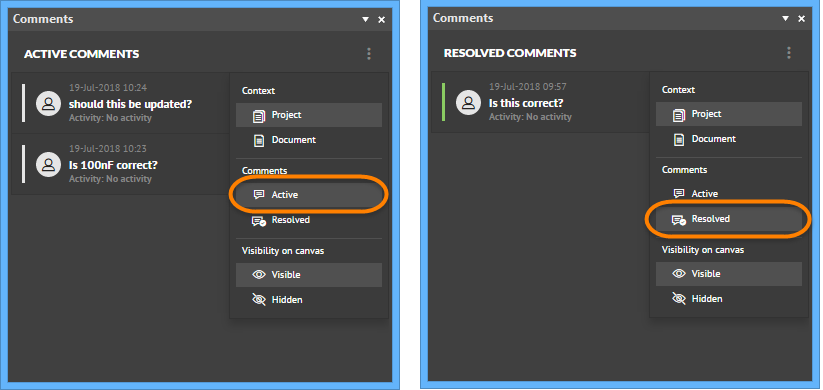
Use the Comments region to view either Active or Resolved comments. Comments that have been resolved will display a green bar as shown below in the image on the right.
Working with Comments
Adding a Comment
To add a new comment, type the desired comment in the text box then click the Post button. The comment will be committed and appear in the panel. It will appear in the workspace linked to the point, area, or component by a dashed reference line.

Editing a Comment
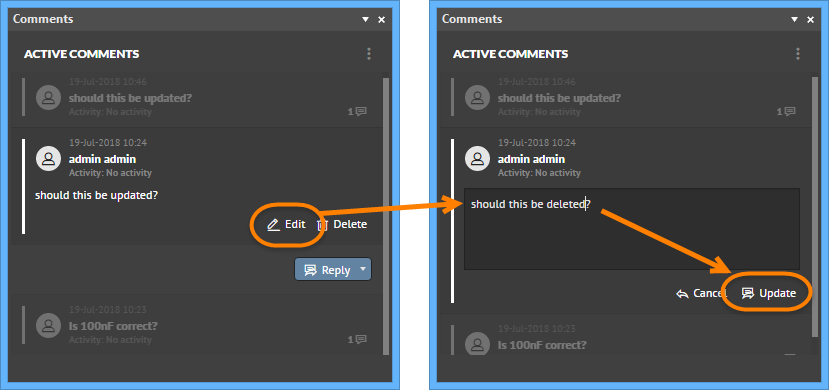
To edit a placed comment, click the Edit button associated with the comment you want to change then enter your edits in the text box. Click Update when you are done editing.
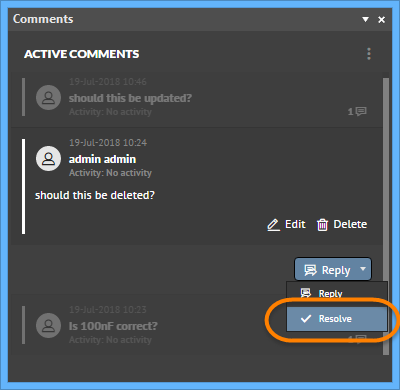
Resolving a Comment
To resolve (close out) a comment, select the comment to highlight it then click the Reply button and choose Resolve entry. The comment will be removed from the panel and the workspace.
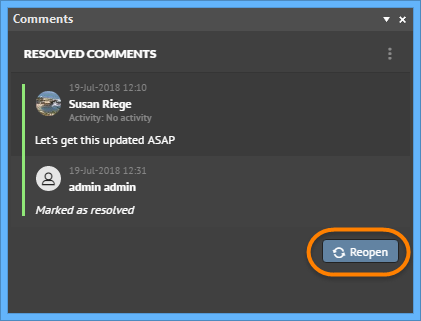
Viewing and Reopening Resolved Comments
To view Resolved comments, click the control at the top right of the panel and switch to Resolved in the Comments region. You can resurrect comments that have been resolved by clicking the Reopen button associated with a resolved comment. The comment will be reinstated in the panel and in the workspace.
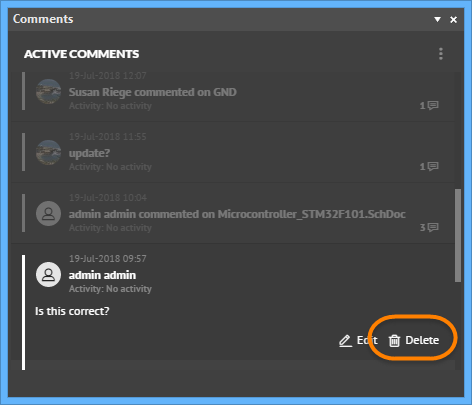
Deleting a Comment
To delete a comment, click the Delete button associated with that comment.
Adding an Avatar
An avatar can be added for a user, as well as the user's name. These are sourced directly from the user's profile in the Server.
![]()
Collapsing a Comment
You can collapse a comment in the workspace by clicking on the small triangle at the top-left of the text area.

Assigning a Comment to a User
Comments added to a project document may be assigned to a specific User by choosing the Assign option from the comment's  button drop down menu, and then selecting an available User. The Comment entry in the panel will indicate the assigned User, and the Comment text in the document will change to reflect the User Assignment, in place of the comment text itself.
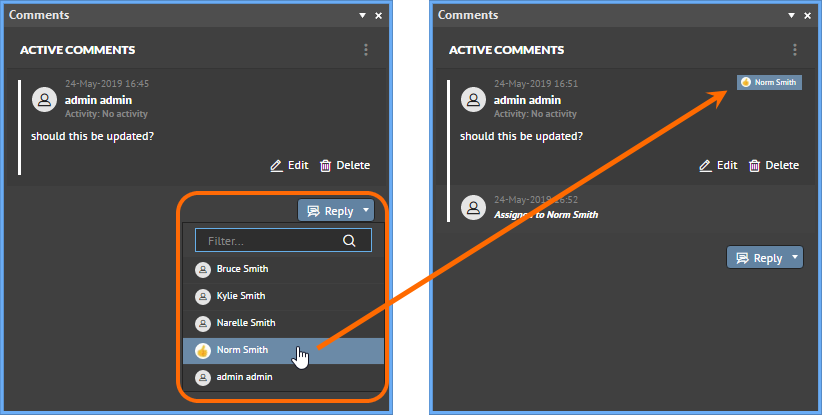
- An associated Task is automatically created for the assigned User, as presented in the Tasklist panel when the User (the task assignee) is signed in.
- When Comment thread is assigned to a User in the Comments panel this is immediately reflected on the server side (Web Review Comments) – and visa versa.
Associating a Comment to an Activity
When an activity (Process Workflow) is running for a managed project – typically a design review related process – a comment can be associated (or 'tagged') to that activity. The association can be made in either a Web Review session or in the NEXUS Comments panel.
► See Working with Tasks for more information.
When there are active review-based processes for the managed project, the field to the right of the Activity entry for a comment will be enabled (No activity). Click this link to access a listing of all available activities, and then choose an entry to associate the comment to.
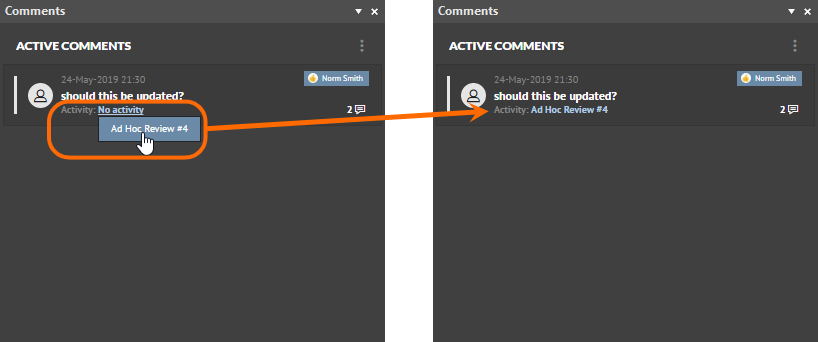
The associated activity for a comment will be reflected from the Comments panel to the Web Review Comments on the server side – and visa versa. If you do not see an update from the server in the Comments panel, sign out and back in to Altium NEXUS.
Freehand Comments
When using the Freehand comment feature (Place » Freehand comment, which allows you to add comments to a document by freehand drawing), the entry for a comment on the Comments panel will contain context information as follows:
- If you draw a freehand shape around a component, the comment will be tagged with the string <UserName> commented on <ComponentDesignator>.
- If you draw a freehand shape anywhere else on the document, the comment will be tagged with the string <UserName> commented on <DocumentName>.
Right-click to finalize the drawn shape and access its related text box in the Active Comments section.
Controlling Display of Comments in the Workspace
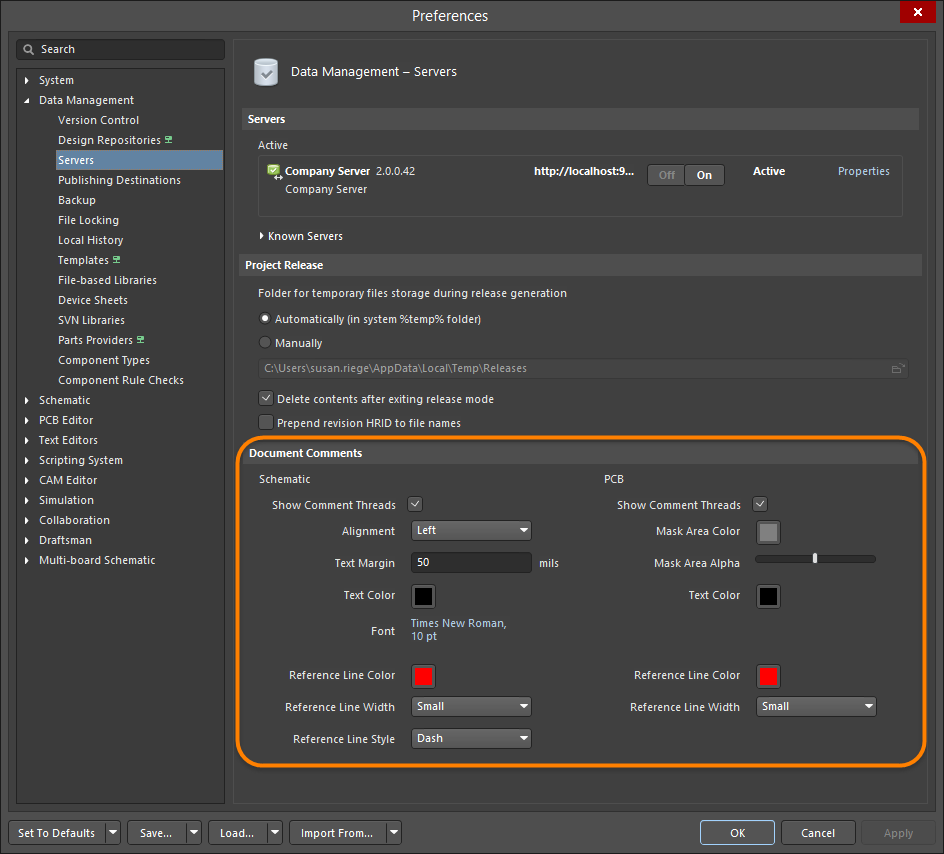
The display and appearance of comments is controlled from the Document Comments region on the Data Management - Servers page of the Preferences dialog. Controls are provided independently for comments displayed on schematic and PCB. To turn off display of comments in the workspace, relying on just the Comments panel, disable the respective Show Comment Threads option. For information regarding the other controls that relate to the look and feel of comments and reference lines, refer to the documentation page here.
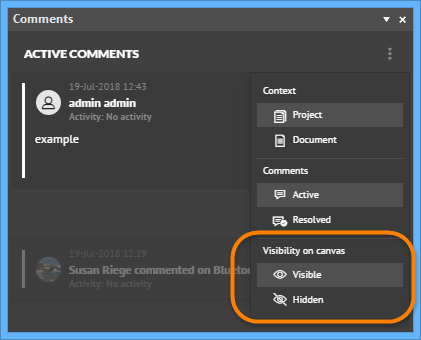
Visibility of comments in the workspace also can be controlled directly from the Comments panel. To do so, click the control at the top-right of the panel and switch between Visible and Hidden in the Visibility on canvas section.
Tips
- When a comment is added, it is seen instantly by all other users that have the same Managed Project and document open in their workspaces.
- The Comments panel will track the entire thread of a specific comment, however, only the latest comment in that thread is displayed in the workspace.
- Within a comment thread on the Comments panel, the latest reply is always added to the bottom of that thread. Where multiple comment threads are present in a document, the latest thread is presented at the top of the panel.
- The active/selected comment on the Comments panel is highlighted. In the workspace, the area/point/component that is the focus of the active/selected comment is zoomed and centered in the main design window (where applicable). For a point, area or component type comment, its associated reference line is also displayed.
- The active/selected comment on the Comments panel is highlighted. In the workspace, the active/selected comment is distinguished by a dashed reference line.
- You can move a comment around in the workspace, only in terms of the area in which the text is displayed. The initial defined point or area cannot be modified. The reference line extends from that point/area to the text area.