
KB:在A365工作区管理的项目中创建并添加模板
Solution Details
While connected to Altium 365 workspace, in Preferences, Data Management » Templates, with Templates tab active, select template type from Add pulldown button to create afresh or load from file. Similarly, in Explorer panel, Managed Content » Templates, select template type and in the right pane, right-click to either Create New or Upload
The following online manual links detail how each template type is managed:
- Managed Project Templates
- Managed BOM Templates
- Managed Component Templates (For Concord Pro and Altium 365 PRO Only)
- Managed Schematic Templates
- Managed Draftsman Templates (Document and Sheet Types)
- Managed Layer Stacks
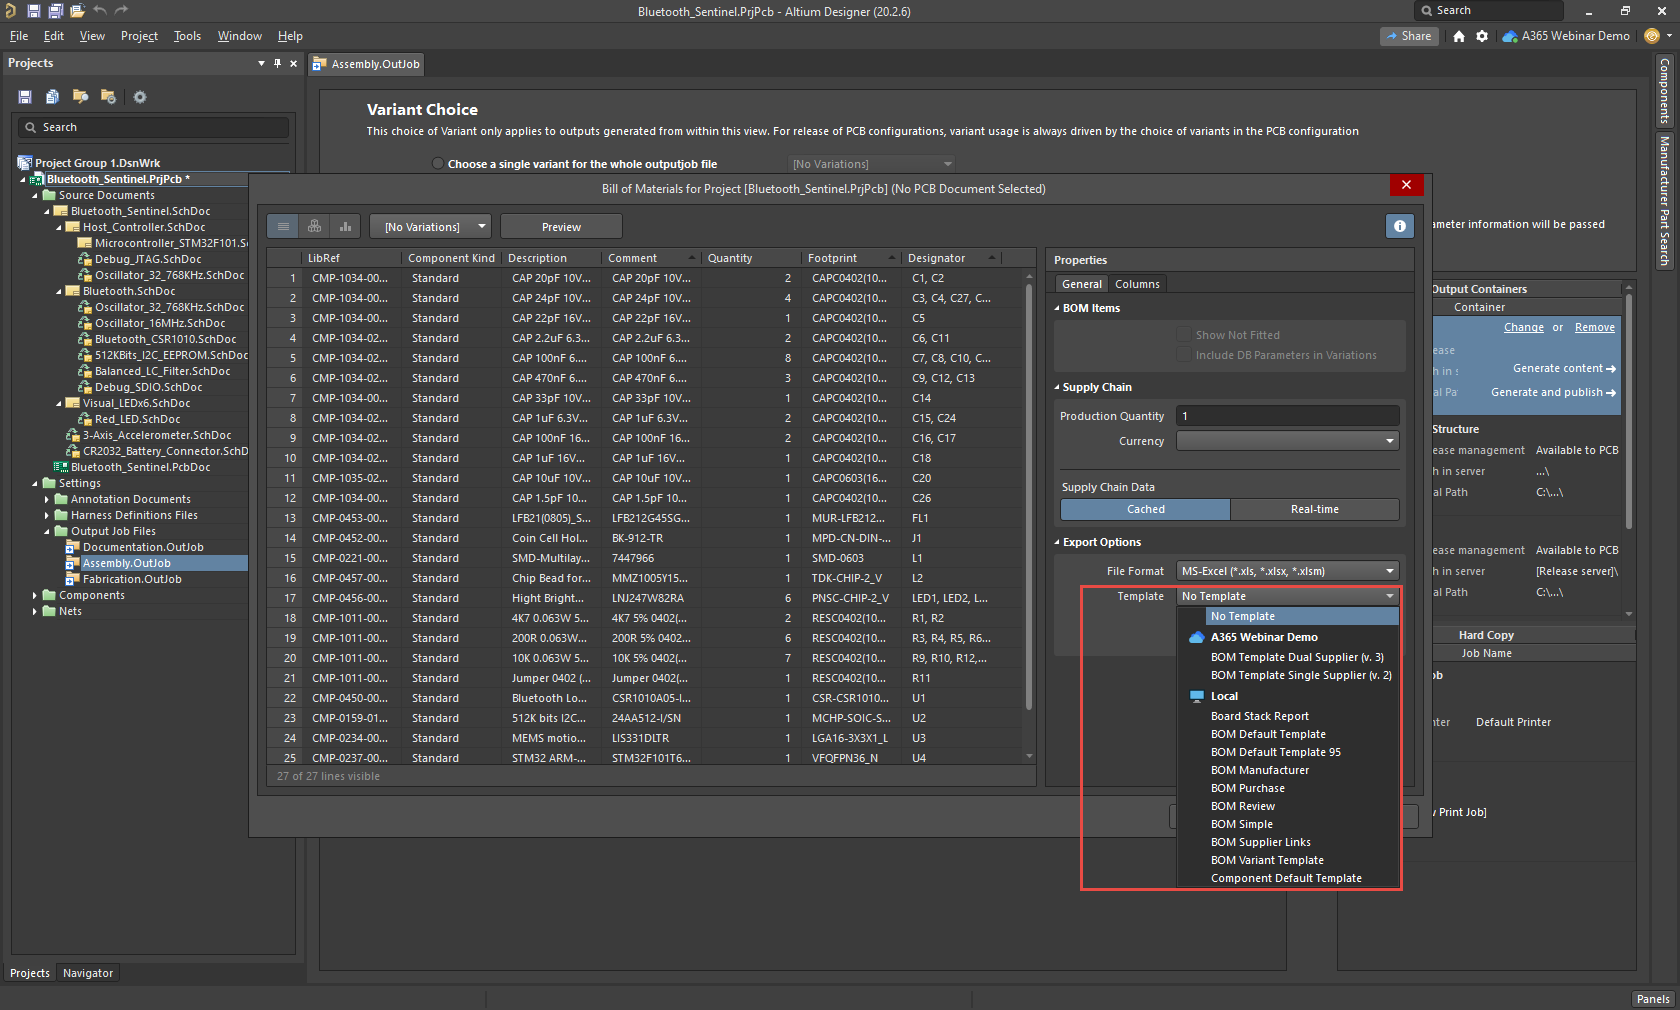
Regarding the BOM document, after executing the BOM Configuration window, it will automatically recognize the managed and local templates while connected to the on-premise server or Altium 365 workspace. You can just select from the drop-down menu either managed BOM templates or local templates as shown in the following image:
The only configurations required in the on-premise server or Altium 365 workspace are:
- to make sure that the server items are set to the “BOM Template” type, recognized by the
 icon
icon - make sure that the BOM Templates folders’ Share options are set properly to restrict access to certain users as necessary

Regarding the default Local Templates, they are controlled by a folder path defined in the Altium Designer Client’s Preferences, under Data Management » Templates as shown in the following image. It is required to disconnect from the server or workspace in order adjust this setting. Otherwise, you will not be able to edit as shown in the following image:
