
Background Agents
Background agents allow you to perform automated checks of requirements in your requirements projects, such as checking for missing attributes, checking the text of requirements for quality standards, or checking the text of requirements for using consistent terminology. Agent findings can then be resolved using the Engineering Assistant.
Managing Agents
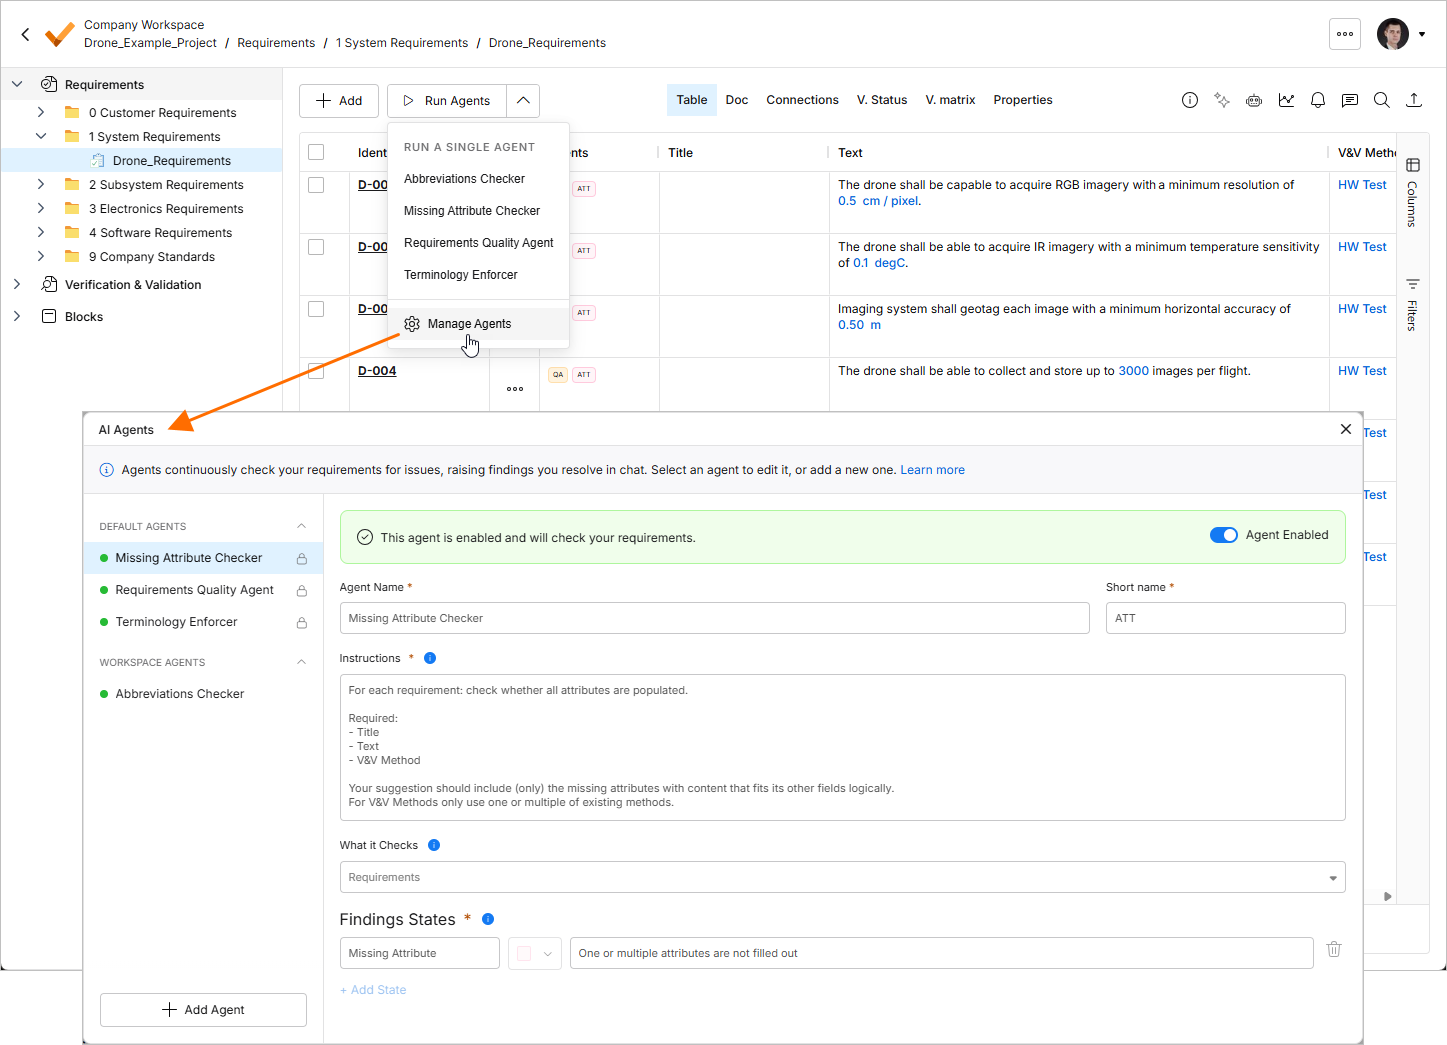
A set of available background agents is managed using the AI Agents window accessed by clicking the drop-down part of the  button at the top of the page when in the Requirements module and selecting Manage Agents from the menu that appears. From this window, you can add new and change, enable/disable, and delete existing agents.
-
Existing agents are listed at the left of the window. Default agents are listed under the Default Agents heading (and are distinguished in the list at the left by a lock icon –
 ), while custom, user-created agents are listed under the Workspace Agents heading. Click an entry to show the selected agent's details.
-
Use the Agent Enabled option in the banner at the top of the window when an agent is selected to enable/disable this agent. When an agent is disabled, it cannot be run. Enabled agents are distinguished in the list on the left by a green dot (
 ), while disabled agents are indicated by an empty circle (
 ).
-
To add a new agent, click the
 button at the bottom left of the window. An entry for a new agent will appear in the list. Define the fields for the new agent and then click the
 button at the bottom right. The following fields are available:
-
Agent Name – the name of the agent. This is how the agent will be shown in the menus in the Requirements module when accessing them.
-
Short name – the short name of the agent. Labels of the agent's findings will be shown with its short name in the Agents column in the Requirements module.
-
Instructions – free-form instructions describing what the agent should look for and flag, and what suggestions should be made to resolve the agent's findings.
-
What it Checks – the type of data with which the agent works. Currently, only the Requirements option is available.
-
Findings States – define the state name, state color (with which the finding's labels will be shown in the Agents column in the Requirements module), and free-form description of the state's meaning. Use the Add State control at the bottom to add a new state and the
 icon at the right of an existing state to remove it. An agent must have at least one state.
-
-
To edit an existing custom agent, select it in the list, modify the required fields, and then click the
 button at the bottom right.
-
To delete an existing custom agent, select it in the list, click the
 button at the bottom right, and then confirm the deletion.
 icon at the top right, selecting Settings from the menu that appears, and then selecting Background Agents in the AI Settings group from the list at the left).
Running Agents and Resolving Findings
You can run all agents or specific agents for requirements in the Requirements module in several ways.
-
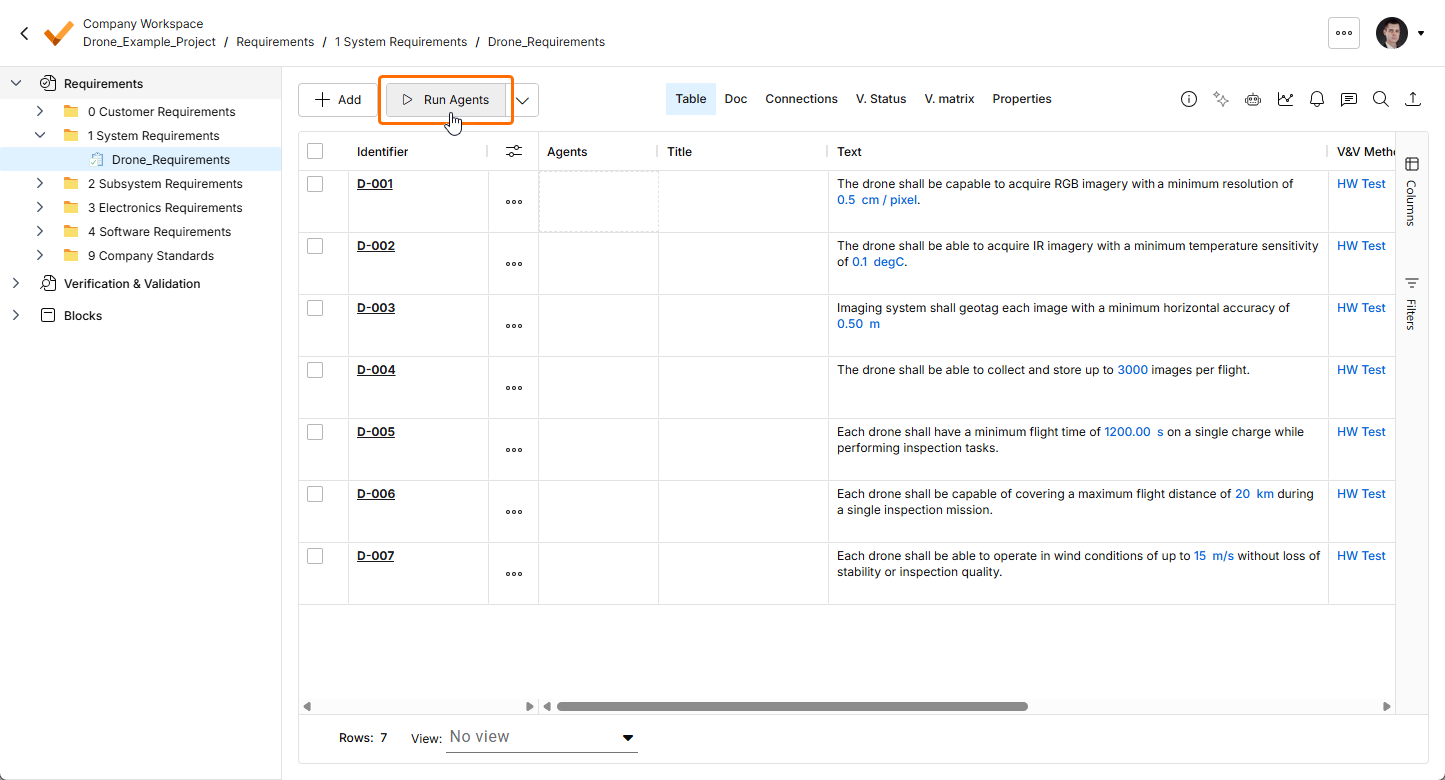
To run all enabled agents for all requirements in the currently selected specification, section, or folder, click the main part of the
 button at the top of the page.
-
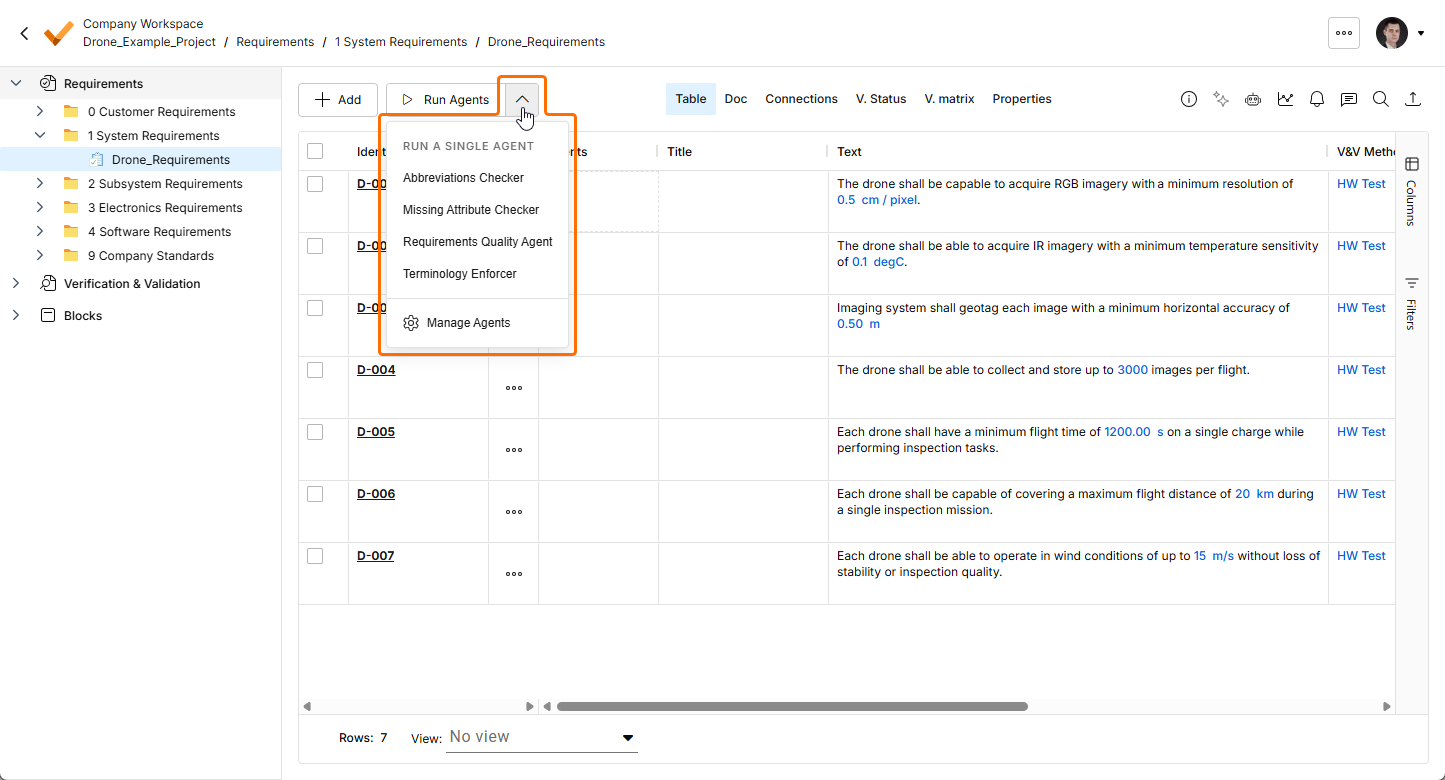
To run a specific agent for all requirements in the currently selected specification, section, or folder, click the drop-down part of the
button at the top of the page and select the required agent from the menu that appears.
-
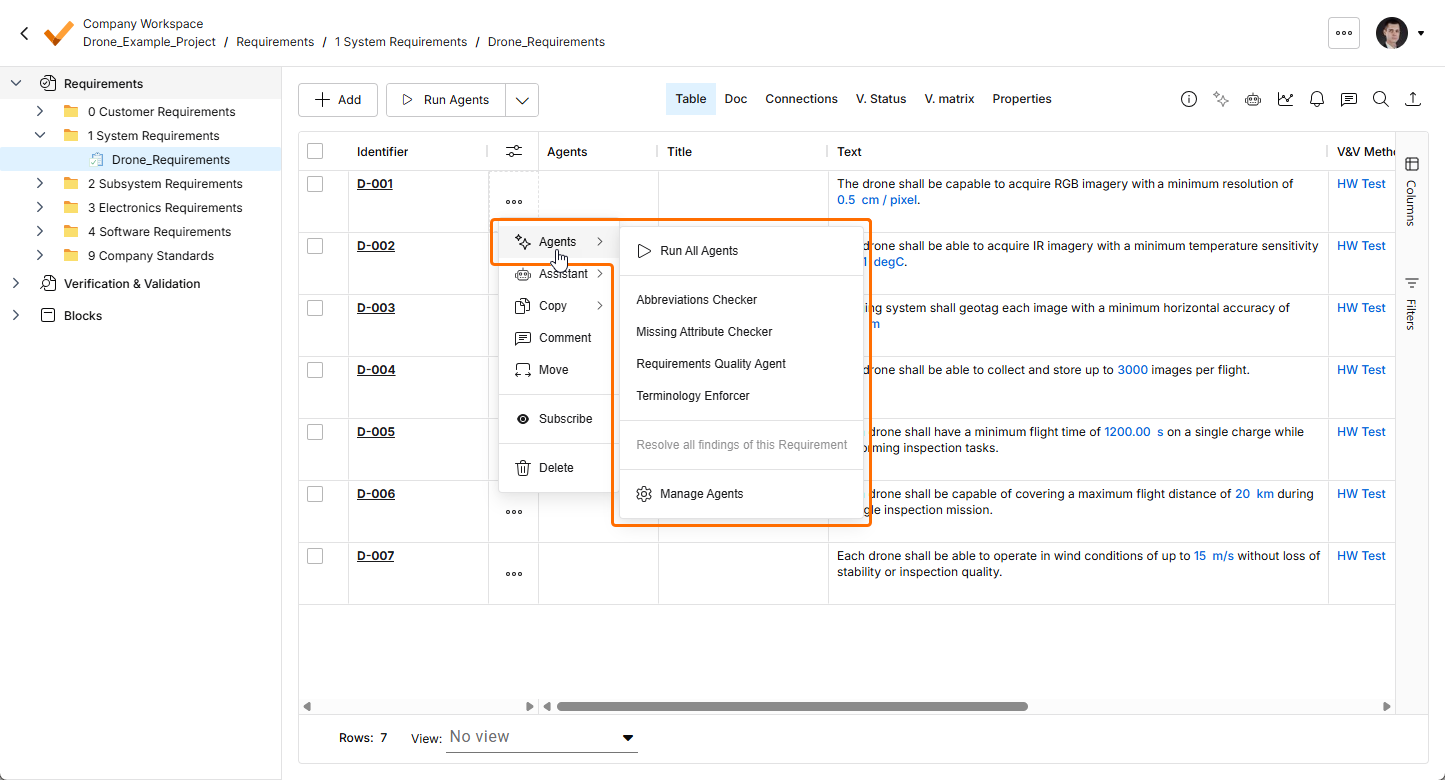
To run all enabled agents for a specific requirement, click the
 button in the actions column for that requirement and select the Run All Agents command from the Agents sub-menu.
-
To run a specific agent for a specific requirement, click the
button in the actions column for that requirement and select the required agent from the Agents sub-menu.
You can also select multiple requirements using checkboxes in the leftmost column and then use the button or its drop-down or the Agents sub-menu of the button's menu to run all agents or a specific agent for the selection.
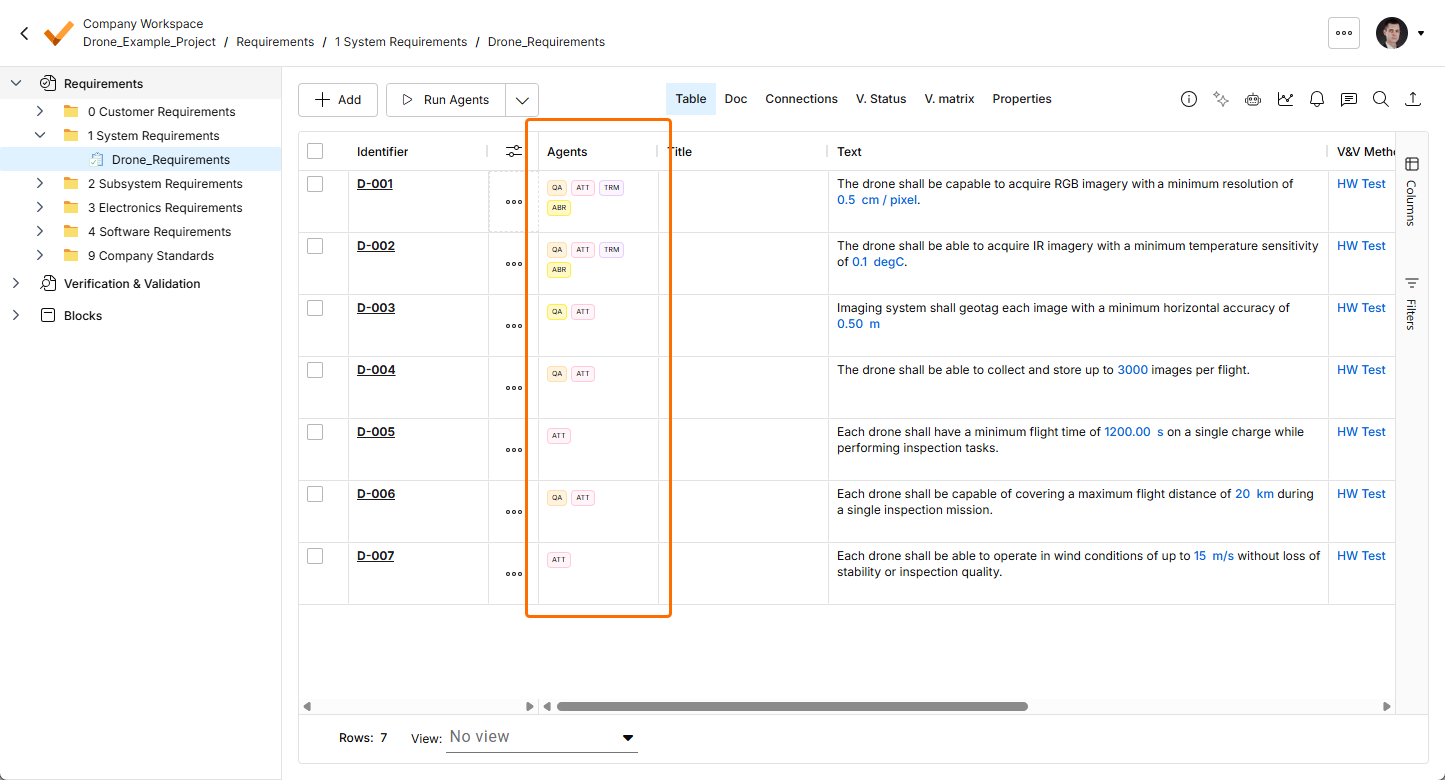
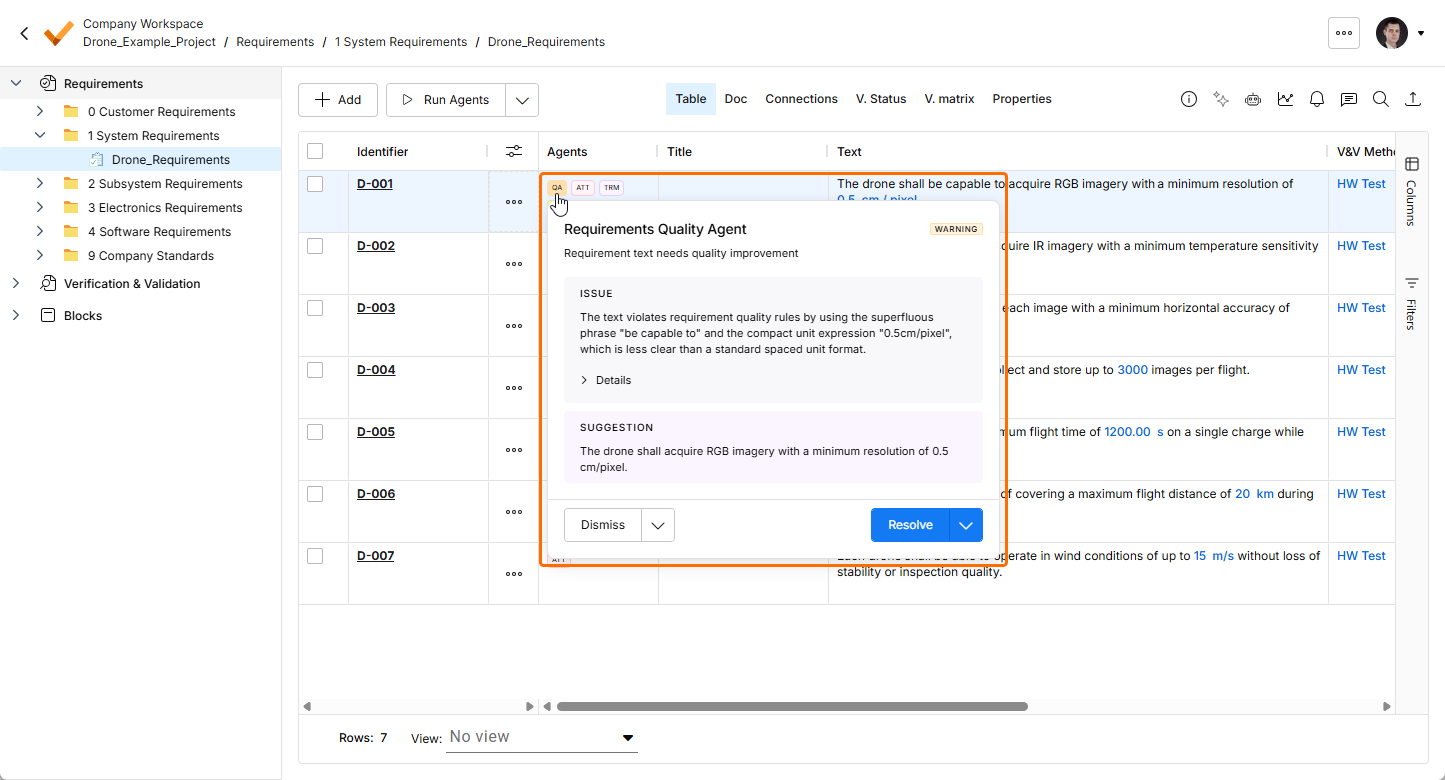
Once agent runs have completed for one or more requirements, each agent finding will be indicated with a label in the Agents column of the requirements table. Hover the cursor over a finding label to display its details in the pop-up window.
You can then resolve findings using the Engineering Assistant.
-
To resolve a specific finding for a requirement, click the main part of the
 button in the finding details pop-up window.
-
To resolve all findings for a requirement, click the drop-down part of the
button in the details pop-up window for any finding of this requirement and select the Resolve all findings of this Requirement command from the menu that appears. Alternatively, click the  button in the actions column for that requirement and select the Resolve all findings of this Requirement command from the Agents sub-menu.
-
To resolve all findings of a specific agent across all requirements, click the drop-down part of the
button in the details pop-up window for any finding of this agent and select the Resolve all findings of this Agent command from the menu that appears.
You can also select multiple requirements using checkboxes in the leftmost column and then use the Agents » Resolve all findings of selected Requirements sub-menu of the button's menu to resolve all findings for the selected requirements.
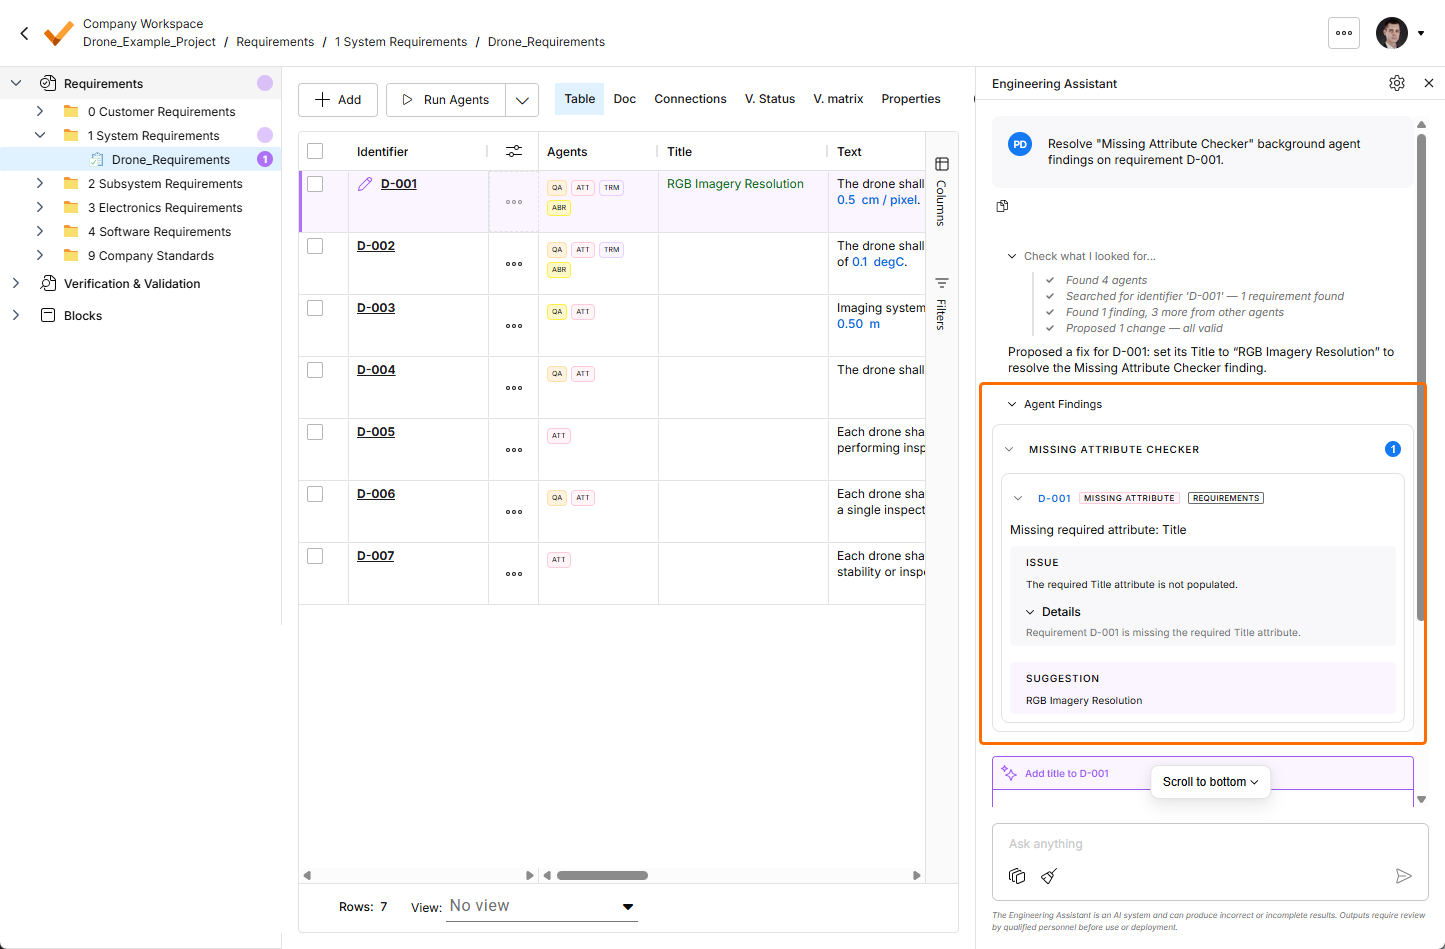
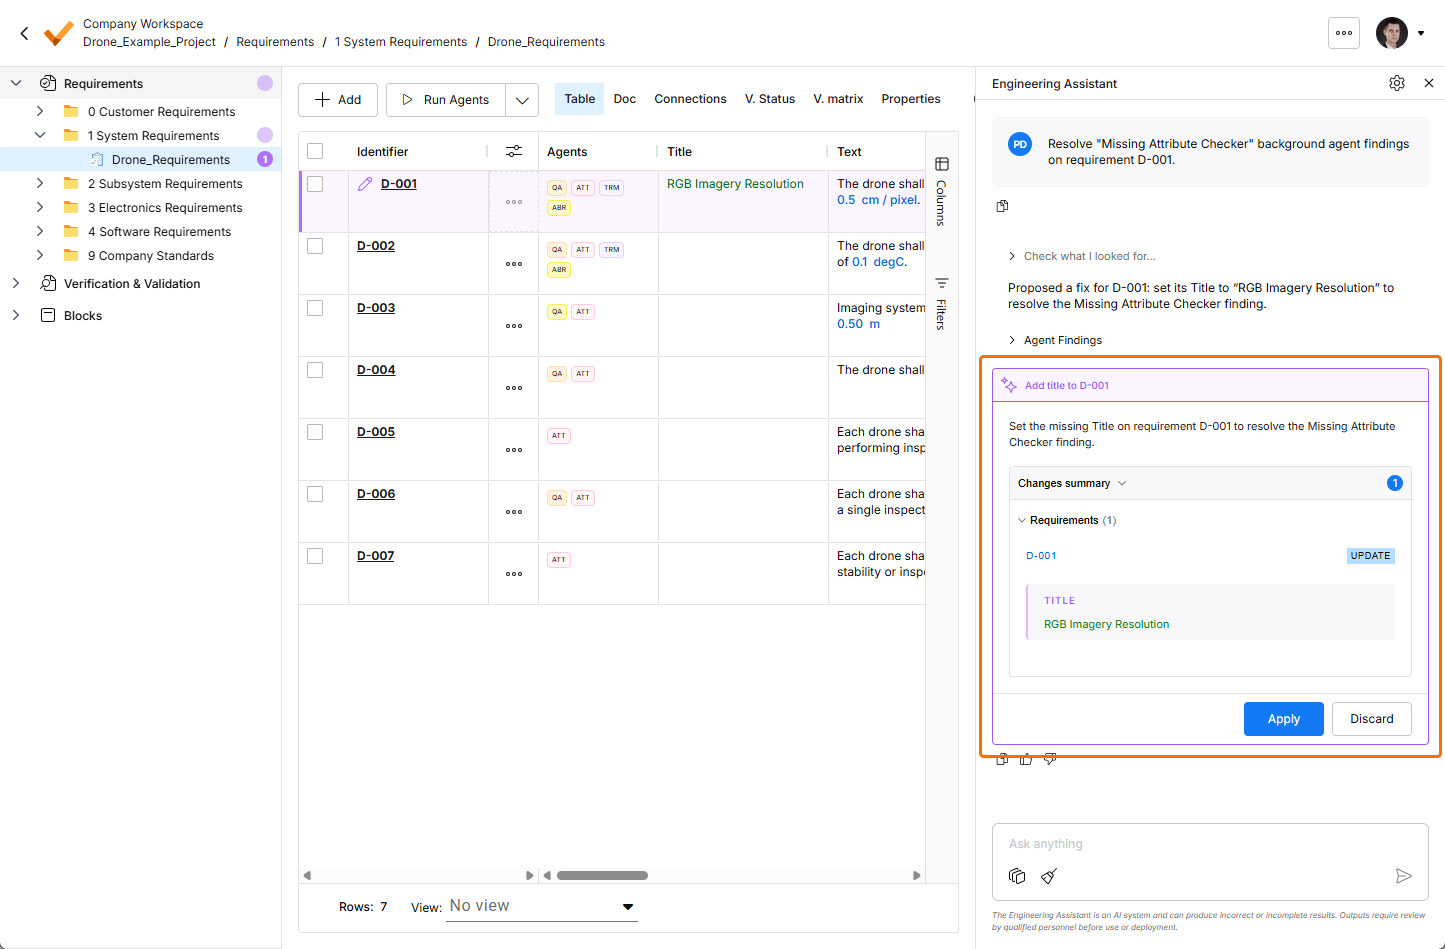
Details on chosen agent findings and proposed changes will be shown in the Engineering Assistant pane where you can apply or discard the changes. You can also request to resolve findings of specific agent(s) if required.
Alternatively, you can dismiss findings to hide their labels from the Agents column.
-
To dismiss a specific finding for a requirement, click the main part of the
 button in the finding details pop-up window.
-
To dismiss all findings for a requirement, click the drop-down part of the
button in the details pop-up window for any finding of this requirement and select the Dismiss all findings of this Requirement command from the menu that appears.
-
To dismiss all findings of a specific agent across all requirements, click the drop-down part of the
button in the details pop-up window for any finding of this agent and select the Dismiss all findings of this Agent command from the menu that appears.