You can quickly and easily upload your existing requirements data into Requirements & Systems Portal using the Import Wizard available in the Requirements Module. Leveraging AI-powered extraction, you can import requirements from unstructured PDF, Word, Excel, and CSV files, reducing the time and effort required to manually transfer requirement data and helping you capture requirements more accurately and efficiently.
Accessing the Importer
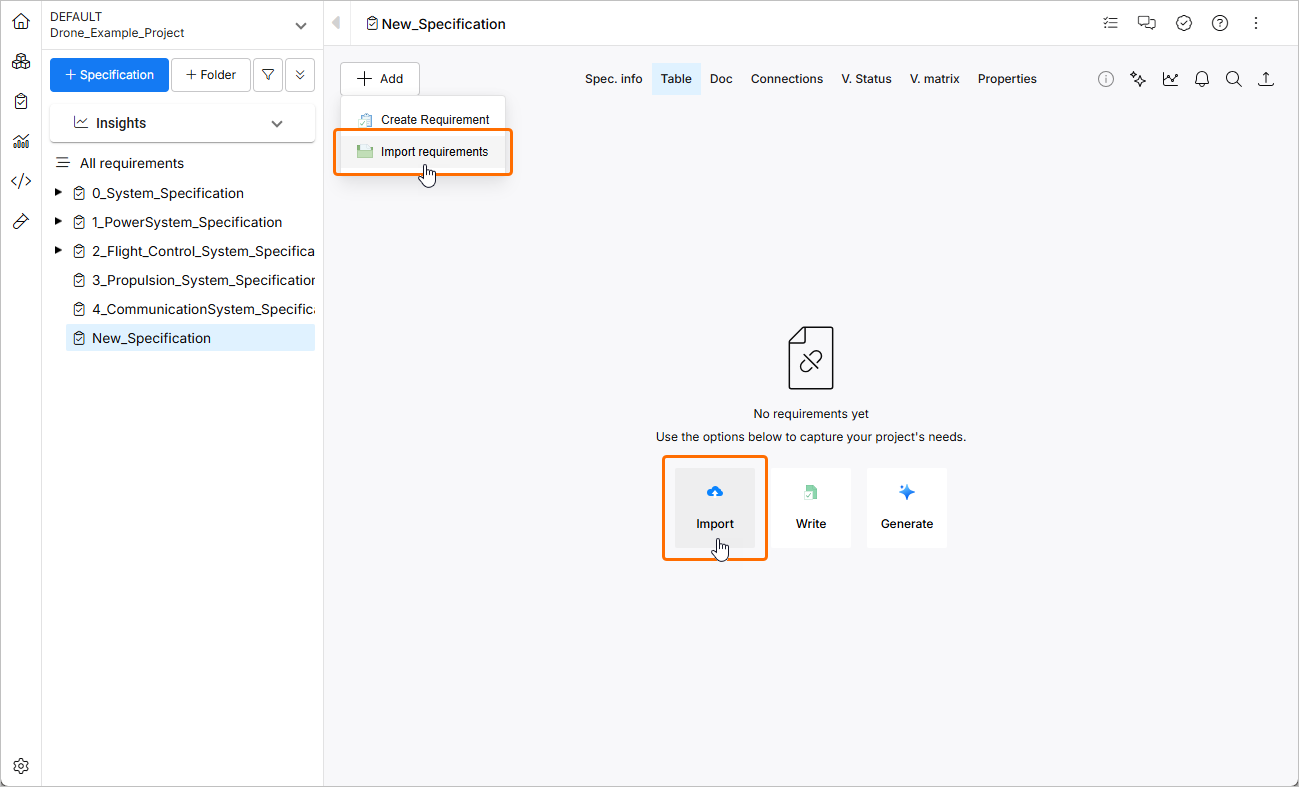
The Importer can be accessed from the Requirements Module ( ) by clicking the
  button at the top left of the page and select Create Requirement from the menu that appears. Alternatively, when the specification currently in view has no requirements, the importer can be accessed by clicking the Import button on the page.
Uploading a File
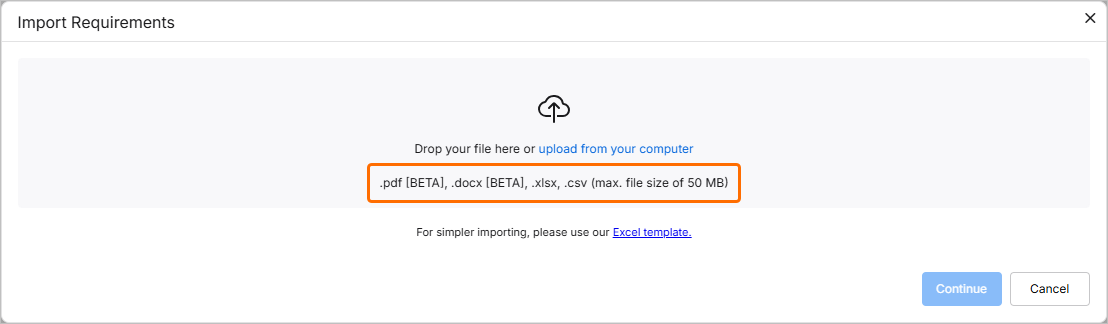
The Import Requirements window will open. On this stage, you can upload a file of a supported type (*.pdf, *.docx, *.xlsx, or *.csv). To do this, drag and drop the file to the corresponding region of the window or click the select from your computer control to browse and select the file from the hard drive.
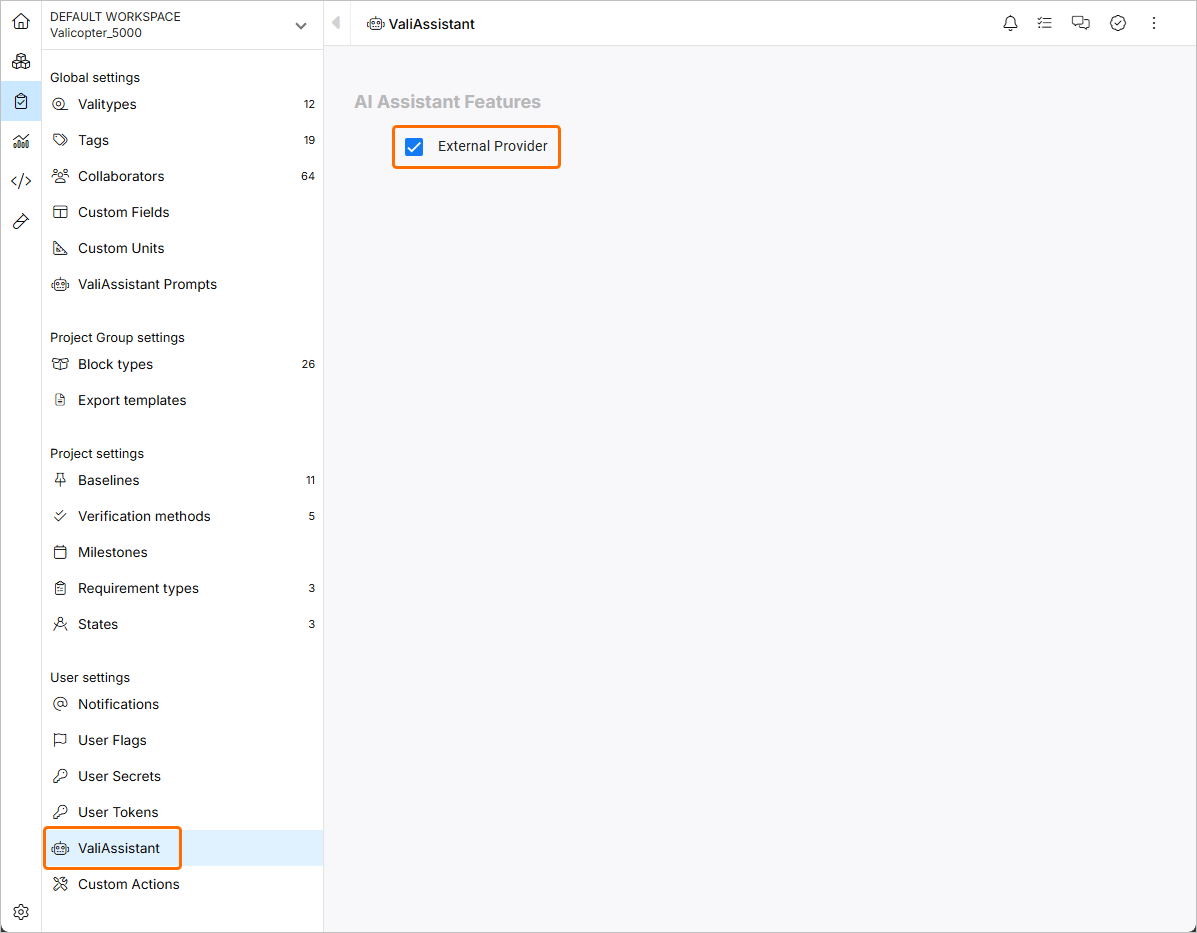
Files in *.pdf and *.docx formats can only be imported using the AI importer which is enabled by default. If required, it can be disabled by a Workspace administrator using the External Provider option on the Settings – ValiAssistant page (accessed by clicking the  icon at the bottom left, selecting Settings from the menu that appears, and then selecting ValiAssistant from list in the left-hand pane) –
  .
.
When the External Provider option is disabled, only files in *.xlsx and *.csv formats can be imported using the classic importer. In this case, a corresponding message will be shown at the top of the Import Requirements window (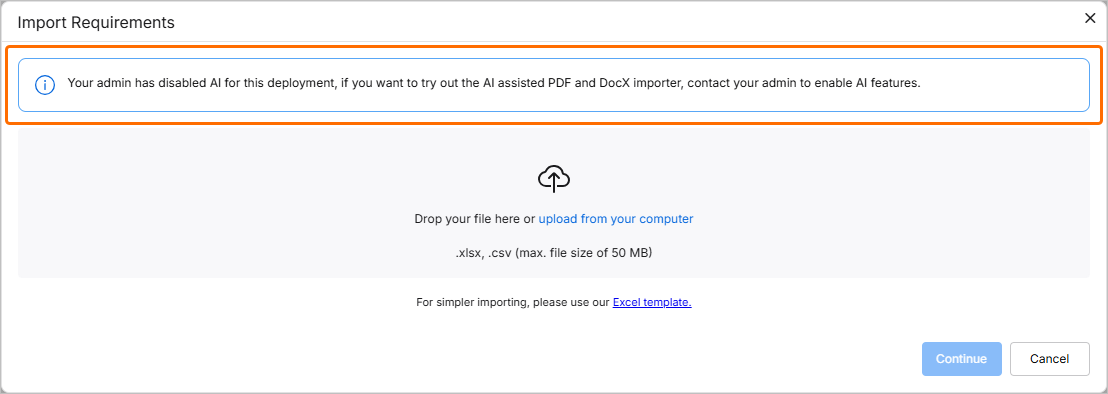 ).
).
While the uploaded file can be unstructured, you can use the Excel template link to download an *.xlsx file that can be used to capture requirements in a structured manner. You can also use this link to download the file.
-
The maximum upload file size is 50 MB.
-
In case a non-supported file is uploaded, an error message will notify you about this.
Once the file is successfully uploaded, its entry will be shown in the window. You can remove it from the window by clicking the  icon.
icon.
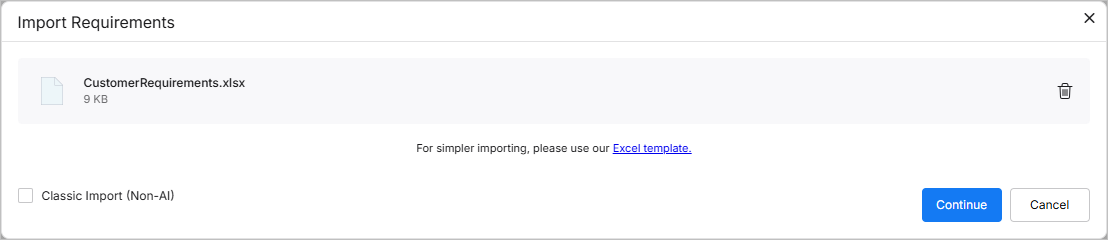
For an uploaded *.xlsx or *.csv file, you can choose to proceed to use the classic importer by enabling the Classic Import (Non-AI) option at the bottom left of the window.
Reviewing the Extracted Data
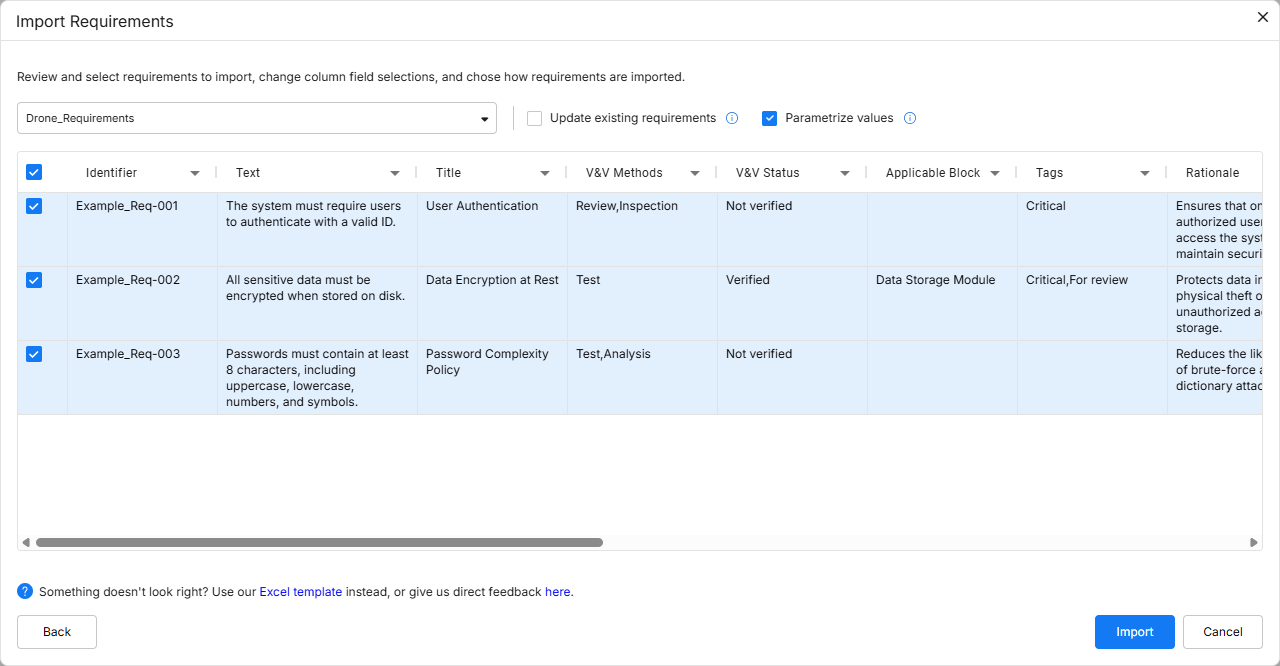
Once the required file is uploaded, click the  button to proceed. The extracted data will be presented as a table of suggested requirements for you to review.
By default, the suggested requirements will be imported to the specification that has been viewed when the Importer was accessed. You can select the required specification by selecting it from the drop-down at the top of the window or create a new specification by selecting the + Add specification entry from the drop-down and defining the name of the new specification using the specification name field that appears (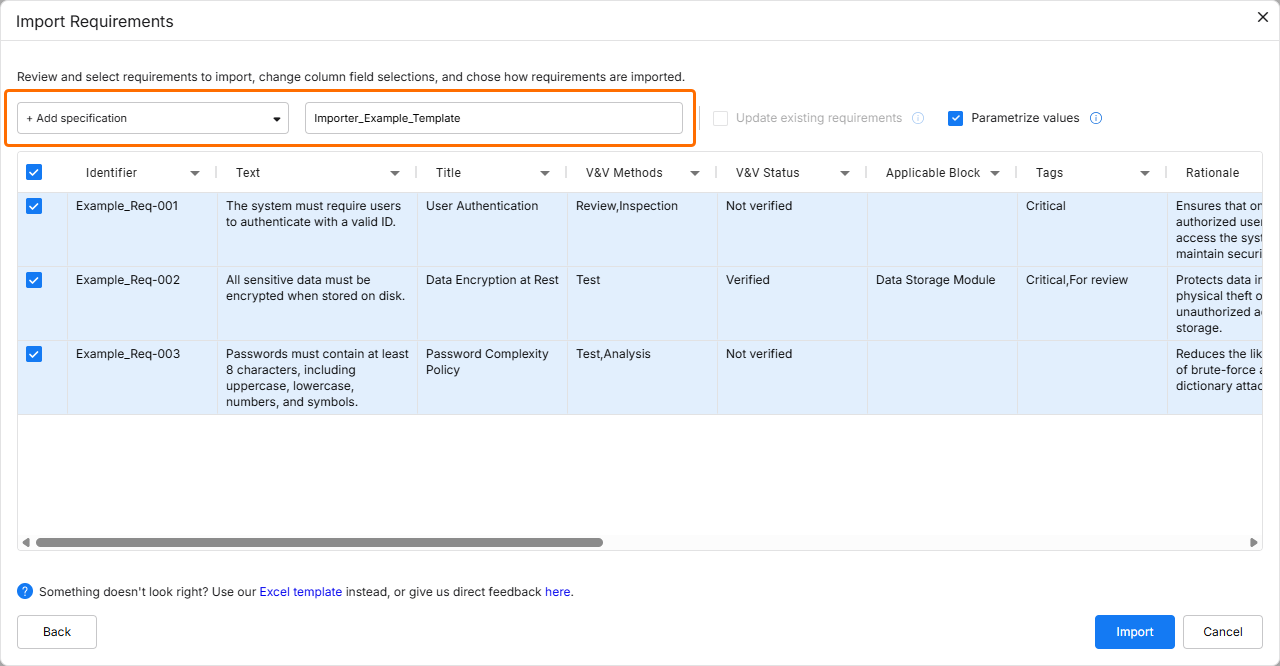 ).
).
When creating a new specification, the naming definition rules must be met. The specification name cannot contain the following characters: \ / ? % * : | " < >. Also, leading and trailing spaces will be ignored.
Enable the Update requirements option to overwrite any existent requirements in the destination specification by substitution of the data (file data substitutes the data in the specification).
-
If the option is disabled and you are importing requirements whose Identifier already exists in the specification selected as the destination, Requirements & Systems Portal will add the numerical suffix (_1, _2, _3, etc.) to the identifiers of the imported requirements to differentiate them.
-
If the option is disabled and you are importing requirements whose Identifiers already exist in the current project but not in the specification selected as the destination, Requirements & Systems Portal will add a warning icon to the identifiers that alert to a duplicate identifier in the same project.
-
If the option is enabled, blank values in the file being imported are supported, i.e., if a value in the file is blank, the value is removed from the requirement. This also applies to multi-select fields, such as Tags.
Enable the Parametrize values option to check the suggested requirements for possible quantifiable parameters and convert them to Valis.
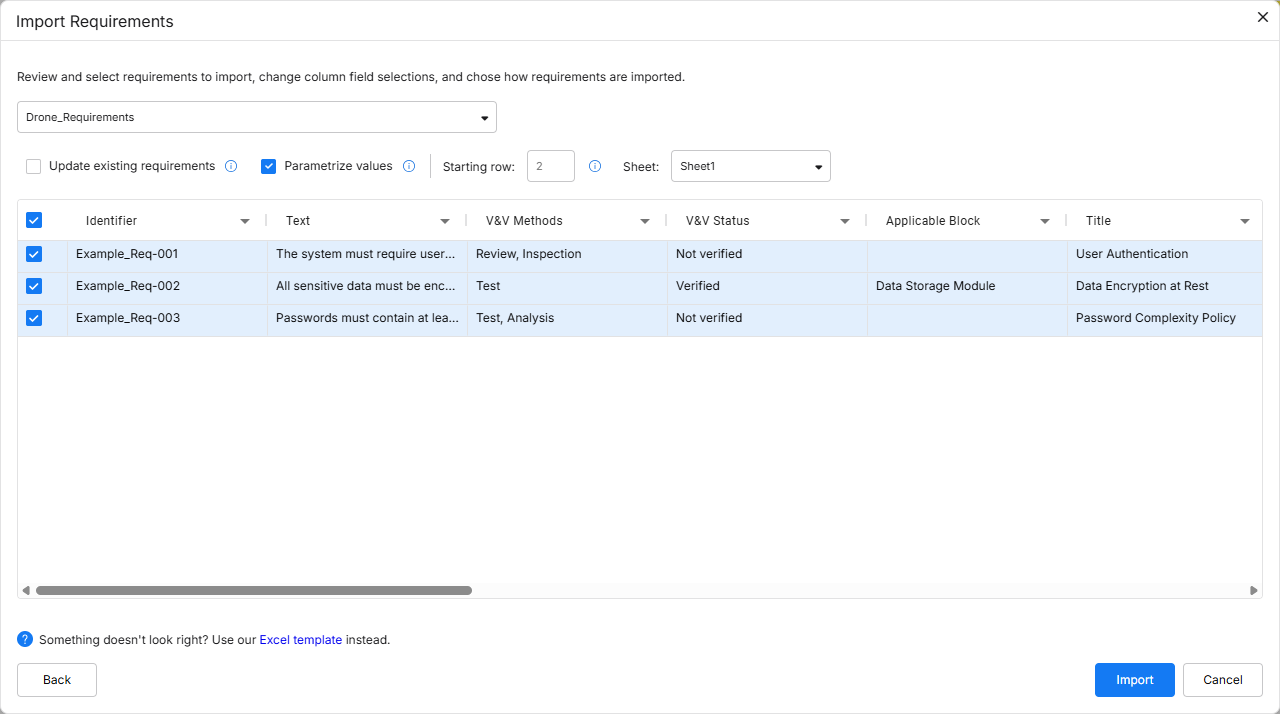
When using the classic importer, the following options are also available:
-
Starting row – you can select from which row of the imported file the data should start being collected to be inserted in Requirements & Systems Portal.
-
Sheet – in case of having a file with multiple sheets, you can select which sheet they want to import from.
You can select the requirements you want to import by enabling checkboxes at the left of corresponding rows.
Data Mapping
You can define how data from the uploaded file will correspond to specific fields in Requirements & Systems Portal. If the file contains headers identical to the default fields in Requirements & Systems Portal, these fields will be automatically mapped. However, you can override or adjust this automatic mapping if needed. Click a column header and select the required field from the drop-down.
Alternatively, you can map the column data into a new, custom column by typing its required name into the Search/Add custom field in the drop-down and then selecting <custom_column_name> (Create new) from the drop-down.
You can also select None from the drop-down to not map the data from the file to any column (i.e., this data will not be imported).
At least the Identifier and Text columns must be selected. Otherwise, a warning message will be displayed until that condition is met (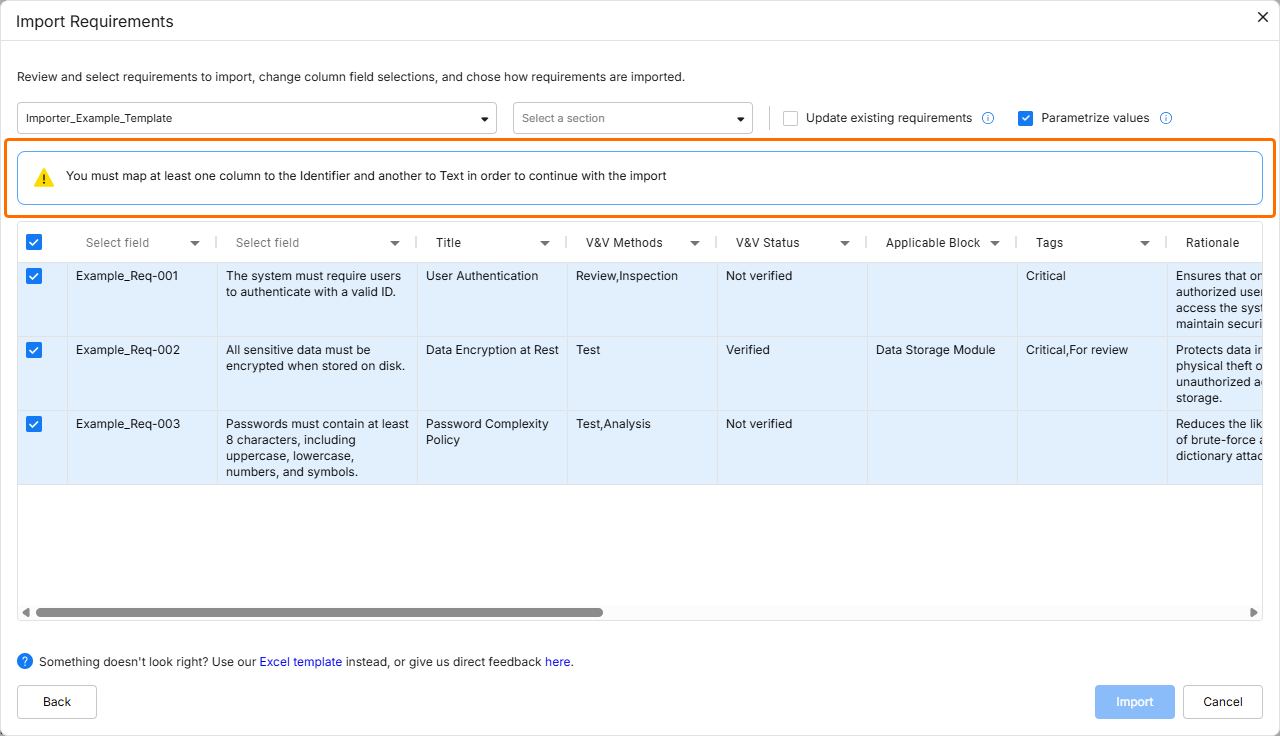 ).
).
The following fields can be imported into requirements using the Importer:
-
Identifier
-
Text
-
Title
-
Rationale
-
Children
-
Parents
-
Section
-
Path to Section
-
Applicable Block
-
Compliance Comment
-
Type
-
State
-
Compliance
-
V&V Status
-
V&V Methods
-
Applicability
-
Owner
-
Tags
-
Custom columns
-
Children, V&V Methods, Applicable Blocks, Applicability, and Tags can be imported with more than one value for each requirement. To do so, each value should be separated by a comma.
-
If a verification method, applicable block, requirement type, state, compliance, or tag being imported does not currently exist in Requirements & Systems Portal, it will be automatically created during the import and added to the requirement.
-
For Applicability, compound block types can be referenced with a /, for example, block_A/block_B.
-
For custom columns, the following types are available: Select, Multiselect, Text, Date, Number.
The following fields are case-sensitive:
-
Type
-
State
-
Compliance
-
Tags
For example, if tag TBD already exists in Requirements & Systems Portal and tag tbd is being imported, a new tag tbd will be created and imported with the requirement.
Execution Report
Once the data to be imported is reviewed and options are configured as required, click the  button to proceed. A confirmation window will appear when the import is finished.
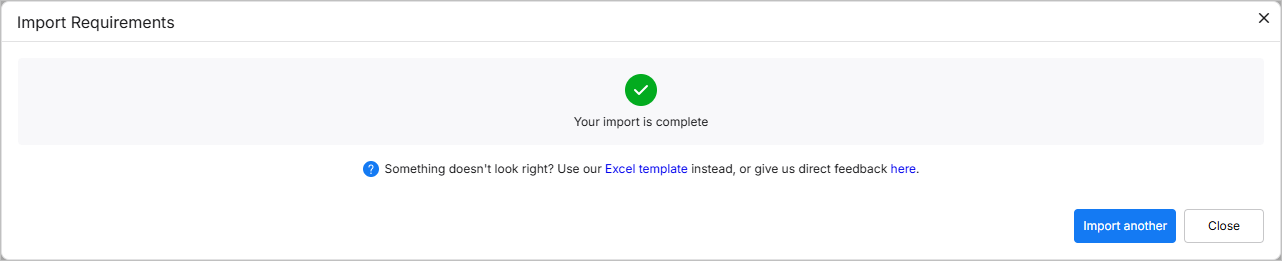
If the importer detects issues in imported requirements, this will be indicated in the window ( ). Click the link to download a report detailing reasons of the detected issues. The possible cases are:
-
An attempt to import a requirement with relations to identifiers that do not exist in the project nor within other requirements in the imported file.
-
An attempt to import a requirement with relations to a requirement identifier that belongs to more than one requirement either in the project or within other the imported file.
-
An attempt to import a requirement with a compliance statement that is not currently defined in Requirements & Systems Portal.
-
An attempt to import a requirement with a type that is not currently defined in Requirements & Systems Portal.
-
An attempt to import a requirement with a state that is not currently defined in Requirements & Systems Portal.
-
An attempt to import a requirement with a tag that is not currently defined in Requirements & Systems Portal.
-
An attempt to import a requirement with an applicability condition that is not currently defined in Requirements & Systems Portal.
-
An attempt to import a requirement with a method that is not currently defined in Requirements & Systems Portal.
-
An attempt to import a requirement with an applicable block that is not currently defined in Requirements & Systems Portal.
-
An attempt to import an owner that is not currently defined in Requirements & Systems Portal.
-
An attempt to import more than one owner, state, or type that is not currently defined in Requirements & Systems Portal.
Click the  button to return to the file uploading stage of the importer or click
  to exit the importer.