
Preparing Onshape for CoDesign
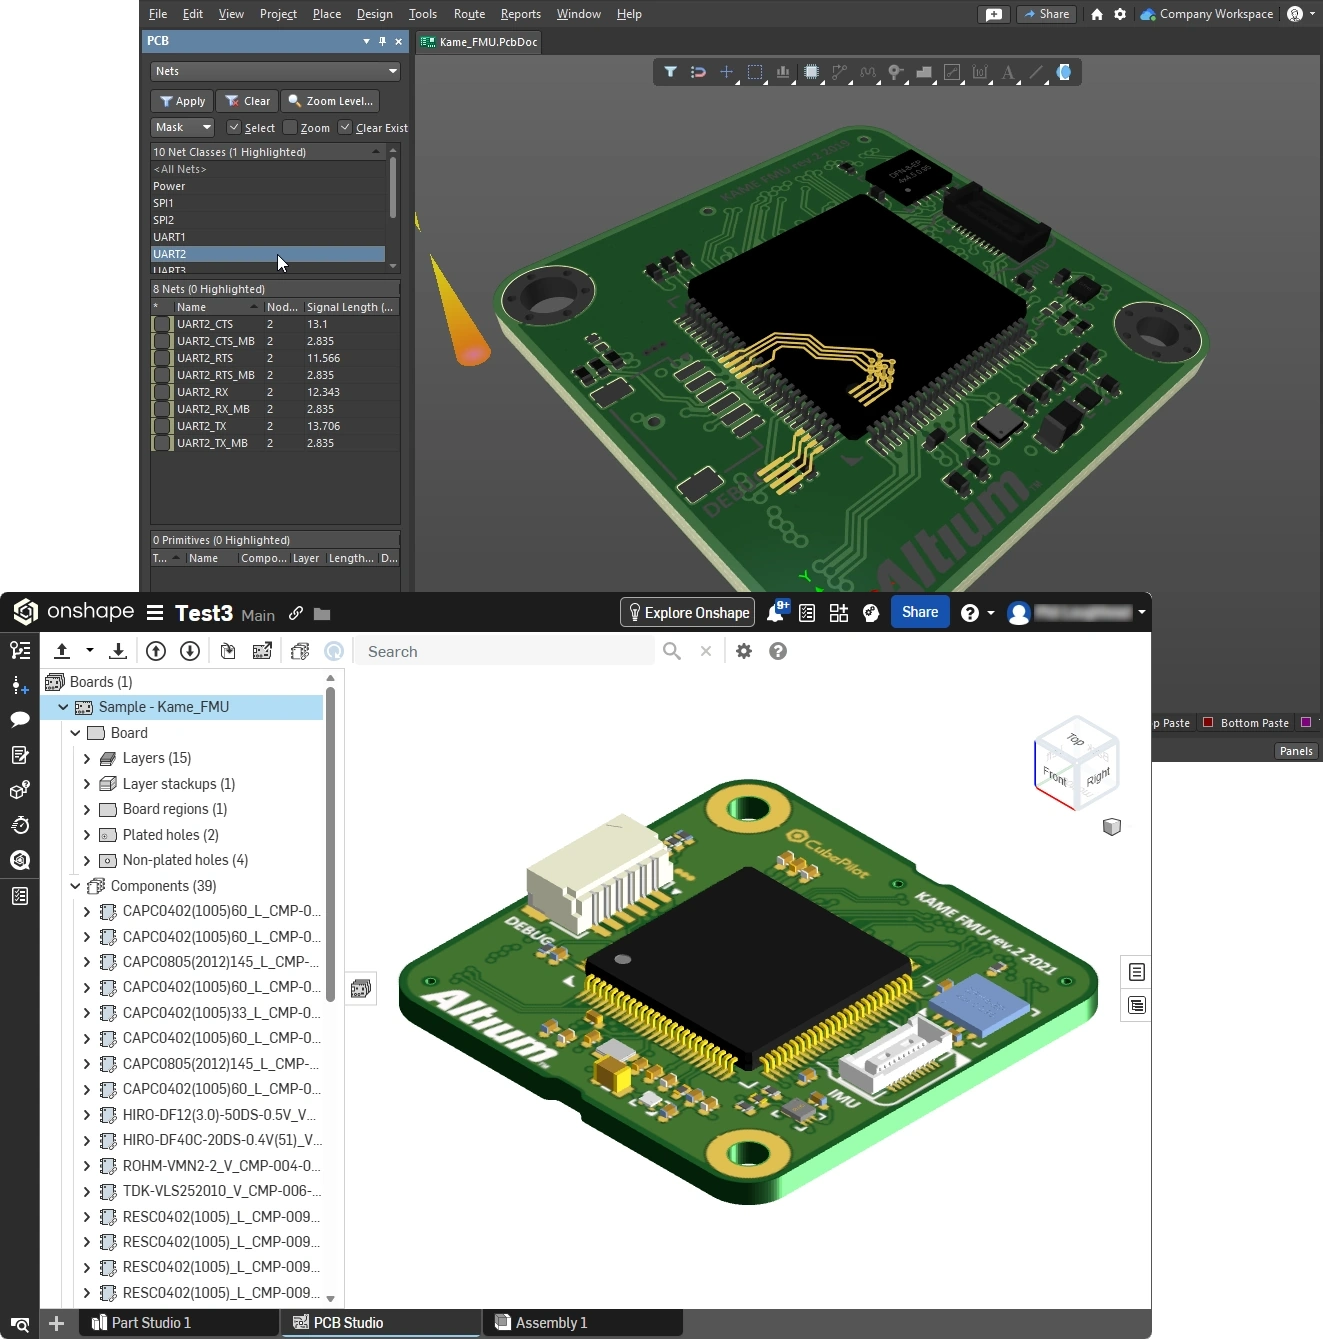
Altium CoDesigner is an interface for transferring printed circuit board designs between the ECAD and MCAD design domains. Design changes are passed through an Altium Workspace, which acts as a bridge between the ECAD and MCAD domains.
Altium MCAD CoDesigner works with Onshape, a fully cloud-native computer-aided design (CAD) and product data management (PDM) platform.
To CoDesign between Altium Designer and Onshape, you will need:
-
An Onshape account with PCB Studio enabled
-
An Altium Designer license with access to Altium 365
No additional software, plug-ins, or extra licensing is required beyond existing subscriptions, with CoDesign support built directly into both platforms.
Configure Altium 365 to Work with Onshape
-
Select Admin - Extensions, then click on Onshape PCB Studio Connector tile (
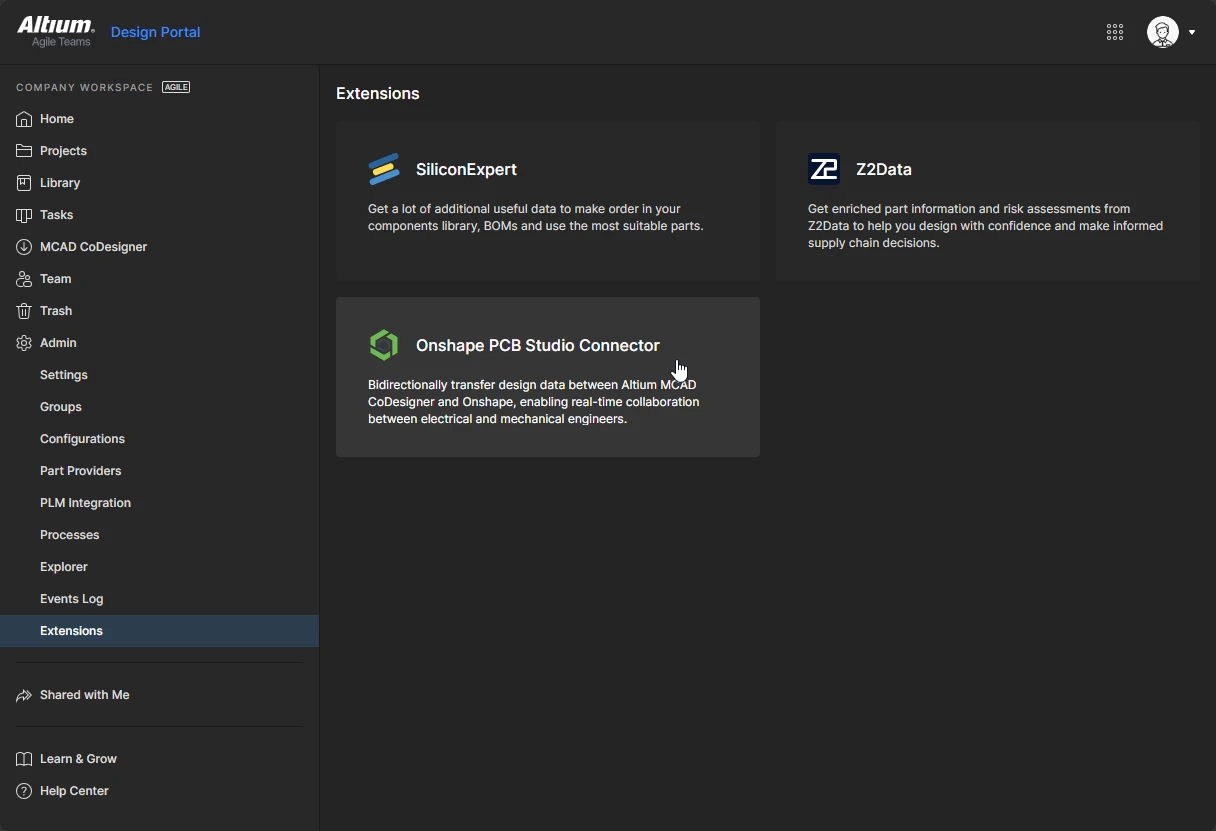 ). Learn more about enabling extensions in Altium 365.
-
The Onshape PCB Studio Connector setup view will open, click Activate to enable Onshape access to your Altium 365 Workspace (
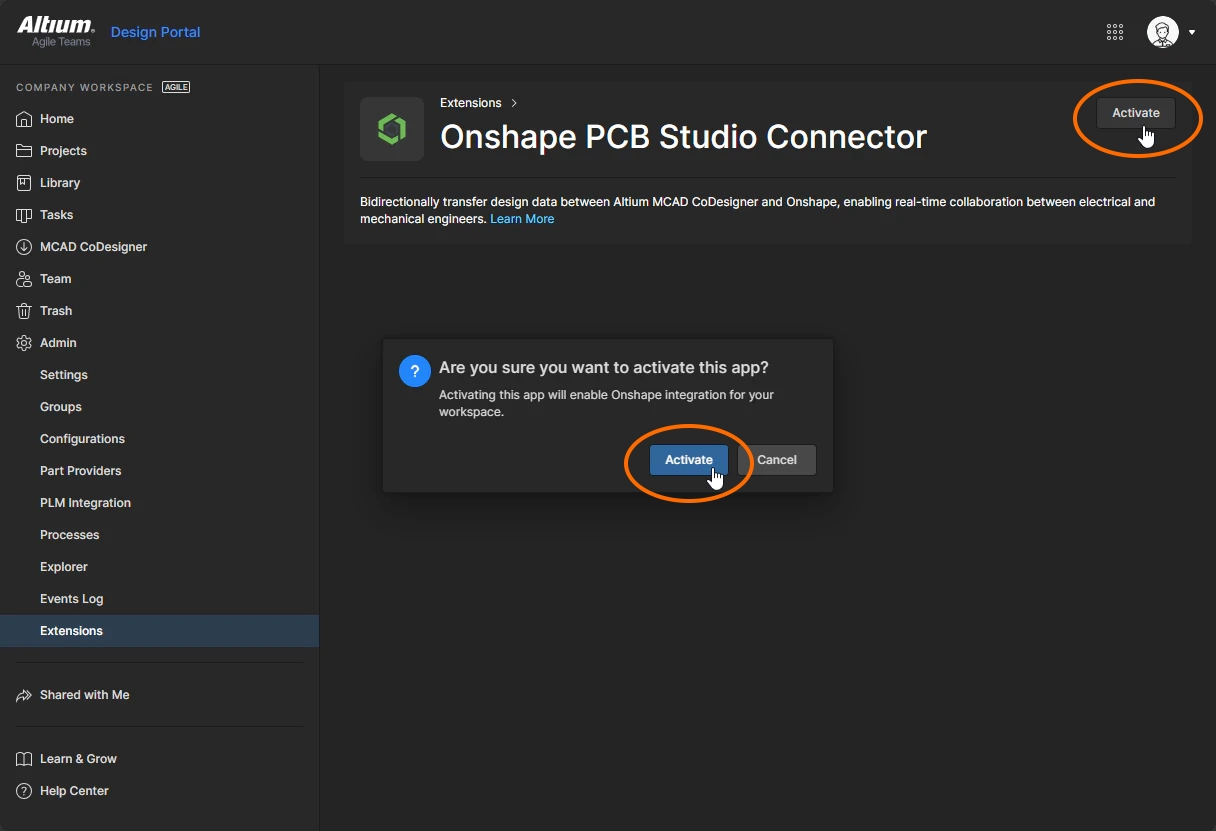 ).
).
Configure Onshape to Work with ECAD
-
Sign in to your Onshape account in your browser.
-
Click on your name at the top right, select My account from the menu (
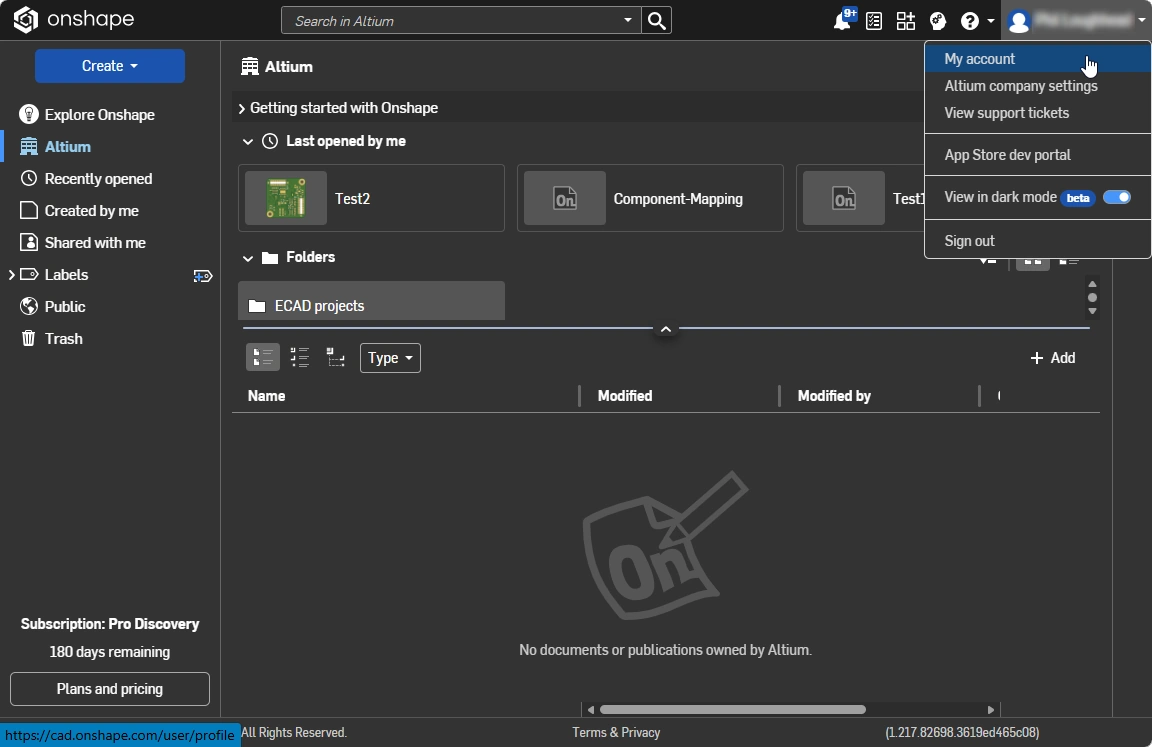 ).
).
-
The first step is to enable access to Altium 365. In the menu on the left, click Integrations.
-
If 365 is available, it will appear in the list of available integrations, click the Add Altium 365 Account button to add it (
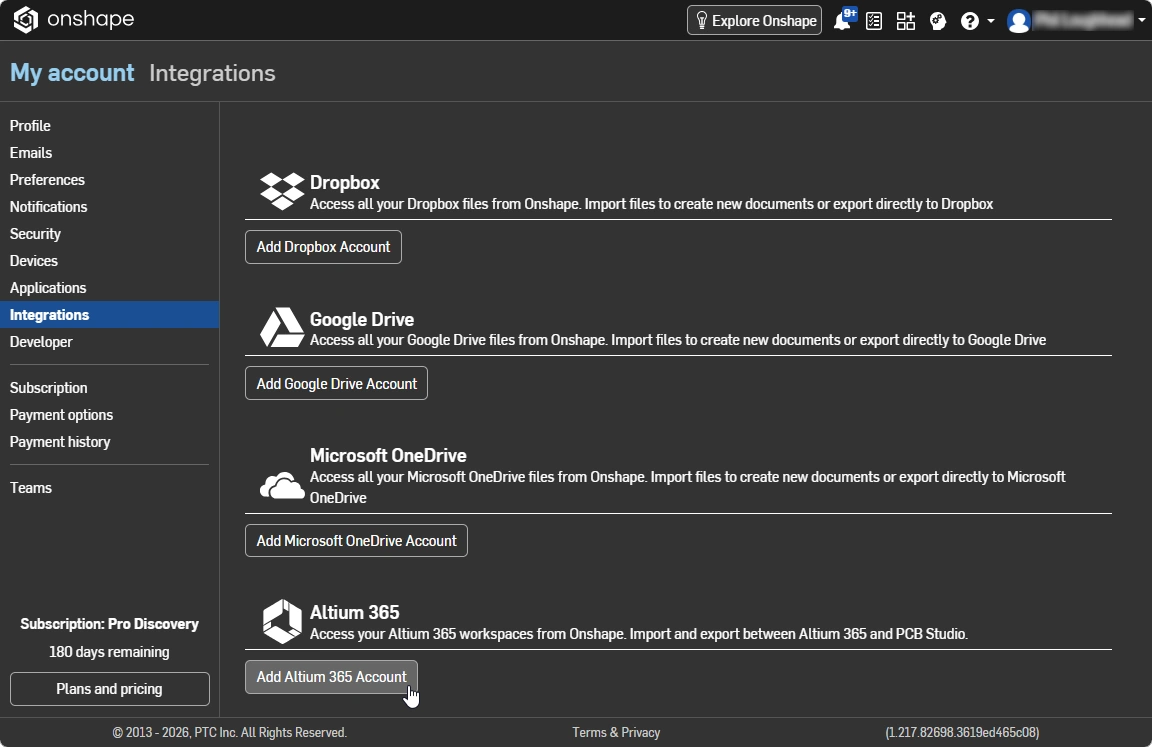 ). You will need to grant Onshape access to your Altium user account for it to be able to Pull and Push board designs in and out of your Altium Workspace.
-
Click on Onshape at the top left of the browser to return to the Explorer type view, showing folders and documents (
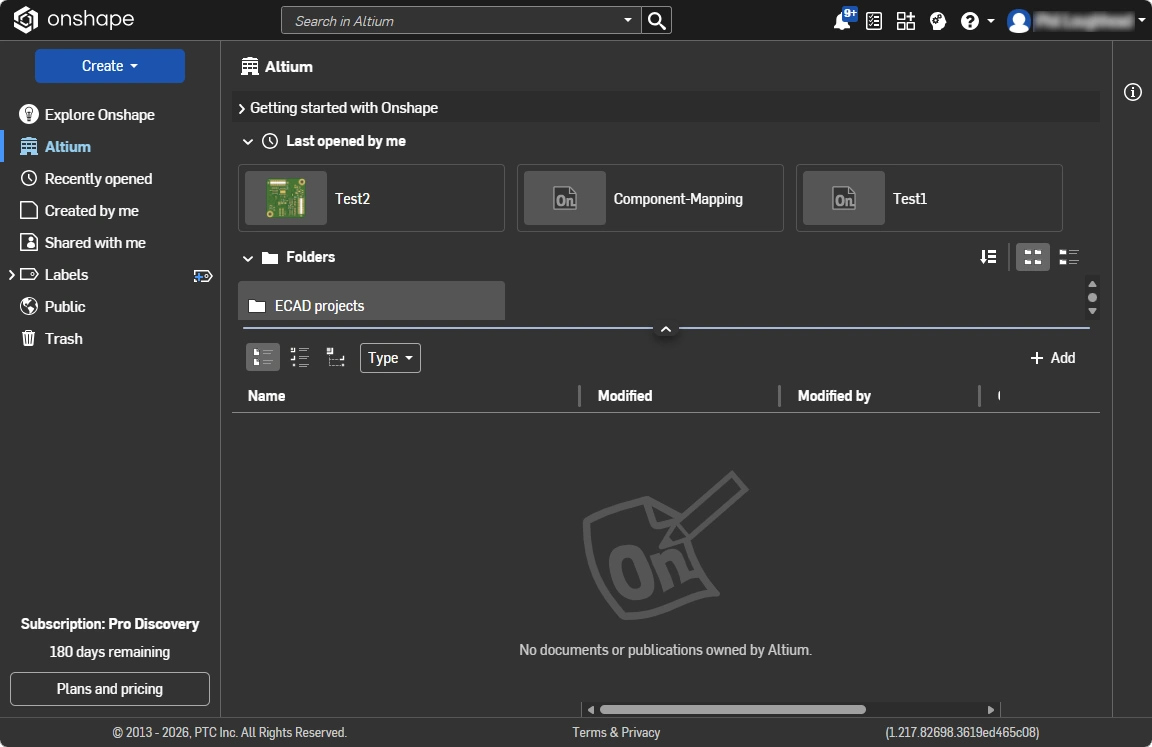 ).
).
-
Before an ECAD design can be opened in Onshape, a default library document and component folder must be created, and pointed to in the setup dialog. To do this:
-
Create a folder in Onshape to store ECAD designs.
-
In that ECAD folder, create a Library Components folder (this stores component models), and also create a Library Components document (this stores component info). This document will open.
-
In the Library document, click the + symbol down the bottom left and select Create PCB Studio from the menu (
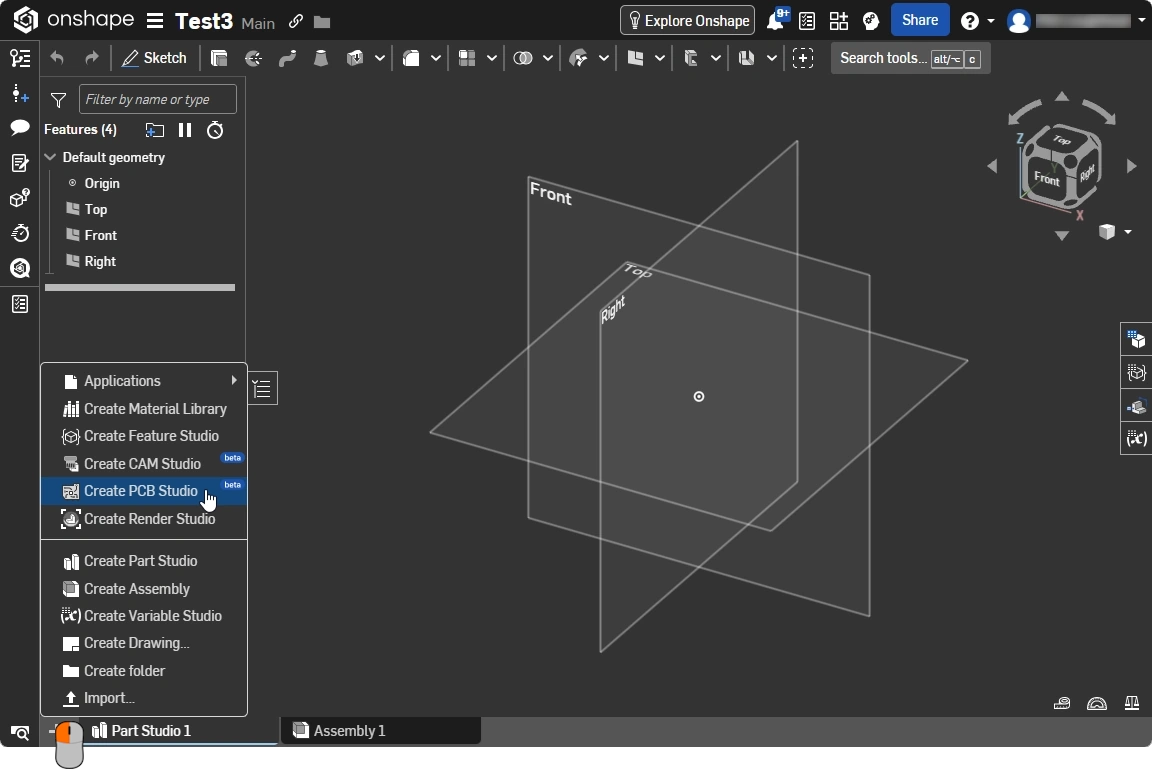 ). Note that the ECAD connection to Onshape is done from within an Onshape document, that has had a PCB Studio added to it.
-
In the PCB Studio tab (check the tabs at the bottom to verify), click the Settings button (
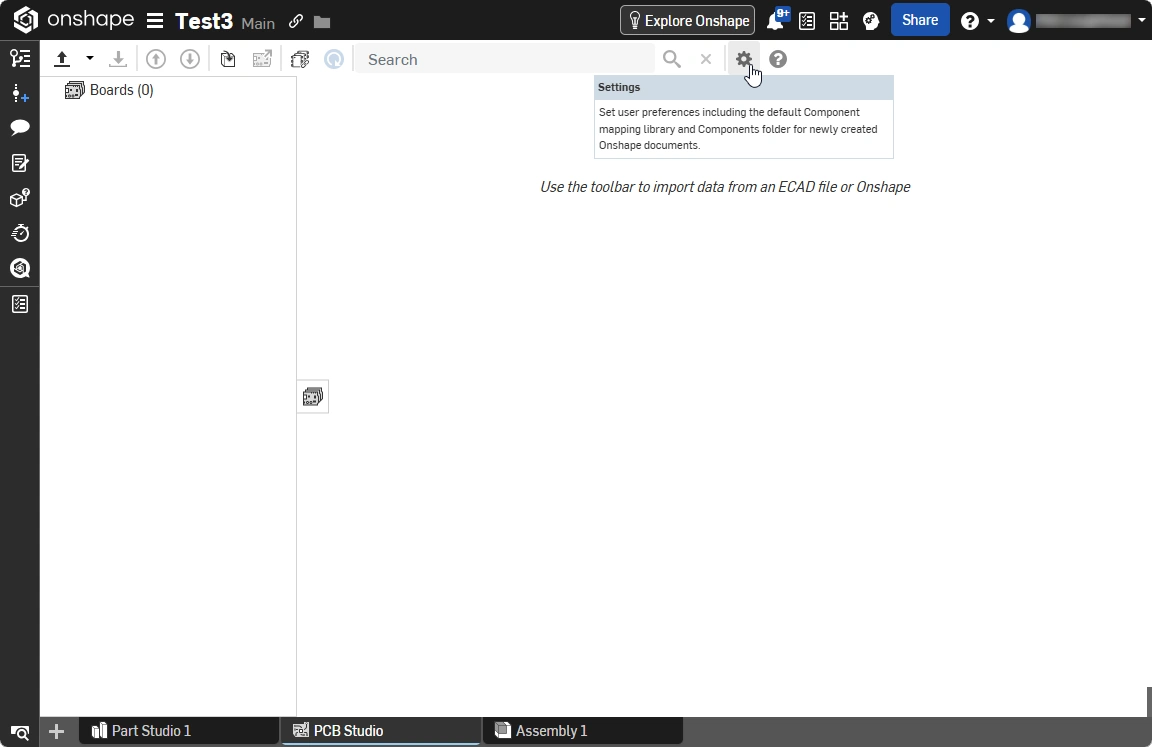 ) to open the PCB Studio Settings dialog.
-
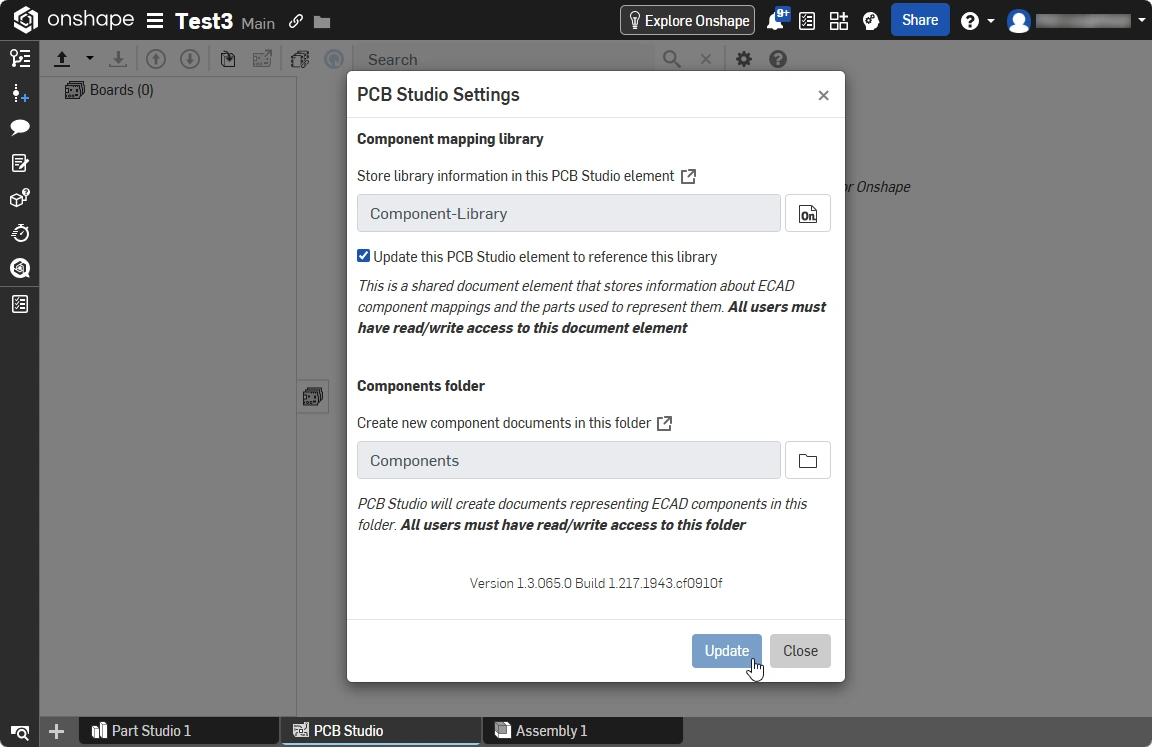
The upper field references the Library Component document (the file you have open), the lower field references the Library Components folder, configure these two fields and click Update (
 ).
).
-
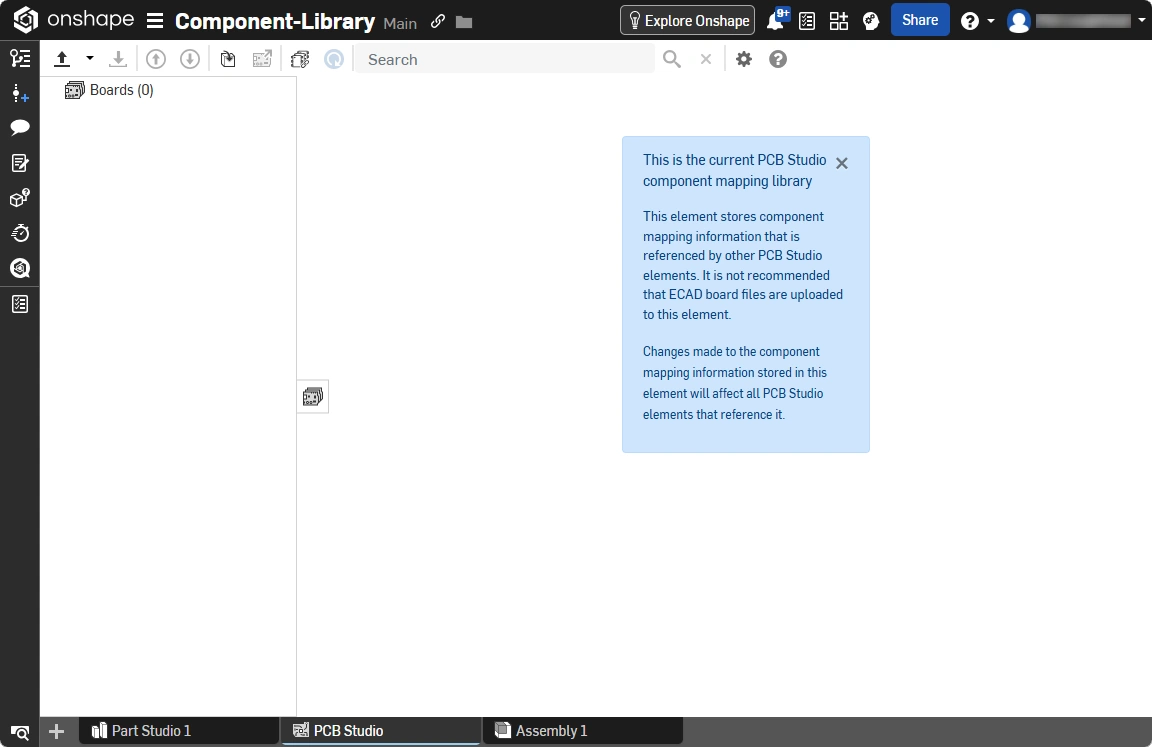
The Library Component document is recognized by Onshape as a special document (
 ), close this document.
-
-
You are now ready to import an ECAD design from the Altium Workspace. To import an ECAD design, first create and open a new Onshape document, and then add a PCB Studio (
).
-
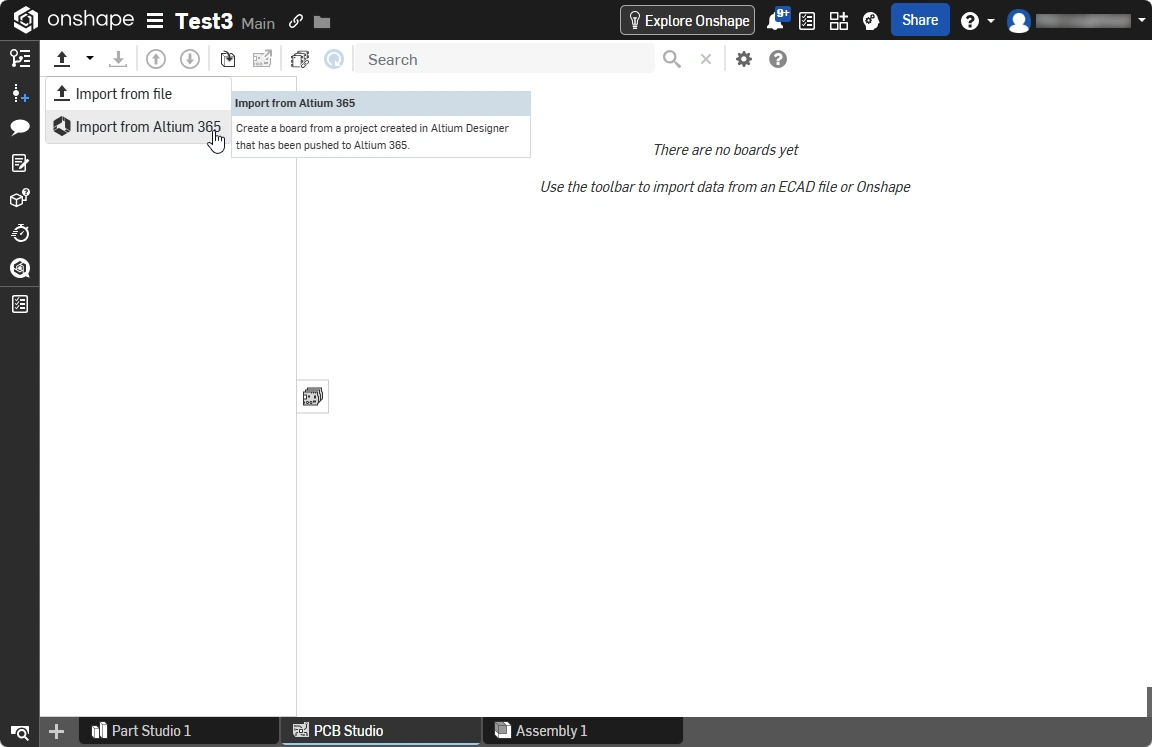
Click the dropdown arrow on the Import ECAD files button, and select Import from Altium 365 from the menu (
 ).
).
-
In the Open dialog that appears, first select the Workspace (
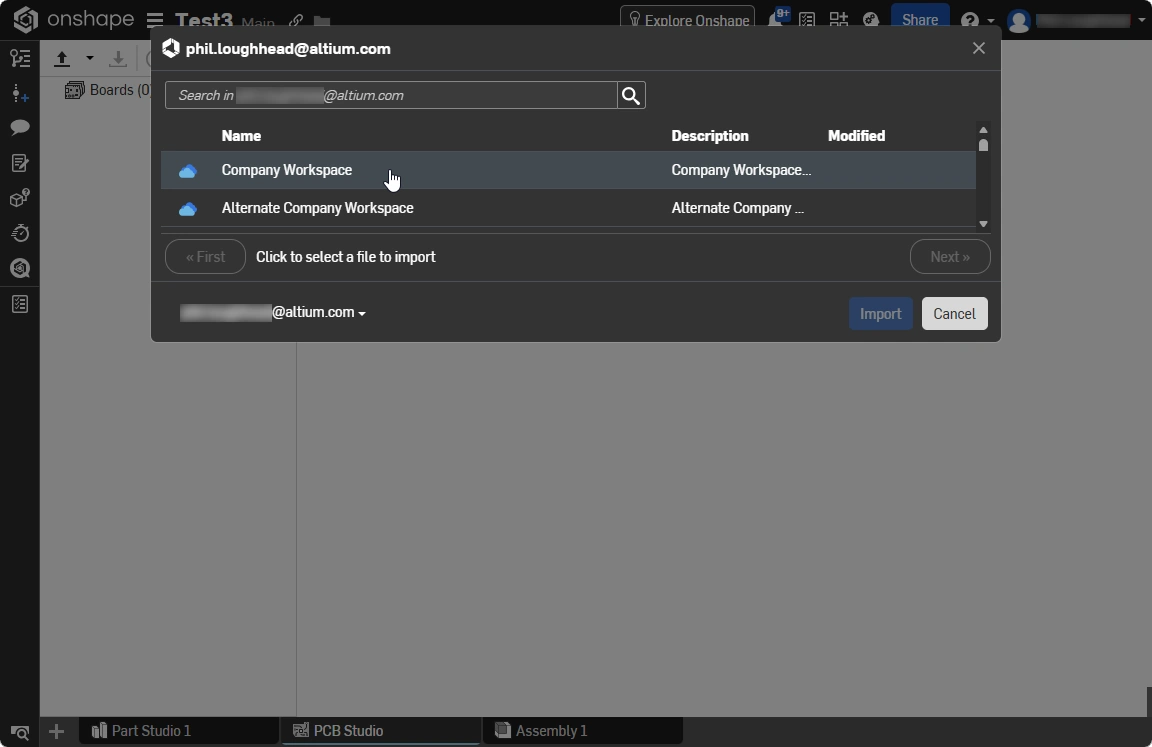 ), then select the required PCB project from the list (
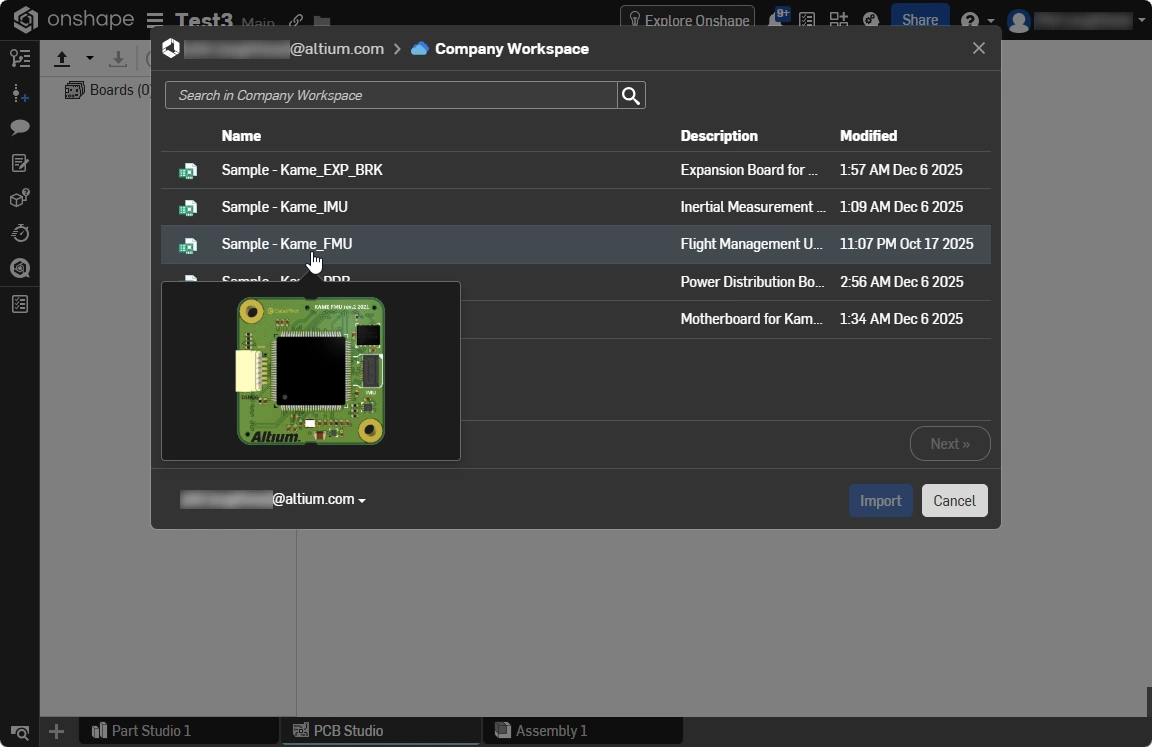 ). Note that only PCB designs that have been Pushed to the Workspace via the MCAD CoDesigner panel in Altium Designer will be available in the list.
-
The next step is to select the variant to be opened, then click the Import button (
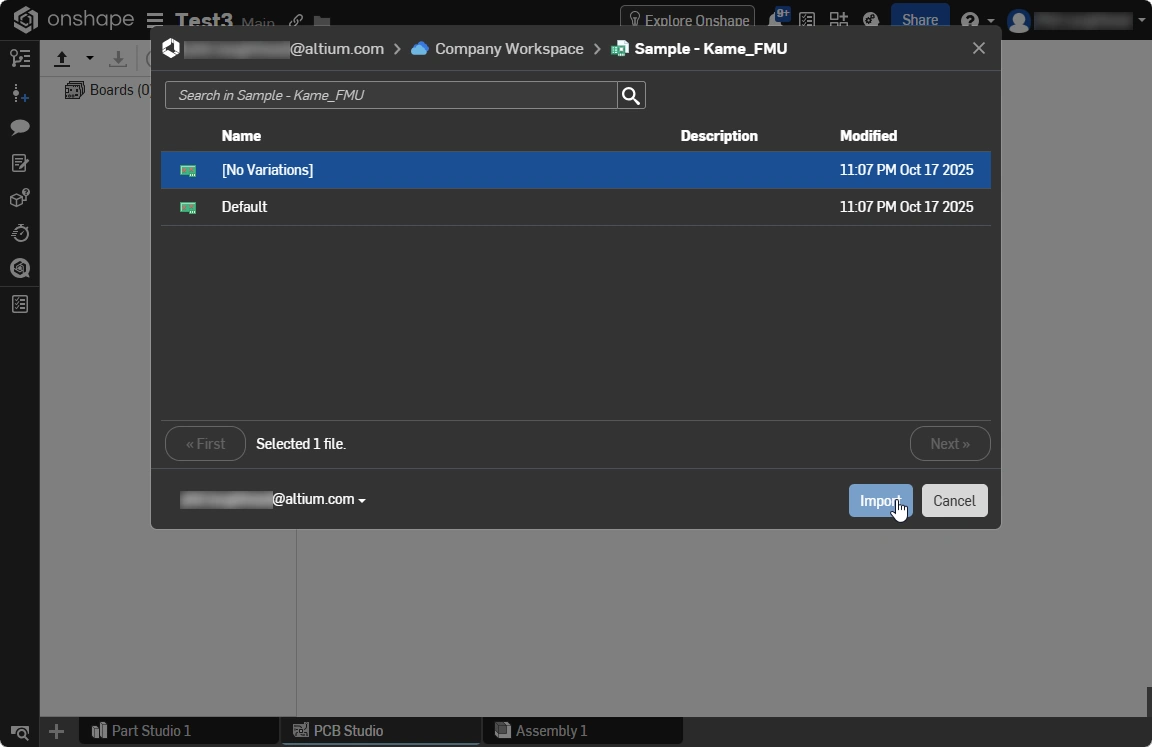 ).
).
-
The board will be imported into the PCB studio in the document you have open in Onshape (
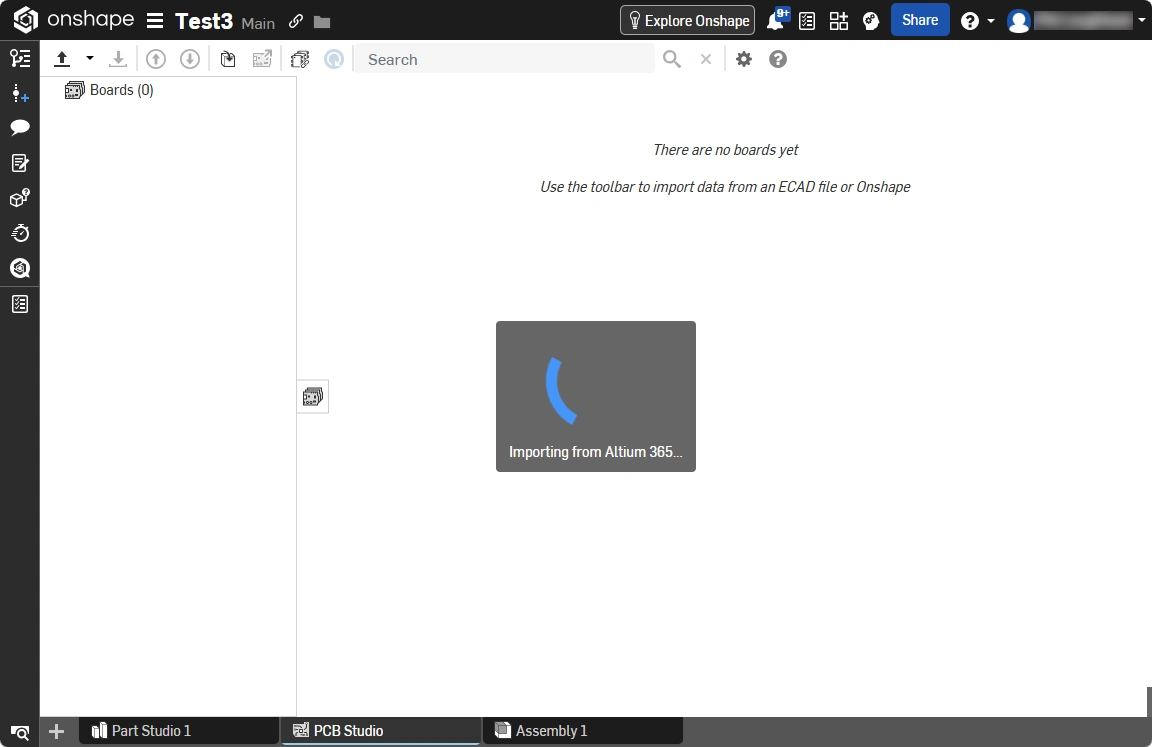 ).
).
-
Updates between Onshape and Altium Designer are Pushed and Pulled using the arrow buttons at the top of the browser.
-
To modify the board in Onshape the PCB Studio must be synchronized with an Onshape assembly, click the Sync to Onshape button to do this (
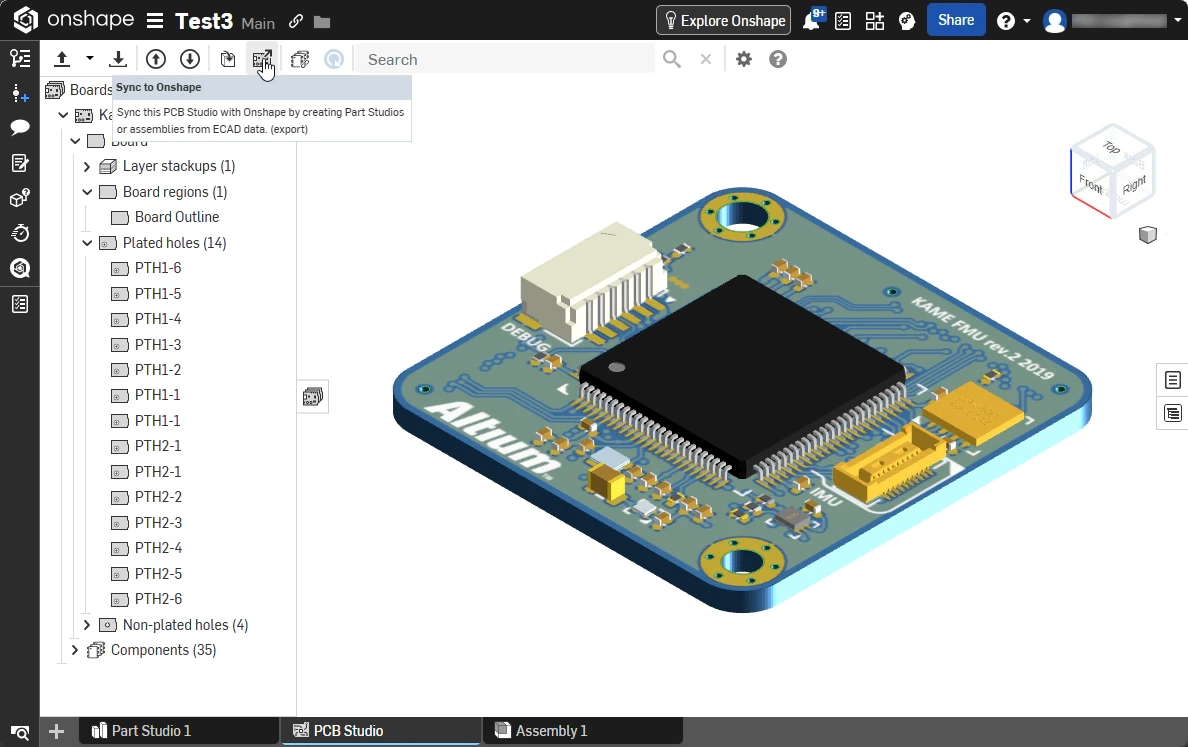 ).
).
-
Before the PCB changes can be pushed back to ECAD, they must be synchronized from the from Onshape assembly back into the Onshape PCB Studio, click the Sync from Onshape button (
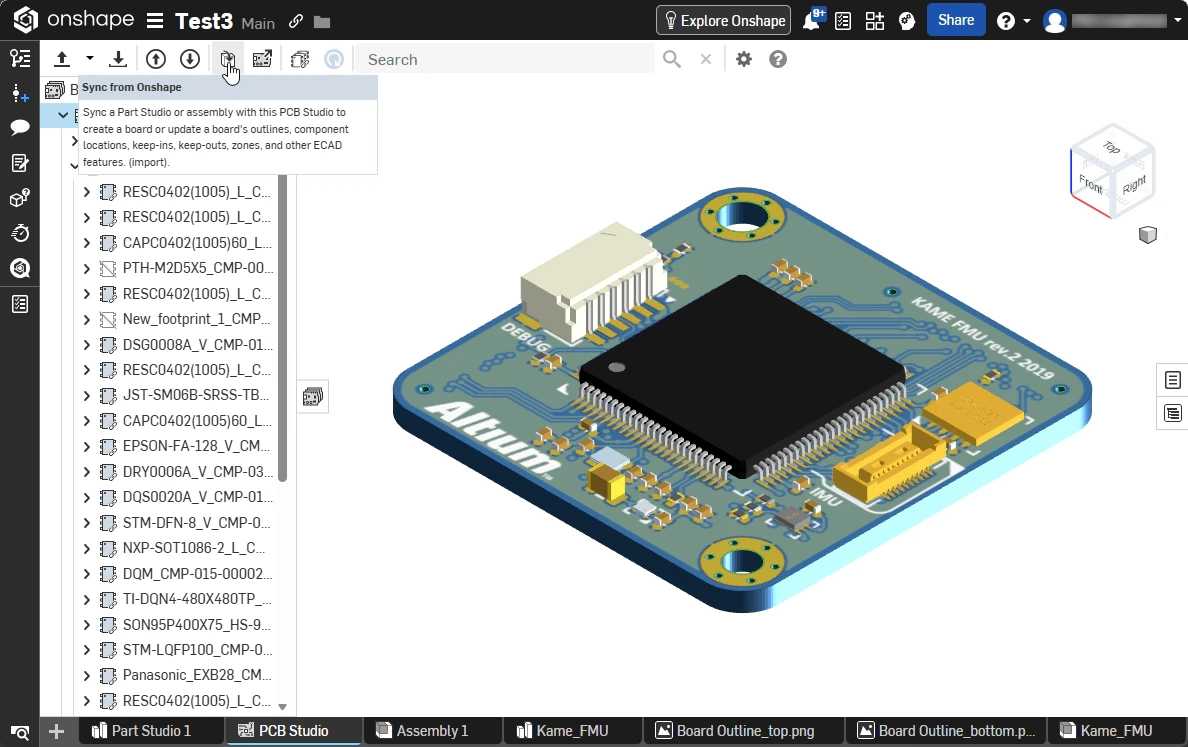 ) in the PCB Studio to do this.
-
To push the MCAD design changes back to ECAD click the Push board to cloud service button, include a comment if required (
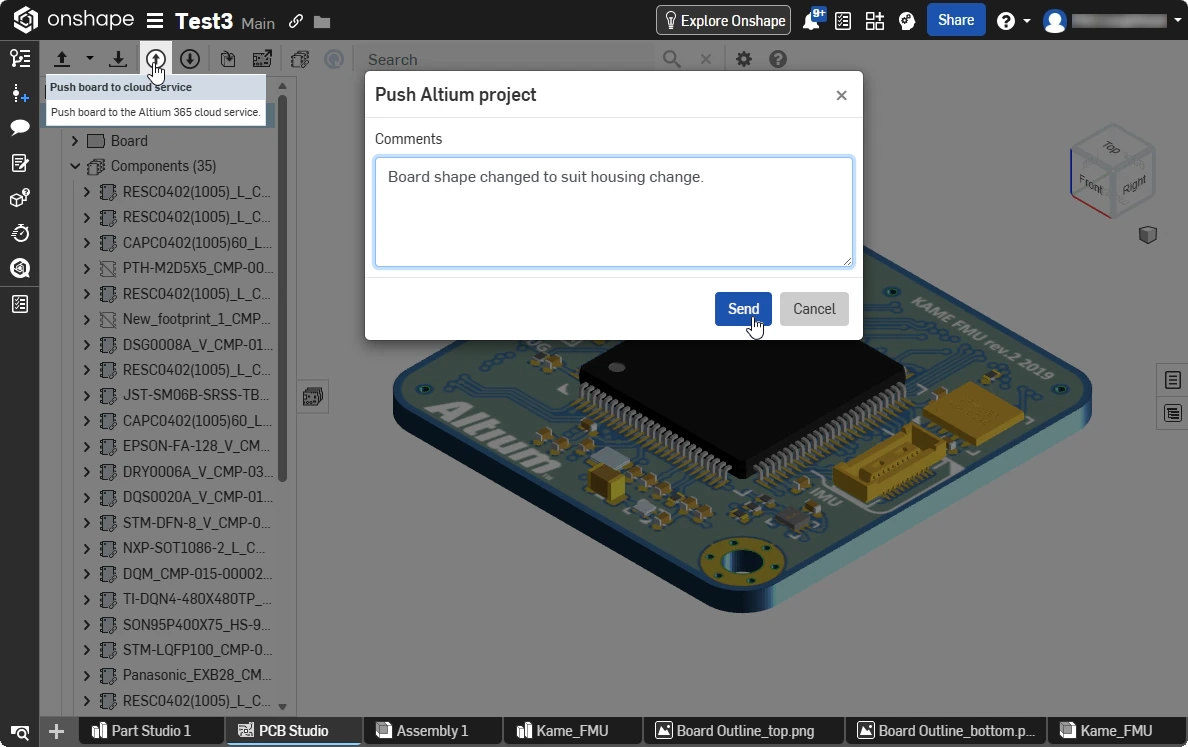 ).
).