
Support for Long Path Names
Starting from Windows 10 version 1607, MAX_PATH limitations have been removed from common Win32 file and directory functions. However, you must opt-in to the new behavior by changing a registry key to enable support for actions when a file path with the file name exceeds 256 characters, such as opening a project from the connected Workspace in Altium Designer, making a local project available in the Workspace, or generating outputs using an Outjob file or the Project Releaser.
Configuring the Server for the Long Path Support
When releasing a project that uses a long path to an Enterprise Server Workspace, the computer where the Altium On-Prem Enterprise Server is installed should also be configured, as described below.
-
Set the
LongPathsEnabledregistry key to1:-
Click Search (shortcut: Win+S), type
regedit.exeand then press Enter.
-
In the Registry Editor, navigate to the following location:
Computer\HKEY_LOCAL_MACHINE\SYSTEM\CurrentControlSet\Control\FileSystem. -
Right-click the entry named
LongPathsEnabledand select Modify. -
Set the Value data to
1and click OK.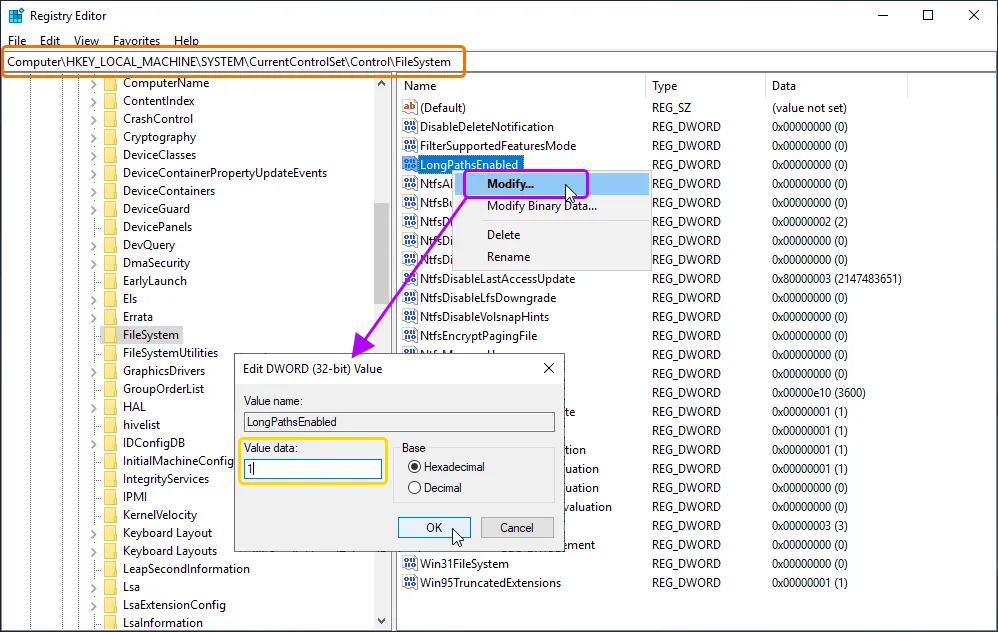
-
-
Download the
w3wp.exe.manifestfile (link) and copy it to the following folders:-
C:\Windows\System32\inetsrv\ -
C:\Windows\SysWOW64\inetsrv\
-
-
Update the timestamp of the
w3wp.exefiles:-
Stop web services:
-
Click Search (shortcut: Win+S), type
IISand then select Internet Information Services (IIS) Manager in the search results.
-
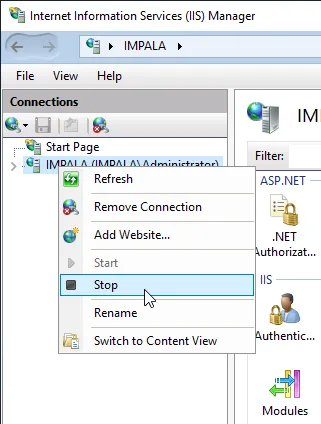
In the Internet Information Services (IIS) Manager window that opens, right-click the entry of your server in the Connections list and select Stop from the context menu. Wait until the services are stopped.
-
Open the Task Manager (right-click the taskbar and select Task Manager from the context menu) and click the More details control at the bottom of the window if not already. On the Details tab, check for any w3wp.exe processes in the Running status.

-
If there is at least one running w3wp.exe process, click Search (shortcut: Win+S), type
servicesand then select Services in the search results.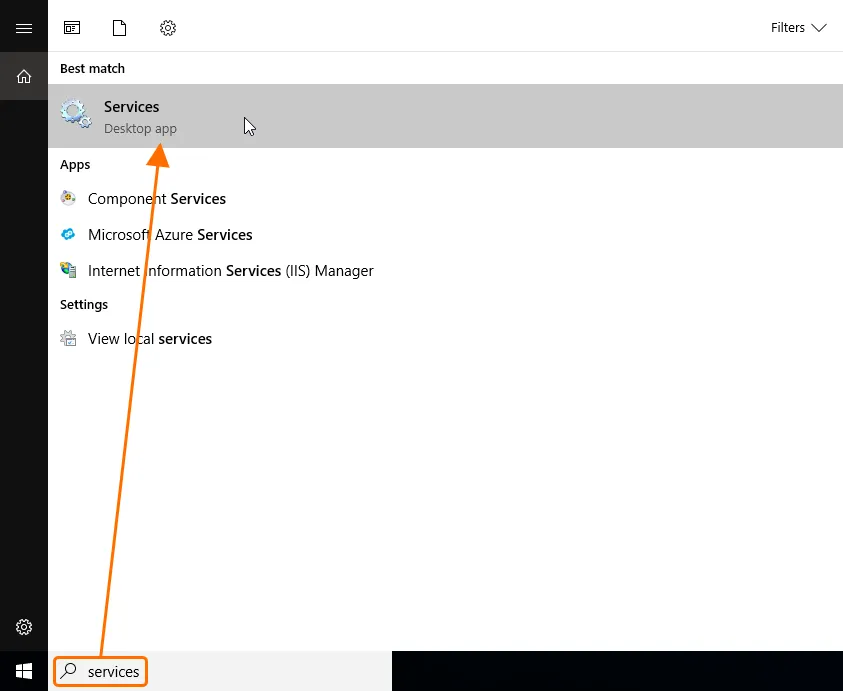
-
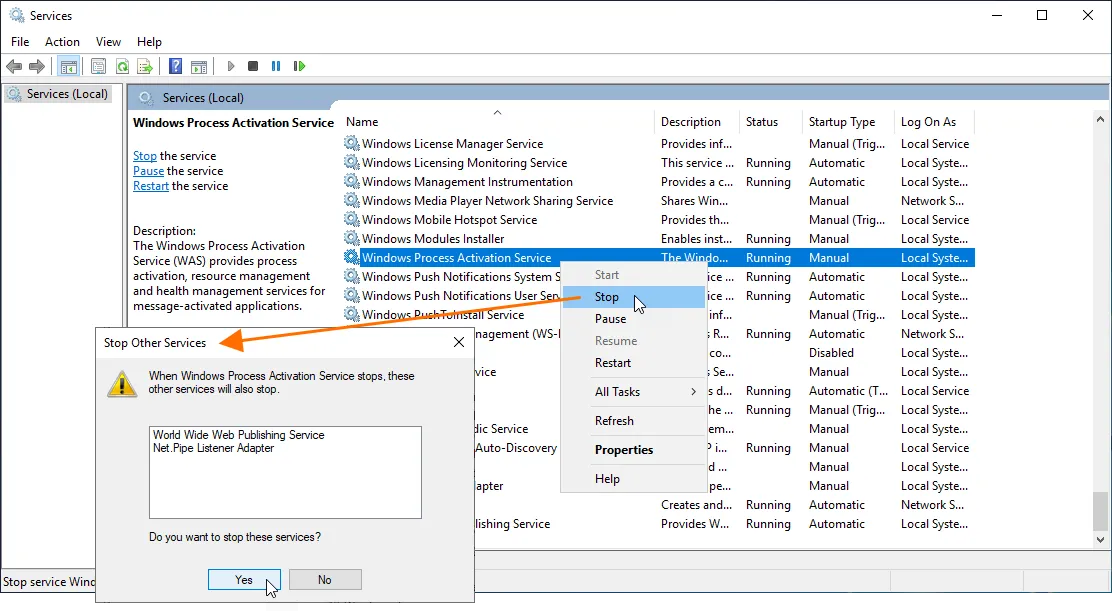
In the Services window that opens, find the Windows Process Activation Service, right-click it and select Stop from the context menu. Agree to stop any related services and wait until the services are stopped. After that, the w3wp.exe processes should disappear from the Task Manager.
-
-
Modify the timestamp of two
w3wp.exesystem files:-
Navigate to
C:\Windows\SysWOW64\inetsrv\w3wp.exein File Explorer. - Right-click the file and select Properties from the context menu.
-
In the Properties dialog, open the Security tab and click the Advanced button.
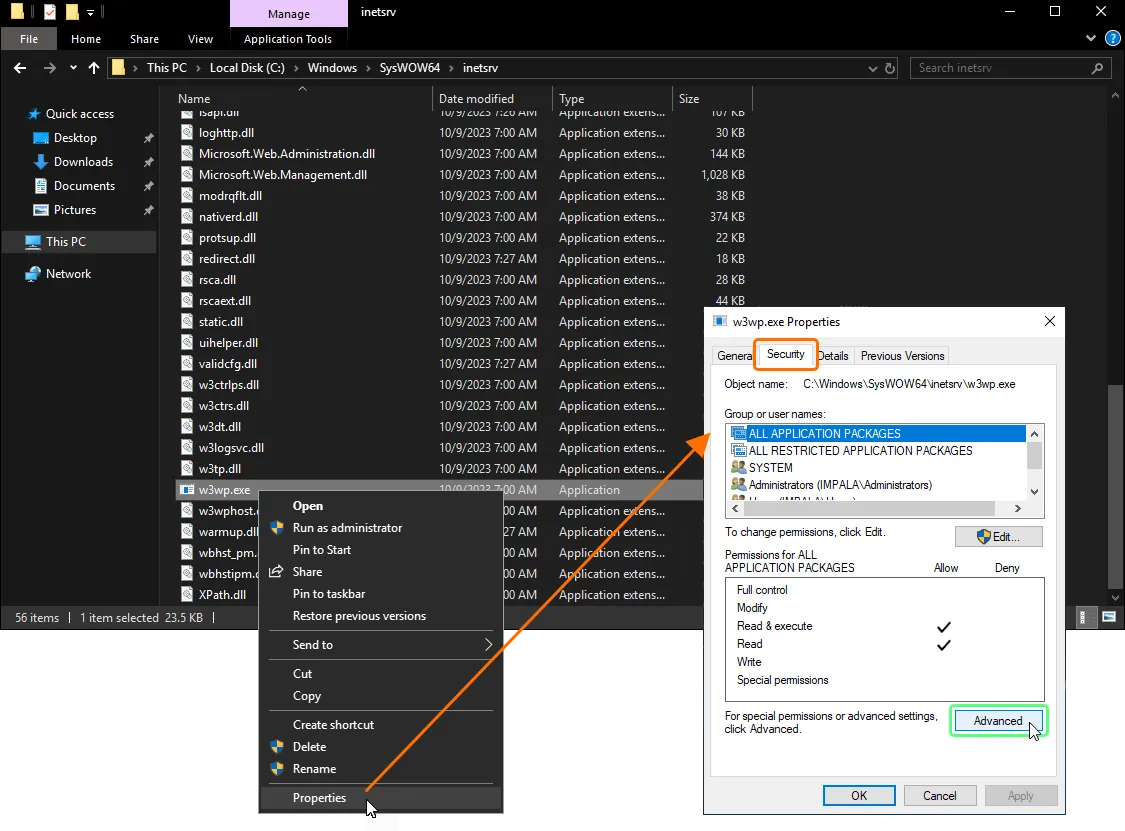
-
In the Advanced Security Settings dialog that opens, check if your current user is an owner of this file. If not, write down or remember who the owner is and proceed with the next steps.

Changing the File Owner
-
Click the Change control next to the Owner field and then click the Advanced button in the Select User or Group dialog that appears.
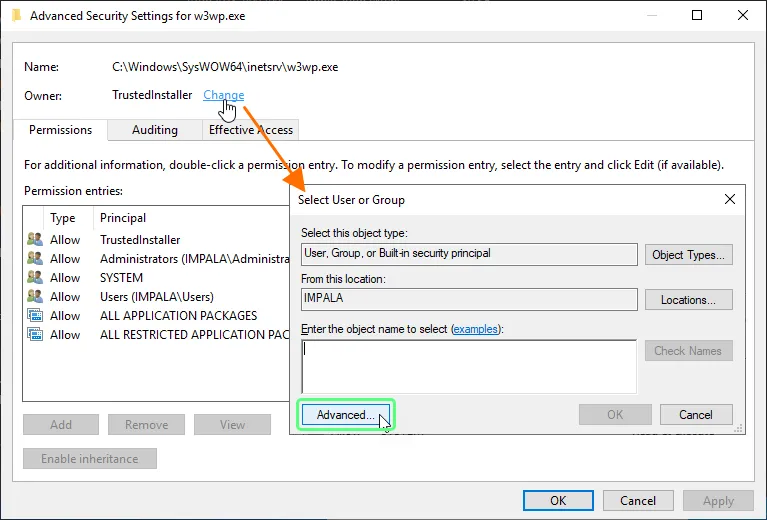
-
In the Select User or Group dialog that opens, click the Locations button to select the location you want to search and click OK.
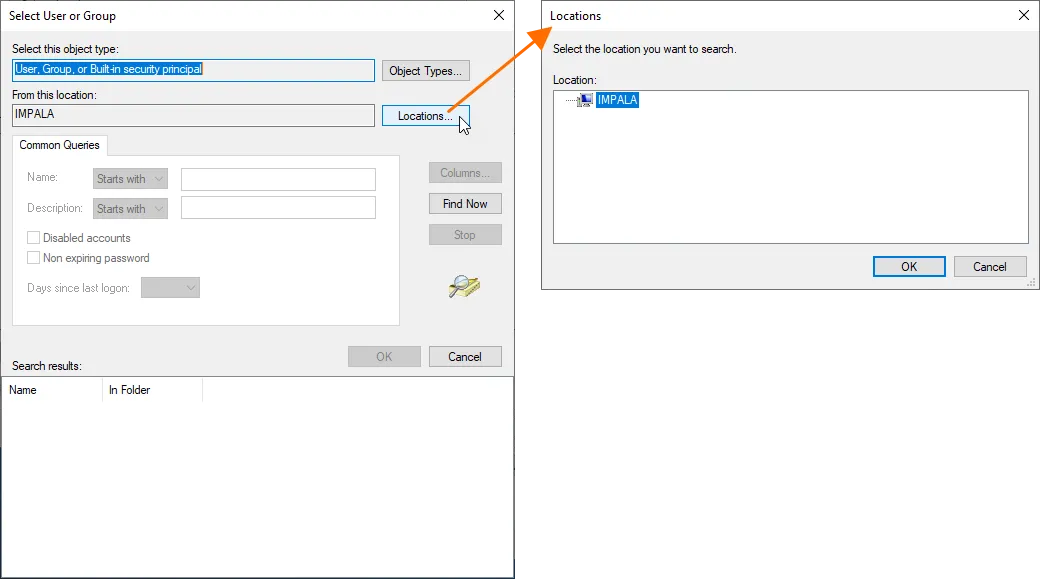
-
In the Select User or Group dialog, click the Find Now button and search for your personal account or set ownership for the Administrators account (the location for the Administrators is your local machine; by default, there will be a domain).
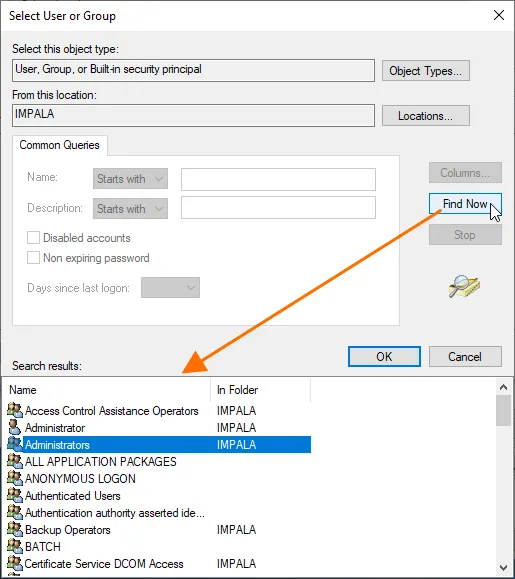
- Click OK in the Select User or Group dialogs and the Advanced Security Settings dialog.
- Click OK in the Advanced Security Settings dialog and then click Advanced in the Properties dialog to open it again.
-
-
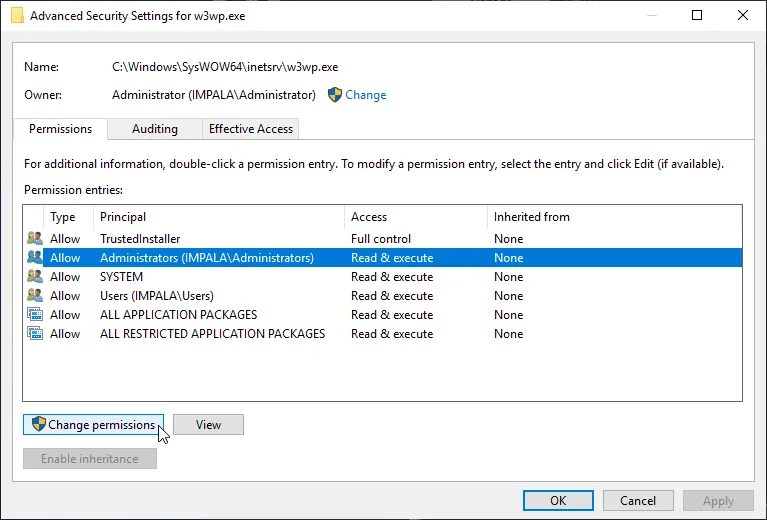
In the Advanced Security Settings dialog, select the Administrators group and click the Change permissions button.
-
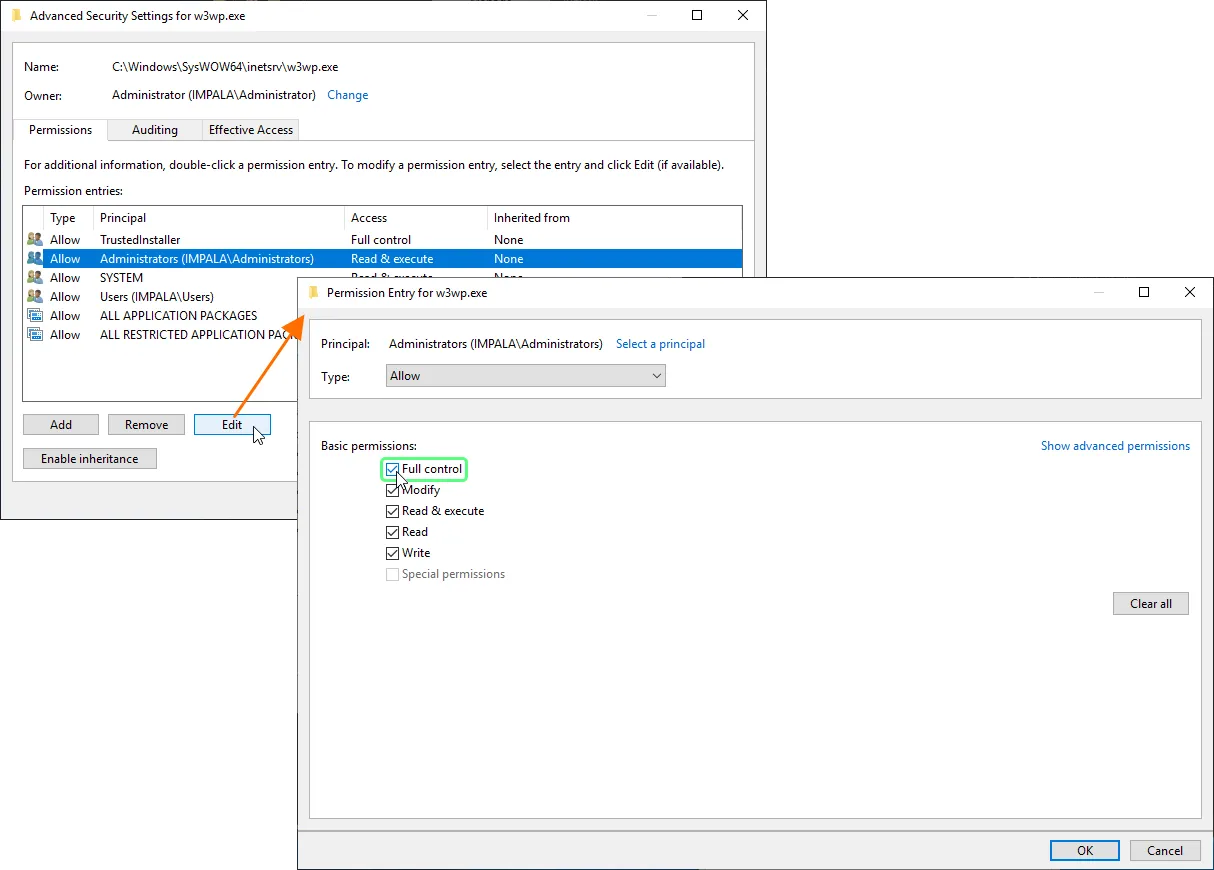
Select the Administrators group again and click the Edit button. In the Permission Entry dialog that opens, enable the Full control checkbox.
-
Click OK in the Permission Entry dialog, then click Apply in the Advanced Security Settings dialog. Click Yes in the warning dialog that opens, then click OK in the Advanced Security Settings dialog.
-
Click Search (shortcut: Win+S), type
cmdand then right-click Command prompt in the search results and select Run as administrator.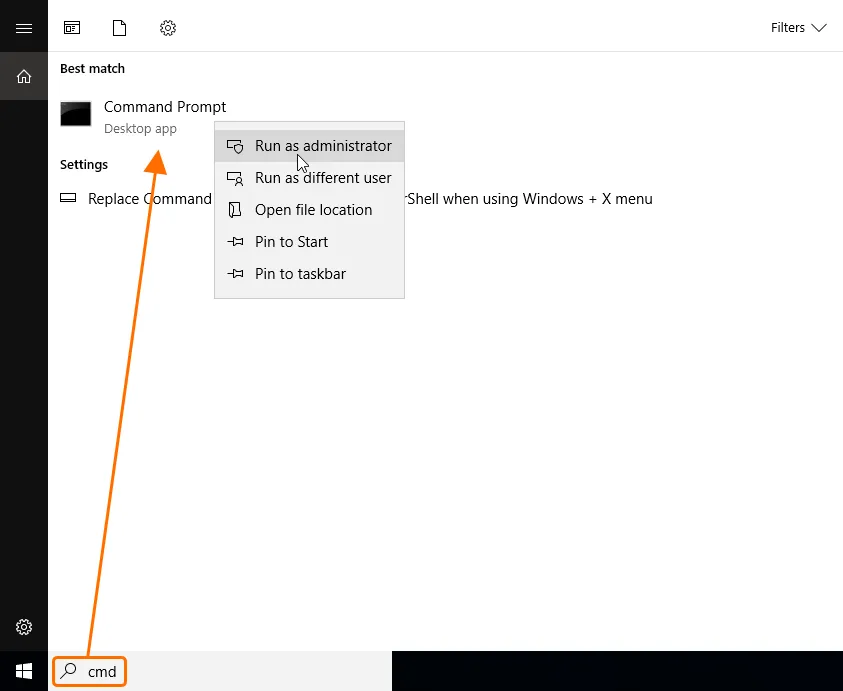
-
In the Command Prompt, enter the
cd C:\Windows\SysWOW64\inetsrvcommand, then enter thecopy /b w3wp.exe +,,command. This will only update the file's timestamp.
-
Navigate to
-
Repeat steps of point 3.b above for the
C:\Windows\System32\inetsrv\w3wp.exefile.
-
Stop web services:
- Restart the server.
Reverting the Changes
If you need to revert the changes, perform the following steps:
-
Navigate to
C:\Windows\System32\inetsrvin File Explorer and remove thew3wp.exe.manifestfile. -
Change
w3wp.exefile permissions for the Administrators group back to Read & execute. -
Navigate to
C:\Windows\SysWOW64\inetsrvin File Explorer and remove thew3wp.exe.manifestfile. -
Change
w3wp.exefile permissions for the Administrators group back to Read & execute. -
In the Registry Editor, navigate to
Computer\HKEY_LOCAL_MACHINE\SYSTEM\CurrentControlSet\Control\FileSystem. and set the Value data forLongPathsEnabledto0. - Restart the server.