
Setup for Teamcenter PLM
As an on-premises, server-based PLM solution, Siemens Teamcenter® PLM must integrate with an Altium 365 Workspace via Altium's Hybrid Agent. The Hybrid Agent service is installed within the same network as the Teamcenter server (such as your company LAN) and acts as a secure data relay between Teamcenter and your Altium 365 Workspace. Setup the Hybrid Agent integration after completing the Teamcenter EDA Gateway setup, as covered below.
► See Hybrid Agent PLM Integration for more information.
Along with the Hybrid Agent installation, Siemens Teamcenter® PLM integration first requires additional setup that is not managed automatically by a Workspace Teamcenter configuration instance. Essentially, there are two levels of setup needed for this, depending on the integration features required. The first level enables Parts Synchronization and is also a prerequisite for the second level, which enables Project Publish/Initialization PLM processes. Nevertheless, it is recommended to perform both setup levels.
Parts Synchronization with Teamcenter
In order to enable library parts synchronization you need to install the Siemens Teamcenter® EDA (Electronic Design Automation) Gateway software on the machine that hosts the Hybrid Agent software – for convenience, this is called the Agent/EDA machine in this document. This guide document also assumes that the Hybrid Agent software and the Teamcenter server are installed on separate machines – we would recommend this approach to ensure separation between the two installations, although they could be installed on the same machine.
Teamcenter EDA Installation and Configuration
The entire installation and configuration procedure for EDA Gateway is described in detail in the version-specific EDA Integration documentation available in the Siemens Support Center. Please follow that documentation thoroughly. The instructions here only cover deviations from the Siemens documentation, or specify Altium-side details that are referred to as requirements in the Siemens documentation.
Choose a version of EDA Gateway that supports your Teamcenter server version. You should find compatibility information in EDA Gateway's corresponding TcEDA<version>_README.pdf files available in the download center, or alternatively, by downloading the EDA Integration Compatibility data file from the Siemens support center (location example). You should then consult the Installing and Configuring EDA Gateway for (Non-Mentor) ECAD Applications documentation (example link is for EDA version 5.1), on the topic of Installing and Configuring EDA Gateway for (Non-Mentor) ECAD Applications for part library management to guide you through the setup:

As part of the installation and configuration of the Workspace/Teamcenter interface you must also install (and license etc as necessary) the following Teamcenter features – refer to Setting up EDA Gateway for ECAD applications:
- Extensions » Mechatronics Process Management » EDA Server Support
- Extensions » Mechatronics Process Management » EMPS-Foundation
- Extensions » Mechatronics Process Management » ECAD Library Management
- Extensions » Mechatronics Process Management » EDA for Business Modeler IDE
- Extensions » Supplier Relationship Management » Vendor Management
- Base Install » Active Workspace » Server Extensions » EDA Server Support for Active Workspace
- Base Install » Active Workspace » Client » Electronic Design Automation for Active Workspace
In addition, perform Install and set up Common Integration Services to support Design Publishing.
Next, follow the steps and install EDA Gateway on the Agent/EDA machine.
Configure EDA Gateway for Parts Library Management
As above, for this section you should also consult the Installing and Configuring EDA Gateway for (Non-Mentor) ECAD Applications documentation (example link is for EDA version 5.1), on the topic of Installing and Configuring EDA Gateway for (Non-Mentor) ECAD Applications for part library management.
Please refer back to this set of instructions when you reach specific chapters in the Teamcenter documentation. The sections below refer to those chapters by name.
Chapter: 'Configure the EDA client for part library management
During that step you will be asked to prepare a library gateway configuration file – instead, use one provided by Altium. You can download it with a package of configuration files from Altium 365 Workspace's browser interface: Open Admin » PLM Integration, use the Add Configuration button to open the Add New Instance view, choose Teamcenter EDA from the Driver drop-down menu, and then select the Download Teamcenter EDA client definition files link associated with the URL field – see example.
Inside the downloaded ZIP file there will be two XML files; altiumLibrary_edadef.xml and altiumPcb_edadef.xml. Copy/move these files into the directory pointed to by the system environment variable: %TCEDAECAD_ROOT%.
Setting the User name – You will need to define the EDA Client User name to one that will be used to run the Hybrid Agent and Teamcenter EDA programs. To do so, set the User= property in the %USERPROFILE%\Teamcenter\EDA\TCEDAClient.properties file to the Teamcenter username that will be used for component synchronization. If this is not specified there will be a timeout and ID/password error when attempting to use the Hybrid Agent. Note that the username you provide in the Workspace interface will be ignored, and the username from the properties file used instead. Reboot the system after this change.
Running the Hybrid Agent as a Windows service - If you're planning on starting the Hybrid Agent in this way (that is, not in the terminal) then the Windows user in question will likely be the System user, unless configured otherwise, and its TCEDAClient.properties file resides in %SystemRoot%\System32\config\systemprofile\Teamcenter\EDA\TCEDAClient.properties. See Hybrid Agent as a Windows Service.
Check the TC EDA log file at the INFO level to confirm if the above changes are effective (see example), for when you run the PLM Configuration Test Connection later.
Chapter: 'Setting up Teamcenter server for part library management'
Open Teamcenter Rich Client as the infodba user, or as another user with administration privileges.
► See information on the Teamcenter Rich Client.
The screenshots below illustrate the steps described in Create external applications for your ECAD tool in Teamcenter. In our case we will add altiumLibrary,15 to the EDALIB_External_Applications preference:

Click the ![]() command to add the new value, followed by Save, and then close the preference. Logout and then log back in to the Teamcenter Rich client.
command to add the new value, followed by Save, and then close the preference. Logout and then log back in to the Teamcenter Rich client.
- Open the Organization application.
-
Navigate to the External Applications section and add an
altiumLibraryapplication as shown below:

- Select Create.
Chapter: 'Mapping ECAD part attributes to Teamcenter attributes'
Through the Teamcenter command prompt, run the export_attr_mappings utility to output the mapping to a file, for example:
export_attr_mappings.exe -file=mappings.txt -u=infodba -p=infodba
Modify the mappings.txt file according to your requirements to map real Teamcenter attributes on the components. An example working mapping, added to the content of exported mappings.txt:
{ Item type="EDAComPart"
    Cost : Item.GRM(IMAN_master_form).object_desc /description="Cost"
    Tolerance : ItemRevision.GRM(IMAN_master_form).object_desc /description="Tolerance"}
After mapping is complete, import it back to Teamcenter :
import_attr_mappings.exe -file=mappings.txt -u=infodba -p=infodba
To troubleshoot attribute mapping problems you can turn on detailed logs by including the line rootLogger.level= DEBUG in the C:\Program Files\Siemens\TeamcenterEDA2\eda\log4j2.properties file.
Logs from Teamcenter EDA execution can be found in C:\Windows\TEMP\eis_eda_log.log.
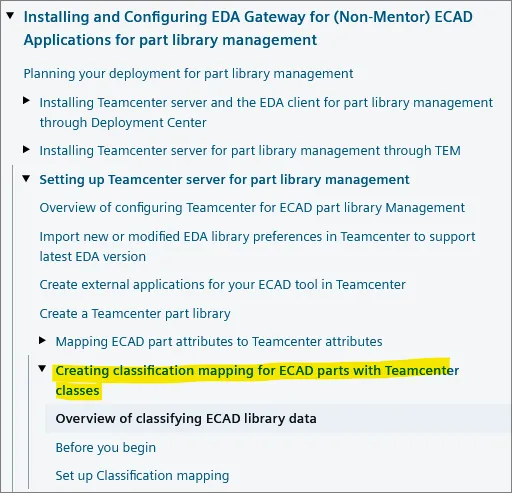
Chapter: 'Creating classification mapping for ECAD parts with Teamcenter classes' (optional)
Classification mapping is an optional setup requirement and may not be used or needed for your Teamcenter PLM installation. Note that to use classification attributes, they need to be included in the attribute mapping configuration/file when completing the previous 'Mapping ECAD part attributes to Teamcenter attributes' section above.
Before beginning this setup stage, ensure to have classification functionality enabled. Then follow the instructions to set up classification mapping.
Make sure that _eda2tc.csv has columns in order category,classId and _tc2eda.csv has columns in order classId,category. If necessary, swap file names.
To use classification attributes you need to include them in the attribute mapping. An example of classification attribute mapping is:
"SMT attribute" : ItemRevision.ICS(-60262) /description="SMT"
Where number -60262 can be found with the Classification Admin tool in Teamcenter.

Set Up Hybrid Agent
Before synchronization is possible with the Altium 365 Workspace, it is necessary to create a library with the eda_cli.bat command (located in the directory of %TCEDAECAD_ROOT% in the Agent/EDA machine), and also ensure that the created files are accessible to the Hybrid Agent:
edacli.bat -configureLibrary -application altiumLibrary -status %userprofile%\status.xml
Additionally, set JAVA_HOME or TCEDA_JAVA_HOME environment variables to the JDK path used by Teamcenter EDA (edacli.bat). Refer to Teamcenter EDA documentation for more details on setting up the Java environment for Teamcenter EDA.
At this stage you can install the Hybrid Agent on the Agent/EDA machine, as detailed in the Hybrid Agent PLM Integration page. To start the Hybrid Agent, use the agent-tceda.bat file instead of agent.bat.
Additional Library Part Sync Information:
-
Synchronization of Released/Unreleased Teamcenter parts – By default only components marked with
release_status_list.name = ‘TCM Released’will be synchronized from Teamcenter to Altium. This can be changed in the Teamcenter Query Builder by modifying the query used by Teamcenter to select components (see example).
The name of the query is stored in the EDALIB_Sync_FindNewParts preference. The default query is __EDALIB_find_newparts and is shown below.

The last condition can be removed to synchronize components that are not “TCM Released” as yet.
► Refer to the related Siemens Teamcenter documentation for more information.
- Multisite synchronization – It is also possible for Teamcenter to be used as a source of component information for multiple sites (one of them being the Altium 365 Workspace). Note that this requires a special setup that is described in the documentation.
- Unit-of-measure parameter synchronization – The Workspace Teamcenter integration supports unit-aware parameter mapping through the additional Data Type and SiPrefix data columns in the Component Parameter Mapping table of the user interface. Use an entry’s drop-down menu options to select a suitable data type (see options) and unit prefix (see options).

-
Destination folder for parts – Target folder for parts synchronized from Altium to Teamcenter can be set per site/user by the EDALIB_SaveAsFolderDefault Teamcenter preference.
-
Current Part Synchronization limitations:
- PLM part numbers are generated on the Altium Workspace side only.
-
The destination folder cannot be specified for components in the configuration file – there is a global setting on the Teamcenter side. A destination folder setting in the PLM XML Configuration file (
dm-config.xml) will be ignored without warning. The target folder is taken from the Teamcenter user level, or the site level option EDALIB_SaveAsFolderDefault for all component types. - Native part choices (Approved Manufacturer/Vendor List, or AML/AVL) is not supported. As previously, only component parameter-based part choices are supported.
Design Publishing with Teamcenter EDA
Design publishing from Altium to Teamcenter is only possible through Altium Designer. In order to enable design publishing you need to install Teamcenter EDA (Electronic Design Automation) Gateway on the machine where Altium Designer is installed. You will also need configuration access to both the Altium 365 Workspace and the Teamcenter server.
The installation and configuration procedure for EDA Gateway is described in detail in the version-specific EDA Integration documentation available in the Siemens Support Center. Please follow that documentation thoroughly. The instructions here only cover deviations from the Siemens documentation, or specify Altium-side details that are referred to as requirements in the Siemens documentation.
Choose a version of EDA Gateway that supports your Teamcenter server version – you should find compatibility information in Gateway's corresponding TcEDA<version>_README.pdf files available in the download center. You should then consult the Installing and Configuring EDA Gateway for (Non-Mentor) ECAD Applications documentation (example link is for EDA version 5.1), on the topic of Installing and Configuring EDA Gateway for (Non-Mentor) ECAD Applications for design management to guide you through the setup:

The destination folder for designs can be set by the site/user options: EDA_SaveAsFolderDefault.
Setting the User name – You will need to define the EDA Client User name by setting the User= property in the %USERPROFILE%\Teamcenter\EDA\TCEDAClient.properties file to the name of the Altium Designer user that will perform Project Publishing.
Business Modeler IDE (BMIDE) configuration for derived datasets
After creating a derived data configuration (see references in the altiumPcb_edadef.xml file), you can specify the name of the configuration in the EDA_DerivedDataConfigDefault preference.
- In BMIDE, open the Extensions folder.
- In the Extensions folder, right-click EDA Derived Data and choose New EDA Derived Data. The New EDA Derived Data wizard is displayed.
- In the EDA Derived Data dialog box, enter the information and click Next.
- For derived PCB dataset add a new entry under ‘Configure datasets’.

Pathname: $TEMP\Altium\TcEda\Project\pcb\*.*
- For derived schematic dataset add a new entry under ‘Configure datasets'.

Pathname: $TEMP\Altium\TcEda\Project\schematic\*.*
- Another derived dataset for Variants datasets:

Pathname: $TEMP\Altium\TcEda\Project\$VARIANT\pcb\*.*
- To save the changes to the data model, choose File » Save Data Model, or click the Save Data Model button on the main toolbar.
- Deploy your changes to the test server. choose Deploy Template on the menu bar, or select the project and then click the Deploy Template button on the main toolbar.
- In the Rich Client, set the EDA_DerivedDataConfigDefault preference to point to the EDA derived data configuration you just created.
- Choose Edit » Options, click the Search link at the bottom of the Options dialog box, locate the EDA_DerivedDataConfigDefault preference, and change its value to the new configuration.
Additional Design Publishing Information
Current Project Publishing Limitations:
- Referencing of specific component revisions ('Precise BOM') is not supported by the Siemens EDA Gateway.
- ECO is not currently supported.