What is a Query?
Perhaps the greatest challenge when working on a complex electronics design is managing a large number of design objects. From the components, net labels and text strings on the schematic sheets to the hundreds of components and tracks that make up the routing on the PCB, you need to be able to access, review and edit those objects. Like most Windows applications, you can double-click on an object and edit its properties. This is fine for a single object, but not something you want to do if you need to edit 300+ component designator strings or change all the vias on the PCB. For these kinds of updates, you need to access multiple objects simultaneously.
Underlying Altium Designer's schematic and PCB editors is a powerful query engine. By entering queries into this engine you can filter down to find and edit precisely those objects you require.

The powerful data filtering and editing system in Altium Designer lets you instruct the software to return a specified set of objects. This instruction is entered in the form of a query. A query is a string you enter using specific keywords and syntax, which will return the targeted objects. What you do with those objects is up to you. Perhaps you want to highlight them and dim out all other objects, or perhaps you want to browse or sort their properties and modify specific attributes they all share.
There are a number of places where you can apply a query but command central are the Filter panels shown in the images below. Press F12 to display/hide the Filter panel.
 The PCB Filter and SCH Filter panels with queries

The PCBLIB Filter and SCHLIB Filter panels with queries
The controls in the panel are used to define to which objects the query will be applied and how to handle the objects that pass the query, as well as those that fail.
SCH Filter Panel

Quickly locate and highlight objects using logical queries in the SCH Filter panel.
Summary
The SCH Filter panel allows you to construct filters through the creation of logical queries. A defined filter can then be applied to the active schematic document or all open schematic documents, allowing you to select and edit multiple objects with greater accuracy and efficiency.
Panel Access
The panel can be accessed in the following ways:
-
Click the Panels button at the bottom-right of the editor when the SCH Editor is active then select SCH Filter from the pop-up menu.
-
Click View » Panels » SCH Filter.
-
Click the F12 shortcut key.
Panels can be configured to be floating in the editor space or docked to sides of the screen. If the SCH Filter panel is currently in a group of panels, use the SCH Filter tab located at the bottom of the panels to bring it to the front.
Defining Filter Scope
The first region of the panel contains controls for defining the scope of the filter:

The Limit search to area provides controls to further refine the scope of the filter:
-
All Objects - apply the filter to all design objects.
-
Selected Objects - apply the filter only to those design objects that are currently selected.
-
Non Selected Objects - apply the filter only to those design objects that are not currently selected.
The Consider objects in drop-down field allows you to control where the filter is applied. Choose from the following options:
-
Current Document - apply filtering to just to the active schematic document (default).
-
Open Documents - apply filtering to all open schematic documents.
-
Project Documents - apply filtering to all open schematic documents that are source documents of the same parent project.
Note that filtering will not be applied to schematic documents that are open but hidden.
Defining Filter Queries
The central region of the panel allows you to construct filters through the entry of logical queries. You can type a query directly into the field. As you type, a prompt list of possible keywords will appear as an aid.

The Query Helper is available to provide aid in the creation of queries. This function can be very useful if you are unsure of the syntax of a query or the possible keywords that you may want to use. To use the Query Helper, click the Helper button to open the Query Helper dialog. The underlying Query Engine analyzes the document and lists all available objects along with generic keywords for use in queries.

Use the top section of the dialog to compose a query expression, using the available SCH Functions and System Functions. The middle section of the dialog provides a range of operators for use when constructing an expression. Use the Check Syntax button to verify that an expression is syntactically correct.
When the expression for the query has been defined as required, clicking OK will load the central region of the SCH Filter panel with the query, ready to apply the filter.
Defining Filter Highlighting
Before application of the query, it is best to define how you want the result of the filtering to appear visually in the design workspace. The Objects passing/not passing the filter regions of the panel provides various options that collectively form the highlight controls for permanent filtering.

The options available in the Objects passing the filter area allow you to control the visual display in the workspace of all objects that fall under the scope and match the specific query expression of the filter:
-
Select - when enabled (default), the filtered objects will be selected in the workspace.
-
Zoom - when enabled (default), the filtered objects will be zoomed and centered (where possible) in the design editor window.
The options available in the Objects not passing the filter area allow you to control the visual display in the workspace of all objects that do not fall under the scope and/or do not match the specific query expression of the filter:
-
Deselect - when enabled (default), all objects not falling under the scope of the filter will be deselected in the workspace.
-
Mask out - when enabled (default), the filtered objects will appear fully visible in the design editor window with all other objects becoming dimmed. With masking applied, all objects not under the filter scope will be unavailable for selection/editing.
Any combination of these options can be enabled. For example, you might want to have all filtered objects that fall under the scope of your query to be zoomed, centered and selected in the design editor window, while also applying masking to take away the clutter of other design objects.
Applying and Clearing the Filter
Once you have defined your query and set up the options in the panel as required, the filter can be applied - either by clicking the Apply button or pressing Enter.
To clear the currently-applied filter from within the panel, clear the entry for the query expression in the panel then either click the Apply button or press Enter. All objects in the design workspace will become fully visible and available for selection/editing.
Right-Click Menus
Right-clicking within the SCH Filter panel provides access to additional options and commands via a pop-up menu.
The menu provides the following commands:
-
Add to Favorites - add the query expression currently displayed in the panel to the list of favorite queries. The query will appear as a new entry on the Favorites tab of the Expression Manager dialog. As a query is added to the list of favorite queries, it will be displayed at the top of the right-click menu. The ten most recently added queries to the favorites list will be displayed on the menu (most recent at the top), enabling you to quickly access and reuse your favorite query expressions.
Keep in mind that the content of the
Favorites list is common to (and can be populated from) both the
SCH Filter and the
SCHLIB Filter panel. Some query expressions may not return results when used in the schematic editor especially if they have been created to target objects that are available within the schematic library editor only.
-
Organize Favorites - use this command to access the Favorites tab of the Expression Manager dialog in which you can organize (rename, delete) entries in the list of favorite queries as required.
-
Examples - click to access a sub-menu of predefined example filters. Choosing an example filter will load the associated, underlying query expression into the central region of the panel.

-
History - click to access a sub-menu containing the nine most recently used query expressions taken from the query history list for the panel. Click on the More entry to access the History tab of the Expression Manager dialog in which you can browse through and apply a query from the full list of historical queries and also clear the history list as required.
-
Show Scope Options - use this command to toggle the display of the filter scope region of the panel.
-
Show Masking Options - use this command to toggle the display of the filter highlighting region of the panel.
Keep in mind that the content of the History list is common to (and can be populated from) both the SCH Filter and the SCHLIB Filter panel. Some query expressions may not return results when used in the schematic editor especially if they have been created to target objects that are available within the schematic library editor only.
Notes
General
-
Pressing the F12 key will toggle the visibility of the panel in the workspace.
-
When using the Query Helper dialog to construct a query, clicking inside a typed keyword or on a keyword in one of the available lists and pressing F1 will launch help for that particular keyword. Similar access to keyword-level help is available by clicking within a keyword in the central region of the SCH Filter panel then pressing F1.
-
Depending on the shape and size of the panel, the content will be dynamically arranged horizontally or vertically.
When building query expressions
-
It is highly advisable to use brackets whenever there is any possibility whatsoever that the query might not be correctly interpreted.
-
Brackets have the highest precedence within an order of precedence that has been defined for the various operators provided and which determines how queries are interpreted by the software (whenever you have not provided brackets). The sequence of this order is as follows:
Brackets
Not
^, *, /, Div, Mod, And
+, -, Or, Xor
=, <>, <, >, <=, >=
&&, ||
This order of precedence is similar to that used in Pascal type languages; generous usage of brackets removes doubt and makes the resulting queries easier to read by others.
-
Ambiguities are resolved by working from left to right.
-
Parentheses are evaluated from inside to outside and equal levels are done left to right.
-
As the display options for objects passing and not passing the applied filter are separated, you can effectively apply new filter queries to build upon the results of previous filtering.
-
Filtering applied when using Queries from the SCH Filter panel is permanent. When masking-out design objects not passing the filter, the extent of the masking is controlled by the slider bar at the bottom of the panel.
-
A permanent filter must be cleared by applying an empty query from the SCH Filter panel.
SCHLIB Filter Panel
 Quickly locate and highlight Schematic Library objects using logical queries in the SCHLIB Filter panel.
Summary
The SCHLIB Filter panel allows you to construct filters through the creation of logical queries. A defined filter can then be applied to the active schematic library component or all components in the active schematic library, which allows you to select and edit multiple objects with greater accuracy and efficiency. The visual display of objects can be specified based on those that match the search criteria of the filter and those that do not.
Panel Access
The panel is accessed in the following ways:
-
Click the Panels button at the bottom-right of the workspace then select SCHLIB Filter.
-
Click View » Panels » SCHLIB Filter from the main menus.
-
Use the F12 shortcut key.
Panels can be configured to be floating in the editor space or docked to sides of the screen. If the SCHLIB Filter panel is currently in the group of docked Workspace panels on the left, use the SCHLIB Filter tab located at the bottom of the panels to bring it to the front.
Defining Filter Scope
The left-hand region of the SCHLIB Filter panel contains controls for defining (limiting) the scope of the filter.

The scope options are:
-
All Objects - apply the filter to all design objects.
-
Selected Objects - apply the filter only to those design objects that are currently selected.
-
Non Selected Objects - apply the filter only to those design objects that are not currently selected.
-
Whole Library - control whether filtering is applied to just the active component (option disabled) or to all components in the active schematic library document (option enabled).
Defining Filter Queries
The central region of the SCHLIB Filter panel allows you to construct filters through the entry of logical queries.
You can type a query directly into the field, and as you type, a prompt list of possible keywords will appear as an aid.

Query Helper
Along with the prompt list, the panel also offers the Query Helper facility to provide aid in the creation of queries. This facility can be very useful if you are unsure of the syntax of a query or the possible keywords that you may want to use. To use the Query Helper, click the Helper button to open the Query Helper dialog. The underlying Query Engine analyzes the document and lists all available objects, along with generic keywords for use in queries.

Use the top section of the dialog to compose a query expression using the available SCH Functions and System Functions. The middle region of the dialog provides a range of operators for use when constructing an expression. Use the Check Syntax button to verify that an expression is syntactically correct.
When the expression for the query has been defined as required, click OK to load the query into the central region of the SCHLIB Filter panel. Apply the filter using the Apply button.

When applied to the whole library, pins that satisfy the filter will be highlighted for all other components.

For more information on applying filters, see Applying and Clearing a Filter section below.
Defining Filter Highlighting
Before application of the query in the SCHLIB Filter panel, it is best to define how you want the result of the filtering to appear visually in the design editor workspace. The right-hand region of the panel provides various options that collectively form the highlight controls for permanent filtering.

The Objects passing the filter options allow you to control how all objects that fall under the scope and match the specific query expression of the filter will be visually displayed in the workspace.
-
Select - when enabled (default), the filtered objects will be selected in the workspace.
-
Zoom - when enabled (default), the filtered objects will be zoomed and centered (where possible) in the library editor window. The zoom action can be determined by the Zoom Library Components options set in the Schematic - Library AutoZoom page of the Preferences dialog.
Conversely, the Objects not passing the filter options allow you to control how all objects that do not fall under the scope and/or match the specific query expression of the filter will be visually displayed in the workspace.
-
Deselect - when enabled (default), all objects not falling under the scope of the filter will be deselected in the workspace.
-
Mask out - when enabled (default), all objects not falling under the scope of the filter will be masked within the library editor window. Use the slider to define the mask level.
Applying and Clearing a Filter
Once you have defined a query and set up the options in the panel as required, the filter can be applied by clicking the panel's Apply button or pressing Enter.
To clear the currently-applied filter from within the panel, clear (select and delete) the query expression in the central region of the panel then either click the Apply button or press Enter. All objects in the design workspace will be restored to full visibility and be available for selection/editing.
To clear filtering in the workspace and leave the query expression loaded into the central region of the panel, use the Clear Current Filter button ( ) on the Sch Lib Standard toolbar (shortcut Shift+C).
Right-Click Menu
Right-clicking within the SCHLIB Filter panel provides access to additional options and commands via a pop-up menu.

The menu provides the following commands:
-
Add to Favorites - use to add the query expression currently displayed in the central region of the panel to the list of favorite queries. The query will appear as a new entry on the Favorites tab of th e Expression Manager dialog. As a query is added to the list of favorite queries, it will be displayed at the top of the right-click menu. The ten most recently added queries to the favorites list will be displayed on the menu (most recent at the top), enabling you to quickly access and reuse your favorite query expressions.
-
Organize Favorites - use to access the Favorites tab of the Expression Manager dialog in which you can organize (rename, delete) entries in the list of favorite queries.
-
Examples - click to access a sub-menu of predefined example filters. Choosing an example filter will load the associated, underlying query expression into the central region of the panel.
-
History - click to access a sub-menu containing the nine most recently used query expressions taken from the query history list for the panel. Click on the More entry to access the History tab of the Expression Manager dialog in which you can browse through and apply a query from the full list of historical queries and also clear the history list as required.
-
Show Scope Options - use to toggle the display of the filter scope region of the panel.
-
Show Masking Options - use to toggle the display of the filter highlighting region of the panel.
The top entries in the right-click menu offer a selection of the current Favorites. Click on an entry to load it into the panel.
Keep in mind that the content of both the Favorites and History lists is common to (and can be populated from) both the SCHLIB Filter and the SCH Filter panel. Some query expressions may not return results when used in the schematic editor especially if they have been created to target objects that are available within the Schematic Library editor only.
Notes
General
-
Pressing the F12 key will toggle the visibility of the panel in the workspace.
-
Filtering applied when using Queries from the SCHLIB Filter panel is permanent for the session. A permanent filter must be cleared by a corresponding Clear action (applying an empty query from the SCHLIB Filter panel).
-
Depending on the shape and size of the SCHLIB Filter panel itself, the content will be dynamically arranged horizontally or vertically.
Building Query Expressions
-
It is highly advisable to use brackets whenever there is any possibility that the query might not be correctly interpreted.
-
Brackets have the highest precedence within an order of precedence that has been defined for the various operators provided and which determines how queries are interpreted by the software (whenever the user has not provided brackets). The sequence of this order is as follows:
Brackets
Not
^, *, /, Div, Mod, And
+, -, Or, Xor
=, <>, <, >, <=, >=
&&, ||
This order of precedence is similar to that used in Pascal type languages. However, generous usage of brackets removes doubt and makes the resulting queries easier to read by others.
-
Ambiguities are resolved by working from left to right.
-
Parentheses are evaluated from inside to outside and equal levels are done left to right.
PCB Filter Panel

The PCB Filter panel
Summary
The PCB Filter panel provides controls to construct filters through the creation of logical queries. A defined filter can then be applied to the active PCB, allowing you to select and edit multiple objects with great accuracy and efficiency.
Panel Access
The panel is accessed from the PCB editor in the following ways:
-
Click the Panels button at the bottom-right of the workspace then select PCB Filter.
-
Click View » Panels » PCB Filter from the main menus.
-
Use the F12 shortcut key.
Panels can be configured to be floating in the editor space or docked to sides of the screen. If the PCB Filter panel is currently in a group of panels, use the PCB Filter tab located at the bottom of the panels to bring it to the front.
Panel Sections
The PCB Filter panel is composed of three regions. The first two are selectable list areas that collectively define the scope of the filtering: Object and Layer.
The third region, Filter, displays the query created based on which objects and layers are currently selected.
Building Simple Filter Expressions
The main region of the panel provides controls for quickly building simple filter expressions targeting any combination of objects. Object types are arranged in an 'object matrix', categorized in accordance with being net objects (Net), component objects (Comp), or free objects (Free). The following core object list is replicated across these three groups:
-
Track
-
Arc
-
Via
-
Pad
-
Fill
-
Region
The Text object is available as part of the Comp and Free groupings, however, since this object type is not net-aware, it is not part of the Net grouping. In addition, the Free grouping also includes: Component, Component Body, Room, and Polygon.
If these are set to 'Component' and 'Top Layer', for example, the board view will highlight top layer components. The selections in both panel sections represent the cumulative effect of multiple stages of filtering action, which can be used to quickly highlight any type of design object.
The order of the columns is customizable. Click on a column's header and drag it horizontally to the required new position. Valid positions are highlighted by green positional arrows.
To use an object in the construction of a filter expression, i.e. filtering by that object, enable the relevant check box associated with that object within the object matrix. Commands available on the right-click menu for the region enable you to quickly check or uncheck all entries in the matrix or toggle the state of all checkboxes in the matrix.
Clicking on an object's name entry will cause all checkboxes associated to it in the matrix to become checked. Clicking again will cause all to become unchecked. Alternatively, click and drag the mouse, either in the object name column or in a particular group column, to check/uncheck multiple entries at once. Note that if selecting this way includes at least one unchecked box, those unchecked boxes will become checked and the boxes that were already checked will remain checked. However, if all boxes were already checked, the result will be to uncheck all boxes involved in the selection.
Use the Layer region of the panel to restrict the filter to a particular layer or layers or a specific class of layers. The entries listed reflect:
-
The defined layer classes for the board, the default of which are:
-
<All Layers>
-
<Component Layers>
-
<Electrical Layers>
-
<Signal Layers>
-
The defined layers in the layer stack (as presented in the Layer Stack Editor).
-
The top and bottom paste mask layers.
Multiple layers can be selected for inclusion into the filter by toggling the associated check box for each required layer accordingly.
The
Layer region will automatically update if additional layer classes have been defined or user-defined layer class names have been changed through the
Object Class Explorer dialog. It will also update to reflect any changes to layers in the layer stack.
As you make your filtering selections, the resulting query expression is built dynamically and presented in the Filter region of the panel. Once the filter query expression has been defined as required, you then need to apply it as a separate action. To do this, click the Apply to All button at the bottom of the panel. Alternatively, if you require application to only those objects that are currently selected in the workspace, click the Apply to Selected button.
The number of objects passing the filter (i.e. the number that remain displayed in the workspace) is indicated at the bottom-left of the panel. If no filtering is currently applied, this is reflected by the entry Not filtered.
Filtering by Object
The selection in the panel's Object list will filter the board view to show primitive design objects. All objects will be highlighted unless modified by the settings in the Object and/or Layer filter lists.
 selected under Object. Layer is set to <All>.")
The board shown with Component Body and Pad (In Any Component) selected under Object. Layer is set to <All>.
 and Pads (In Any Net). Layer is set to <All>.")
The board shown with Object set to Tracks (In Any Net) and Pads (In Any Net). Layer is set to <All>.
Filtering by Layer
The selection in the panel's Layer list filters the board view to show objects on the nominated physical design layer (Signal, Mask and Silkscreen layers). All valid layer objects will be highlighted unless modified by the settings in the Layer and/or Objects filter lists.
. Layers is set to Top Layer.")
The board shown with Object set to Components and Pads (In Any Component). Layers is set to Top Layer.
. Layer is set to Bottom Layer.")
The board shown with Object set to Tracks (In Any Net). Layer is set to Bottom Layer.
To filter objects on the current layer only, select the <Active Layers> entry.
Selecting Filtered Objects
The collective filter action provided by the panel assists both viewing and selecting board design objects of interest.
Only highlighted (filtered) objects are selectable, making it easy to locate, edit and find information about the object.
Clearing the Filter
Clear the currently applied filter by clicking the Clear button.
Note that a filter applied to the workspace is persistent and must be specifically reset or over-ridden with another type of selection mechanism such as that of the PCB panel.
Setting the Visual Filtering
The visual result of the applied filtering on the document in the workspace is determined by a series of highlighting controls. The effect that is imposed in the editor view can be set to Normal, Mask or Dim, where in practice, Mask has the most obvious highlighting effect.
The Normal / Mask / Dim drop-down list provides options for visibly contrasting filtered and unfiltered objects within the workspace.

Select the type of visual filtering applied using the masking mode drop-down list.
The visual highlighting effect for each masking mode:
-
Normal - filtered objects are visible in the workspace and the appearance of unfiltered objects remains unchanged.
-
Mask - filtered objects are highlighted in the workspace with all other objects made monochrome.
-
Dim - filtered objects are highlighted in the workspace with all other objects retaining their colors but shaded.
Defining Filter Queries
The central region of the panel provides controls to construct filters through the entry of logical queries.
You can type a query directly into the field, and as you type, a list of possible keywords appears as an aid.

Two functions are available that help in the creation of queries - the Query Helper and the Query Builder. These functions can be very useful if you are unsure of the syntax of a query or the possible keywords that you may want to use.
Query Helper
To use the Query Helper, click the Helper button to open the Query Helper dialog. The underlying Query Engine analyzes the document and lists all available objects along with generic keywords for use in queries.

Use the top section of the dialog to compose a query expression using the available PCB Functions, PCB Object Lists and System Functions. The middle region of the dialog provides a range of operators for use when constructing an expression. Use the Check Syntax button to verify that an expression is syntactically correct.
When the expression for the query has been defined as required, click OK to load the central region of the panel with the query, ready to apply the filter.
Query Builder
To use the Query Builder, click the panel's Builder button to open the Building Query from Board dialog. This dialog enables you to create a query for targeting specific objects in the design document by construction of a string of ANDed and/or ORed conditions. The left side of the dialog is used to specify the condition(s) that are required to target the set of objects needed. Initially, the entry in the Condition Type/Operator column will be Add first condition. Clicking once on this entry will reveal a drop-down list of condition types.

The condition types that are listed will reflect only those relevant to a board design.
Select the desired condition then click in the Condition Value column to access a drop-down list of possible values for that condition type. As you define a condition in the left side of the dialog, a preview of the currently built query is shown in the right side.

Continue to add further conditions to narrow down the target set of design objects as required. Conditions can be ANDed or ORed together. The default logical operator is AND, which is automatically inserted when you add another condition.
To change the logical operator between conditions, click on the AND or OR entry in the Condition Type/Operator column then select the required operator. The preview of the query will update accordingly.

Specifying Precedence
The  and
and  buttons at the top of the Building Query from Board dialog allow you to add and remove brackets around the presently selected condition (increasing and decreasing indent). This allows you to create precedence for certain logically ANDed or logically ORed conditions.
For example, consider the following built query:
InNet('5V') AND (OnLayer('TopLayer')
The first condition has been set to the condition type Belongs to Net with value 16M_IN. Another condition has then been added using the condition type Exists on Layer with the value TopLayer.

Note that the outermost bracket pairing is added automatically by the Builder and is not displayed while building the query expression.
At this stage, with the second condition selected in the dialog, the right arrow button has been clicked. Brackets have been automatically added around the second condition and now the possibility to add a condition within that pair of brackets is available.

The third condition with condition type Object Kind is and value Track is then added within the brackets.

Use the Show Level drop-down at the top-left of the dialog to control the visual display of levels in your structured string of conditions. This essentially expands/collapses the display of brackets. Adding brackets effectively creates a new level. You can display levels 1-5, but for any further levels added, use the Show All Levels option.

Alternatively, click on the expand or contract symbols (associated with a bracketed condition) to show the next level(s) or hide the current level (and all levels below) respectively. The  and
and  buttons at the top of the dialog can also be used to expand or collapse the currently selected condition.
Use the  and
and  buttons at the top of the dialog to move a selected condition in the query string. For a condition that has sub-levels (i.e. a bracketed condition), any condition in the level structure can be moved. When levels are expanded, a condition can be moved down or up through the levels. When levels are collapsed, a condition will be moved over the level structure.
To delete a condition, select it and either click the  button at the top of the dialog or use the Delete key.
When the expression for the query has been defined as required, click OK to load the central region of the PCB Filter panel with the query, ready to apply the filter.
Creating Design Rules
The PCB Filter panel also provides the facility for creating a design rule, where its scope will use the currently defined query expression in the central region of the panel.
To add a new design rule, click on the PCB Filter panel's Create Rule button. The Choose Design Rule Type dialog will open.
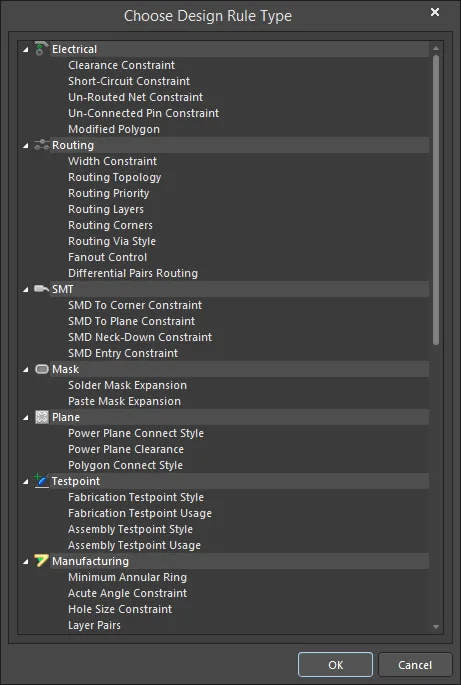
This dialog lists each of the rule categories and rule types that are available in the PCB document. Choose the type of rule you want to create then click OK (or double-click directly on the entry). The PCB Rules and Constraints Editor dialog will open.

The newly created rule name can be seen selected in the left side navigation tree. The rule query expression is in the dialog's top-right pane.
A rule of the chosen type is created and the main editing window for the rule is displayed, ready for you to define specific constraints for the rule. The query expression from the PCB Filter panel is entered into the Full Query region of the dialog. Refine the rule configuration settings as required, and apply the new rule.
Applying and Clearing the Filter
Once you have defined a query and set up the options in the panel as required, the filter can be applied either by clicking one of the panel's Apply buttons or by clicking Enter.
To clear the currently-applied filter from within the panel, clear (select and delete) the query expression in the central region of the panel then either click one of the Apply buttons or press Enter. All objects in the design workspace will be restored to full visibility and be available for selection/editing.
Right-Click Menus
Right-clicking within the PCB Filter panel provides access to additional options and commands via pop-up menus.
Right-clicking in the Object or Layer region of the panel opens the following context menu options:
-
Toggle Check - enable to toggle options. Currently selected options will be deselected while deselected options will be selected.
-
Check All - enable to select all available options.
-
Uncheck All - enable to deselect all available options.
Notes
General
-
Pressing the F12 key will toggle the visibility of the panel in the workspace.
-
The Query Builder (Building Query from Board dialog) provides a simple method of constructing a query, using sensitive condition types and values that only allow you to build using relevant 'building blocks.' For advanced query construction, with full keyword specification and operator syntax, use the Query Helper dialog.
-
As the display options for objects passing and not passing the applied filter are separated, you can effectively apply new filter queries to build upon the results of previous filtering.
When Building Query Expressions
-
It is highly advisable to use brackets whenever there is any possibility that the query will not be correctly interpreted.
-
Brackets have the highest precedence within an order of precedence that has been defined for the various operators provided and which determines how queries are interpreted by the software (whenever the user has not provided brackets). The sequence of this order is as follows:
Brackets
Not
^, *, /, Div, Mod, And
+, -, Or, Xor
=, <>, <, >, <=, >=
&&, ||
This order of precedence is similar to that used in Pascal type languages. However, generous usage of brackets removes doubt and makes the resulting queries easier to read by others.
-
Ambiguities are resolved by working from left to right.
-
Parentheses are evaluated from inside to outside and equal levels are done left to right.
PCBLIB Filter Panel

Summary
The PCBLIB Filter panel provides controls to construct filters through the creation of logical queries. A defined filter can then be applied to the active PCB component footprint, or all component footprints in the active PCB library, allowing you to select and edit multiple objects with great accuracy and efficiency.
Use the Filter The Whole Library option to control whether filtering is applied to just the active component (disabled) or to all components in the active PCB library document (enabled).
Panel Access
The panel is accessed from the PCB Library Editor in the following ways:
-
Click the Panels button at the bottom-right of the workspace then select the PCBLIB Filter entry.
-
Click View » Panels » PCBLIB Filter from the main menus.
-
Use the F12 shortcut key.
Panels can be configured to be floating in the editor space or docked to sides of the screen. If the PCBLIB Filter panel is currently in a group of panels, use the PCBLIB Filter tab located at the bottom of the panels to bring it to the front.
Panel Sections
The PCBLIB Filter panel is composed of three regions. The first two are selectable list areas that collectively define the scope of the filtering: Object and Layer. The third region, Filter, displays the query created based on the objects and layers that are currently selected.
Building Simple Filter Expressions
The main region of the panel provides controls for quickly building simple filter expressions targeting any combination of objects. Object types are arranged in an 'object matrix', categorized in accordance with being net objects (Net), component objects (Comp), or free objects (Free). The following core object list is replicated across these three groups:
-
Track
-
Arc
-
Via
-
Pad
-
Fill
-
Region
The Text object is available as part of the Comp and Free groupings, however, since this object type is not net-aware, it is not part of the Net grouping. In addition, the Free grouping also includes Component, ComponentBody, Room, and Polygon.
If these are set to 'Components' and 'Top Layer', for example, the board view will highlight top layer components. The selections in both panel sections represent the cumulative effect of multiple stages of filtering action, which can be used to quickly highlight any type of design object.
The order of the columns is customizable. Click on a column's header and drag it horizontally to the required new position. Valid positions are highlighted by green positional arrows.
To use an object in the construction of a filter expression, i.e. filtering by that object, enable the relevant check box associated with that object within the object matrix. Commands available on the right-click context menu for the region enable you to quickly check or uncheck all entries in the matrix, or toggle the state of all checkboxes in the matrix, respectively.
Clicking on an object's name entry will cause all checkboxes associated to it in the matrix to become checked. Clicking again will cause all to become unchecked. Alternatively, click and drag either in the object name column or in a particular group column to check/uncheck multiple entries at once. Note that if when selecting this way at least one unchecked box is included, the unchecked boxes will become checked, and the boxes that were already checked will remain checked. However, if all boxes were already checked, the result will be to uncheck all boxes involved in the selection.
Use the Layer region to restrict the filter to a particular layer or layers or a specific class of layers. The entries listed reflect:
-
The defined layer classes for the board, the default of which are:
-
<All Layers>
-
<Component Layers>
-
<Electrical Layers>
-
<Signal Layers>
-
The defined layers in the layer stack (as presented in the Layer Stack).
-
The top and bottom paste mask layers.
Multiple layers can be selected for inclusion into the filter by toggling the associated check box for each required layer.
The
Layer region will automatically update if additional layer classes have been defined or user-defined layer class names have been changed through the
Object Class Explorer dialog. It will also update to reflect any changes to layers in the layer stack.
Layer classes will not be presented in the Layer region.
As you make your filtering selections, the resulting query expression is built dynamically and presented in the Filter region of the panel. Once the filter query expression has been defined as required, you then need to apply it as a separate action. To do this, click the Apply to All button at the bottom of the panel. Alternatively, if you require application to only those objects that are currently selected in the workspace, use the Apply to Selected button.
The number of objects passing the filter, i.e. the number that remain displayed in the workspace, is indicated at the bottom-left of the panel. If no filtering is currently applied, this is reflected by the entry Not filtered.
Applying Filtering
PCB Library components are composed of primitive object types (Arcs, Pads, Tracks, etc.,) arranged on different board Layers. The objects are either 'free' in nature or 'owned' by a group object. Note that selecting Free in the Object region will highlight only those objects that are not part of a group object.
Filtering applies to all components in the active PCB Library.
Filtering by Object
The selection in the panel's Object list will filter the board view to show primitive design objects. All objects will be highlighted unless modified by the settings in the Layer filter list.

The example board shown with Track and Arc selected under Object. Layer is set to Top Overlay.
Filtering by Layer
The selection in the panel's Layers list will filter the board view to show objects on the nominated physical design layer (Signal, Mask and Silkscreen layers). All valid Layer objects will be highlighted unless modified by the settings in the Object filter list.

The example board shown with Object set to Pad. Layer is set to Top Layer.
To filter objects on the current layer only, select the <Active Layer> entry.
Selecting Filtered Objects
The collective filter action provided by the PCBLIB Filter panel assists both viewing and selecting board design objects of interest.
Only highlighted (filtered) objects are selectable, making it easy to locate, edit and find information about the object.
Clearing the Filter
Clear the currently applied filter with the panel's Clear button.
Note that a filter applied to the workspace is persistent and must be specifically reset or over-ridden with another type of selection mechanism, such as that of the
PCB panel.
Setting the Visual Filtering
The visual result of the applied filtering on the document in the workspace is determined by a series of highlighting controls. The effect that is imposed in the editor view can be set to Normal, Mask or Dim, where in practice, Mask has the most obvious highlighting effect.
The Normal / Mask / Dim drop-down list provides options for visibly contrasting filtered and unfiltered objects within the workspace.

Select the type of visual filtering applied using the masking mode drop-down list.
The visual highlighting effect for each masking mode:
-
Normal - filtered objects are visible in the workspace and the appearance of unfiltered objects remains unchanged.
-
Mask - filtered objects are highlighted in the workspace with all other objects made monochrome.
-
Dim - filtered objects are highlighted in the workspace with all other objects retaining their colors but shaded.
Defining Filter Queries
The central region of the panel allows you to construct filters through the entry of logical queries.
You can type a query directly into the field, and as you type, a prompt list of possible keywords will appear as an aid.

Two features are available to provide aid in the creation of queries - the Query Helper and the Query Builder. These facilities can be very useful if you are unsure of the syntax of a query or the possible keywords that you may want to use.
Query Helper
To use the Query Helper, click the Helper button to open the Query Helper dialog. The underlying Query Engine analyzes the document and lists all available objects, along with generic keywords for use in queries.
Use the top section of the dialog to compose a query expression using the available PCB Functions, PCB Object Lists, and System Functions. The middle region of the dialog provides a range of operators for use when constructing an expression. Use the Check Syntax button to verify that an expression is syntactically correct.
When the expression for the query has been defined as required, click OK to load the central region of the PCBLIB Filter panel with the query, ready to apply the filter.
Query Builder
To use the Query Builder, click the PCBLIB Filter panel's Builder button to open the Building Query from Board dialog.
This dialog enables you to create a query for targeting specific objects in the design document, by simple construction of a string of ANDed and/or ORed conditions.
The left side of the dialog is where you specify the condition(s) that are required to target the set of objects needed. Initially, the entry in the Condition Type/Operator column will be Add first condition. Click once on this entry to open a drop-down list of condition types.

The condition types listed will only reflect those relevant to a board design.
Select the condition then click in the Condition Value column to access a drop-down list of possible values for that condition type. As you define a condition in the left side of the dialog, a preview of the currently built query is shown on the right side.

Continue to add further conditions to narrow down the target set of design objects as required. Conditions can be ANDed or ORed together. The default logical operator is AND and is automatically inserted when you add another condition.
To change the logical operator between conditions, click on the AND or OR entry in the Condition Type/Operator column then select the required operator. The preview of the query will update accordingly.

Specifying Precedence
The and buttons at the top of the Building Query from Board dialog allow you to add and remove brackets around the presently selected condition (increasing and decreasing indent). This allows you to create precedence for certain logically ANDed or logically ORed conditions.
The first condition has been set to the condition type Exists on Layer with value Top Layer. Another condition has then been added using the condition type Object Kind is with the value Arc.

Note that the outermost bracket pairing is added automatically by the Builder and is not displayed while building the query expression.
At this stage, with the second condition selected in the dialog, the right arrow button has been clicked. Brackets have been automatically added around the second condition, and now the possibility to add a condition within that pair of brackets is available.

The third condition with condition type In Any Polygon is then added within the brackets.

Use the Show All Levels drop-down at the top-left of the dialog to control the visual display of levels in your structured string of conditions. This essentially expands/collapses the display of brackets. Adding brackets effectively creates a new level. You can display levels 1-5, but for any further levels added use the Show All Levels option.
Alternatively, click on the expand or contract symbols associated with a bracketed condition to show the next level(s) or hide the current level (and all levels below) respectively. The and buttons at the top of the dialog also can be used to expand or collapse the currently selected condition.
Use the and buttons at the top of the dialog to move a selected condition in the query string being built. For a condition that has sub-levels (i.e. a bracketed condition), any condition in the level structure can be moved. When levels are expanded, a condition can be moved down or up through the levels. When levels are collapsed, a condition will be moved over the level structure.
To delete a condition, select it and either click the button at the top of the dialog or use the Delete key.
When the expression for the query has been defined as required, click OK to load the central region of the PCBLIB Filter panel with the query, ready to apply the filter.
Creating Design Rules
The PCBLIB Filter panel also provides the facility for creating a design rule. Its scope will use the currently defined query expression in the central region of the panel.
To add a new design rule, click on the PCBLIB Filter panel's Create Rule button. The Choose Design Rule Type dialog will open.
This dialog lists each of the rule categories and rule types that are available in the PCB document. Choose the type of rule you want to create then click OK (or double-click directly on the entry). The PCB Rules and Constraints Editor dialog will open.
The newly-created rule name can be seen selected in the left side navigation tree. The rule query expression is in the dialog's top-right pane.
A rule of the chosen type is created and the main editing window for the rule is displayed, ready for you to define specific constraints for the rule. The query expression from the PCBLIB Filter panel is entered into the Full Query region of the dialog. Refine the rule configuration settings as required, and apply the new rule.
Applying and Clearing the Filter
Once you have defined the query and set up the options in the panel as required, the filter can be applied either by clicking the panel's Apply button or pressing Enter.
To clear the currently-applied filter from within the panel, clear (select and delete) the query expression in the central region of the panel then either click the Apply button or press Enter. All objects in the design workspace will be restored to full visibility and be available for selection/editing.
Right-click Menus
Right-click within the PCBLIB Filter panel to access to additional options and commands via pop-up menus.
Right-clicking in the Object or Layer region of the panel opens the following context menu options:
-
Toggle Check - enable to toggle options. Currently selected options will be deselected, while deselected options will be selected.
-
Check All - enable to select all available options.
-
Uncheck All - enable to deselect all available options.
Notes
General
-
Pressing the F12 key will toggle the visibility of the panel in the workspace.
-
The Query Builder (Building Query from Board dialog) provides a simple method of constructing a query using sensitive condition types and values that only allow you to build using relevant 'building blocks'. For advanced query construction with full keyword specification and operator syntax, use the Query Helper dialog.
-
As the display options for objects passing and not passing the applied filter are separated, you can effectively apply new filter queries to build upon the results of previous filtering.
When Building Query Expressions
-
It is highly advisable to use brackets whenever there is any possibility that the query might not be correctly interpreted.
-
Brackets have the highest precedence within an order of precedence that has been defined for the various operators provided and that determines how queries are interpreted by the software (whenever the user has not provided brackets). The sequence of this order is as follows:
Brackets
Not
^, *, /, Div, Mod, And
+, -, Or, Xor
=, <>, <, >, <=, >=
&&, ||
This order of precedence is similar to that used in Pascal type languages. However, generous usage of brackets removes doubt and makes the resulting queries easier to read by others.
-
Ambiguities are resolved by working from left to right.
-
Parentheses are evaluated from inside to outside and equal levels are done left to right.
The query language is also used in the PCB Rules and Constraints Editor dialog to define scopes of design rules (refer to the Defining, Scoping & Managing PCB Design Rules page to learn more). Note that the set of objects scoped by a design rule depends not only on the query but also on the rule type (for example, a Width rule scopes only tracks, a Routing Via Style rule scopes only vias, etc.), so results of highlighting/scoping objects when using the same query expression in the Filter panel and the rule scope might be different.
Where Are the Query Results?
Now that you have written a query in the Filter panel, how do you access the objects returned by your query? There are two ways that objects can be accessed and edited in the Altium Designer environment.
-
Graphically - after applying a filter, the default behavior is to mask (fade and make non-editable) all objects that failed the query, leaving only those that passed. This mode is excellent for locating and reviewing objects in the workspace. Since the masked objects are not editable, commands like Ctrl+A (select all) only apply to the objects returned by the query.
-
List panel - the List panel (Shift+F12) is a spreadsheet-like view into your design data. By default, it displays all design objects but once a filter has been applied, it displays only the objects returned by the query. The List panel has standard spreadsheet-like behaviors for sorting and selecting, allowing you to edit single or multiple cells directly.
 The PCB List panel and SCH List panel display the results from the PSB/SCH queries in the previous section.
Highlighting Options
Whenever a query is applied (or the data filtering feature is otherwise used), each object within the target document becomes a member of that filtering action's results. However, how the objects in the results and the objects that are not in the results are subsequently displayed depends upon the highlighting option(s) selected in the Filter panel. There are three different highlighting options available and the options are totally independent of one another, so you can select one, two or all.
Zoom
When the Zoom option is enabled when the query is applied, the view of the target document is updated to display the region occupied by all of the objects that are in the results. Whether or not each remaining object is displayed in the updated view depends upon its location relative to that region, so each of those objects can end up being totally displayed, or partially displayed, or not even displayed at all.
This option is often selected in conjunction with one or both of the other options. If the Mask option has not been enabled, objects that are not in the results will still be displayed in the graphical view if they are located within the updated boundaries. At first glance, selecting this option by itself might seem pointless, but there could be times when you want to update the graphical view so that this encompasses particular objects, while not changing the selected state or masked state of any of the document's objects.
Select
When the Select option is enabled, all of the objects that are in the results are in the selected state, while all of the remaining objects are not selected. Selected objects are displayed in a more distinctive manner as non-selected objects.
If the Select option is selected when the current query is applied, all of the objects which are members of the result set subsequently acquire a selected state, while all of the remaining objects (which are not members of the result set) acquire an unselected state instead. This option would typically be selected just prior to global editing procedures because only those objects which are currently selected have their properties updated at the time. But there are other occasions when the Select option can be useful, such as when particular objects are to be moved, copied or deleted.
Mask
The Mask highlighting option determines the updated masked property of objects in the target document. When selected, all of the objects that are in the results are masked, while all of the remaining objects are unmasked. The main aspect of masked objects is that they and their properties are not capable of being edited. (Masked objects are displayed as dimmed in the list view, but are not displayed in the list view unless the all objects option is currently selected in the List panel.) The main aspect of masked objects is that the object and its properties are not capable of being edited.
The Query Builder
The PCB editor includes a dedicated Query Builder dialog. This dialog allows you to build complex queries by choosing test conditions from drop-down lists. An advantage of the Query Builder is that it lets you create a query that targets different kinds of objects.
The 'Building Query' dialog (part of the 'Query Builder' feature) assists those who are less experienced in specifying queries; a query is automatically generated whose contents correspond to the conditions specified by the designer.
The left-hand section in this dialog contains controls, whose purpose is to assist the designer in the task of specifying what properties are required for each of the document's objects to be returned by the query generated by this dialog. As each of those conditions is specified or edited, the contents of the corresponding query are updated and displayed in the dialog's right-hand section. If this dialog is then closed by clicking on its OK (or Apply) button, either the associated query will then be applied, or its contents will then be copied back to the Filter panel (depending upon how this dialog was invoked in the first instance).
The Query Builder dialog can be launched from the following places (as shown in the image below):
-
From the PCB Filter panel, click the Query Builder button to build a query and to load the string into the panel.
-
From the PCB Rules and Constraints Editor dialog, click the Builder button to build a query that defines to which objects this rule applies.

When the Query Builder dialog is accessed from the PCB Rules and Constraints Editor dialog, it will display options that are suitable only for that rule kind.
The image below shows the Query Builder dialog being used to create a query that targets both pads and vias on the 5V net.

The Query Builder dialog
Options and Controls of the Query Builder Dialog
-
Show All Levels - use the drop-down to control the visual display of levels in the structured string of conditions. This essentially expands/collapses the display of brackets. Adding brackets creates a new level and you can display levels 1-5. Alternatively, click on the expand ( ) or contract (
 ) symbols to show the next level(s) or hide the current level (and all levels below), respectively.
-
 - use to remove brackets around the presently selected condition (decreasing indent). This allows you to create precedence for certain logically ANDed or logically ORed conditions.
-
 - use to add brackets around the presently selected condition (increasing indent). This allows you to create precedence for certain logically ANDed or logically ORed conditions.
-
 - to move a selected condition up in the query string being built. For a condition that has sub-levels (i.e. a bracketed condition), any condition in the level structure can be moved. When levels are expanded, a condition can be moved up through the levels. When levels are collapsed, a condition will be moved over the level structure.
-
 - to move a selected condition down in the query string being built. For a condition that has sub-levels (i.e. a bracketed condition), any condition in the level structure can be moved. When levels are expanded, a condition can be moved down through the levels. When levels are collapsed, a condition will be moved over the level structure.
-
- use to expand symbols to show the next level(s).
-
- use to contract symbols to hide the current level (and all levels below).
-
 - use to delete the selected condition.
-
Condition Type/Operator - use this region to specify the condition(s) required to target the set of objects needed. Initially, the entry in the Condition Type/Operator column will be Add first condition. Click once on this entry to open a drop-down list of condition types. The list is sensitive to wherever the dialog was launched from. If you are building a query for a particular design rule within the PCB Rules And Constraints Editor dialog, the condition list will only reflect condition types possible for that particular rule type.
-
Condition Value - choose the first condition then click in the Condition Value column to access a drop-down list of possible values for that condition type. As you define a condition, a preview of the currently built query is shown in the Query Preview region.
-
Add further conditions to narrow down your target set of design objects as required. Conditions can be ANDed or ORed together. The default logical operator is AND.
-
To change the logical operator between conditions, click on the AND or OR entry in the Condition Type/Operator column then select the required operator. The preview of the query will update accordingly.
-
The Query Builder dialog (Building Query from Board ) is a simpler method of constructing a query using sensitive condition types and values that only allow you to build using relevant 'building blocks.' For advanced query construction with full keyword specification and operator syntax use the Query Helper dialog.
-
You can adjust any condition in your query string at any time by clicking on the entry for that condition in the Condition Type/Operator column then choosing the required new condition from the available entries in the drop-down list. The preview of the query will update accordingly.
-
Use Ctrl+Up Arrow and Ctrl+Down Arrow keyboard shortcuts to move the selected condition entry up or down in the structure.
-
Use Ctrl+Right Arrow and Ctrl+Left Arrow keyboard shortcuts to increase or decrease the indent at the selected position in the structure (add/remove brackets).
The Query Helper
The next step in building your query-writing skills is to use the Query Helper dialog. The Query Helper dialog includes a Query box in which you can enter the desired query, while also using the syntax buttons below the Query field (e.g., And, Or, <, Not, Like, etc.,) as well as a complete list of all query keywords in the Categories field.
The 'Query Helper' dialog provides assistance for designers who want to specify their own queries. A brief description is provided for each keyword that is listed, but the online help can be accessed by pressing the F1 key while a keyword is highlighted. That invokes the Altium Designer Documentation Library dialog, which provides details of which objects within a document are returned by the highlighted keyword, how to use that keyword, and one or more examples of its usage.
The dialog can be accessed in the following ways:
-
Click the Helper button in the Filter panel.

PCB Filter panel access

SCH Filter panel access
The Helper button is available after clicking Advanced in the File-based Libraries Search dialog.
 File-based Libraries Search dialog access
Use the Query section at the top of the dialog to compose a query expression, using the available functions. In the text box, you can review and/or further edit the search expression. Type directly into the text box to edit the search expression. To search for specific keywords to add, begin typing. While you are typing, the dialog will offer a drop down menu of available keywords that match the text you have written so far. Click a keyword to auto-finish typing your selection. If the desired keyword is highlight, pressing Enter will also auto-finish your selection.
Browse through the Categories of available keywords for the one you want. Use the Mask field if you are not sure what the exact keyword is. For example, in the schematic editor's Query Helper, entering *har in the Mask field will find keywords that apply specifically to harnesses, as shown in the image below. Note that the Mask field works on both the keyword Name field and the Description field, so it can be the quickest way to find possible keywords.

If you press F1 when a keyword is highlighted or the cursor is within a keyword you have entered, documentation for that keyword will open. This is the most valuable resource for learning the basic behavior of each query keyword.
Double-click a keyword in the grid to add it to the query at the current cursor position.
The middle region of the dialog includes syntax buttons that provide a range of operators for use when constructing an expression. For more information on the individual function of each syntax button, visit the Logical Query Expression Operators section below. Use the Check Syntax button (bottom left of the dialog) to verify that an expression is syntactically correct.
Historical Queries
As you enter and apply a new query from a filter panel (SCH Filter / SCHLIB Filter, PCB Filter / PCBLIB Filter), it will be added to a query history list. Click the History button on the panel to access this list. The Expression Manager dialog opens with the History tab active.
 The History tab of the Expression Manager dialog provides a listing of query expressions used in the past. Here, an example of historical queries for the Schematic is shown. Hover the mouse over the image to see a similar example list for the PCB.
To use a historical query from the list, either select its entry and click on the Apply Expression button or double-click on the entry directly. The dialog will close and the expression for the query will be loaded into the central region of the relevant filter panel.
A historical query can be added to the list of favorite queries by selecting its entry and clicking the Add To Favorites button. Use the Clear History button if you want to 'flush' the history list.
Up to nine of the most recently used query expressions from the list will be available for use from the filter panel's right-click History sub-menu.
Note that the content of the History list is common to (and accessible from) the filter panels in a design domain (SCH Filter / SCHLIB Filter in the Schematic editing domain; PCB Filter / PCBLIB Filter in the PCB editing domain). Some query expressions may not return results when used in the Schematic Editor, especially if they have been created to target objects that are available within the Schematic Library Editor only.
Favorite Queries
Any defined query may be added to a list of favorite queries in two ways:
-
Click the Add To Favorites button or right-click in the main Query Expression region and choose the Add to Favorites command from the context menu to add the query expression currently defined in the central region of the active filter panel.
-
Select a historical query entry on the History tab of the Expression Manager dialog, then click the Add To Favorites button.
Favorite query expressions are stored to, and managed from, the Favorites tab of the Expression Manager dialog. Access can be made by using the Favorites button on a filter panel (SCH Filter / SCHLIB Filter, PCB Filter / PCBLIB Filter) or by right-clicking in the main Query Expression region of a filter panel, and choosing the Organize Favorites command from the context menu. From the design space, the dialog can be accessed by using the Y shortcut key, then selecting Organize Favorites from the pop-up filtering menu.
 Access a listing of your favorite queries from the editor's filter panel or from the design space, using the filtering pop-up menu.
When a query expression is added to the Favorites list, it is assigned a unique name. By default, a generic name is assigned - Favorite_n - where n is the next available unused number. The name for an entry can be changed at any stage by using one of the following methods:
-
Selecting the query entry then clicking the Rename button.
-
Selecting the query entry then choosing the Edit command from the right-click menu.
-
Selecting the query entry then clicking again within the Name field.
In each case, type the new name as required then click outside the Name field to effect the change.
To edit a favorite query expression select its entry in the list, then click the Edit button (or right-click and choose Edit from the context menu). The Edit Favorite dialog will open. Use the dialog to modify the name of the favorite, change the expression itself, and also determine how design objects are handled (both those that pass the filter and those that don't).
 and PCB (right).") Modify an existing favorite query using the Edit Favorite dialog, shown here for Schematic (left) and PCB (right).
Modify an existing favorite query using the Edit Favorite dialog, shown here for Schematic (left) and PCB (right).
To remove a query from the Favorites list, select its entry in the list then either click the Remove button or choose the Remove command from the right-click menu. A dialog will appear requesting confirmation of the removal.
Note that the content of the Favorites list is common to (and accessible from) the filter panels in a design domain (SCH Filter / SCHLIB Filter in the Schematic editing domain; PCB Filter / PCBLIB Filter in the PCB editing domain). Some query expressions may not return results when used in the Schematic Editor, especially if they have been created to target objects that are available within the Schematic Library Editor only.
Using Favorite Queries
There are three ways in which to use your favorite queries:
-
From the Favorites tab of the Expression Manager dialog - either select its entry then click on the Apply Expression button or double-click on its entry. The dialog will close and the expression for the query will be loaded into the central region of the relevant filter panel.

-
From the top of the filter panel's right-click menu (up to ten of the most recently added query expressions to the Favorites list are available).

-
From the design space's filtering pop-up menu (press Y) - up to ten favorite query expressions are listed at the top of the menu. The chosen query expression will be loaded into the central region of the relevant filter panel.
Using Pre-packaged Examples
Both the schematic and PCB editors come with a set of pre-packaged example queries. These examples are available from the filtering menu - accessed either by right-clicking in the expression region of the filter panel, or by using the Y shortcut key in the design space. Hover over Examples to view the sub-menu.

When you select an entry in the sub-menu, the query behind that filter is applied. To view the actual query behind one of the examples, look in the History list after applying it. You also can access this list in the filtering pop-up menu.

To clear the filtering, press
Shift+C in the design space or right-click in the design space and select the
Clear Filter command in the context menu.
Query Building Tools
Perhaps the easiest way to write a query is to have Altium Designer write it for you! You can do this by using either the Find Similar Objects dialog or the Query Builder dialog.
Find Similar Objects Dialog
When you use the Find Similar Objects dialog, it generates a query to find the required objects. If the Create Expression option is enabled, that query will be displayed in the Filter panel. This is an excellent technique for learning different query keywords.
The Find Similar Objects dialog opens when you right-click on any unmasked object in your design document then select Find Similar Objects from the context menu.
 Left image: PCB version; right image: SCH version
This dialog allows you to find objects similar to the one on which you right-clicked, then define which of the object's attributes that must be the same (or different) for a match. Suppose you wanted to change all GND pads in your design. You could right-click on one such pad, choose Find Similar Objects, then change the Net field from Any (the default setting) to Same. All of the GND pads will be selected when you click Apply in the dialog. If the Create Expression option is enabled, the following query would appear in the Filter panel: (ObjectKind = 'Pad') And (Net = 'GND').
As an example from a schematic, you can change the Color property of all Power Objects having a particular Text property (e.g. 'GND') within a document to the same value. For example, from a PCB, you can change the Hole Size property of all vias having a particular Via Diameter property within a document to the same value.
Clear Existing Option
Enable the Clear Existing option to clear any existing selection or editing mask before applying the search. Disable this option if you are performing successive searches and it is desirable for the results to accumulate.
Filter Toolbar

The Filter Toolbar is provided for PCB documents and allows you to mask all of the objects within a document except for those having a specified property, or for those forming part of a specified component. The right-most field of the toolbar is used to specify the contents of a query. You can enter the query in the field or you can use the drop-down to select from recent queries (one that exists in the query History list). It is not possible to specify which options to use when queries are applied from the Filter Toolbar and in all cases, any previous query is cleared, and the Mask and Zoom options are then used with the current query. To use query options, use the Filter panel, Query Builder dialog, Query Helper dialog, or Find Similar Objects dialog.
-
If the board is unrouted, the logical connections associated with the chosen net will become visible when the filter is applied. If the board is routed, the routed track associated with the chosen net will become visible when the filter is applied.
-
With masking applied, all objects not under the filter scope will be unavailable for selection/editing. The extent of the masking applied can be manually adjusted using the Masked Objects slider bar accessed in the Mask and Dim Settings section on the View Options tab of the View Configuration panel.
-
You can manually clear an existing (and applied) filter at any time by using the Shift+C keyboard shortcut or by clicking the
 button on the Filter toolbar.
Logical Query Expression Operators
Below is a summary of the operators that can be used when defining logical query expressions with the query language.
Arithmetic Operators
| Operator |
Description |
Example |
| + |
Addition operator |
NetPinCount + NetViaCount |
| - |
Subtraction operator |
ArcStopAngle - ArcStartAngle |
| * |
Multiplication operator |
PadXSize_BottomLayer * PadYSize_BottomLayer |
| / |
Division operator |
HoleDiameter / ViaDiameter |
| Div |
Integral division operator |
Color Div 65536
This calculates Color divided by 65536 and the fractional part of the result is discarded |
| Mod |
Modulus operator |
Color Mod 256
This calculates the remainder when Color is divided by 256, without determining the fractional part of the result |
Logical Operators
| Operator |
Description |
Example |
| And |
Logical AND operator |
IsPad And OnMultiLayer
To be returned, an object has to be a pad, and reside on the Multi-Layer layer |
| && |
Logical AND operator
(lower precedence) |
IsPad && OnMultiLayer
To be returned, an object has to be a pad, and reside on the Multi-Layer layer |
| Or |
Logical OR operator |
IsPad Or IsVia
To be returned, an object has to either be a pad, or a via |
| || |
Logical OR operator
(lower precedence) |
IsPad || IsVia
To be returned, an object has to either be a pad, or a via |
| Xor |
Logical EXCLUSIVE OR operator |
OnMultiLayer Xor (HoleDiameter <> 0)
To be returned, an object has to either be on the Multi-Layer layer and have a Hole Diameter that is zero, or not
be on the Multi-Layer layer and have a Hole Diameter that is not zero. |
| Not |
Logical NOT operator |
Not OnMultiLayer
To be returned, an object has to not be on the Multi-Layer layer |
When using the Not operator in query expressions in the PCB editor to exclude primitives of a specific type, note that these primitives will not be excluded if they are part of group objects and these group objects are not also excluded by the expression as well. For example, the Not IsPad query expression returns all objects except free pad objects, but it returns component objects that might include pads, so pads in components will be returned by this expression. Also, pads might be included in nets which are also considered group objects in the PCB editor. To exclude all pad objects, the Not IsPad And Not IsComponent And Not IsNet query expression should be used.
Comparison Operators
| Operator |
Description |
Example |
| < |
Less Than operator |
HoleDiameter < 40
To be returned, an object has to have a Hole Diameter which is less than 40 |
| <= |
Less Than Or Equal To operator |
HoleDiameter <= 40
To be returned, an object has to have a Hole Diameter which is less than, or equal to 40 |
| >= |
Greater Than Or Equal To operator |
HoleDiameter >= 40
To be returned, an object has to have a Hole Diameter which is greater than, or equal to 40 |
| > |
Greater Than operator |
HoleDiameter > 40
To be returned, an object has to have a Hole Diameter which is greater than 40 |
| <> |
Not Equal To operator |
HoleDiameter <> 40
To be returned, an object has to have a Hole Diameter which is not equal to 40 |
| = |
Equal To operator |
HoleDiameter = 40
To be returned, an object has to have a Hole Diameter which is equal to 40 |
| Between...And... |
Inclusive range operator |
HoleDiameter Between 30 And 50
To be returned, an object has to have a Hole Diameter that is greater than, or equal to 30, and
less than, or equal to 50. |
| Like |
Like operator |
Name Like 'ADDR?*'
This returns objects having a Name property whose associated (text) string begins with ADDR and
which contains at least one more character |
Wild Card Characters
Wild Card characters permit the provision of strings which are not exactly specified. These characters are typically used in conjunction with other characters, resulting in the provision of strings which are partially specified. A few exceptional keywords can accept string parameters that are not exactly specified, but for the most part, strings can only contain Wild Card characters when these are being compared by the Like operator.
| Operator |
Description |
Example |
| ? |
This can be replaced by a single character of any type |
Footprint Like 'DIP1?'
This returns objects which have a Footprint property of DIP10, or DIP12, or DIP14, etc. |
| * |
This can be replaced by any number of characters, each of which can be of any type |
Footprint Like 'SIP*'
This returns objects which have a Footprint property of SIP1, or SIP12, or SIP216, etc. (Any objects having a Footprint property of SIP are also returned, because '*' can also be replaced by no characters) |
Boolean Strings
| Operator |
Description |
Example |
| True |
This affirms the meaning of a Keyword |
IsPad = True
To be returned, an object has to be a pad |
| False |
This negates the meaning of a Keyword |
IsVia = False
To be returned, an object has to not be a via |
Round Brackets and Order of Precedence
It is worthwhile taking a look at the order of precedence in place for the operators used in logical Query expressions. After all, without such knowledge, an expression may not target the objects required.
Round brackets have the highest precedence within an order of precedence that has been defined for the various operators, and which determines how queries are interpreted by the software (whenever the user has not provided round brackets). The sequence of this order, from highest to lowest, is as follows:
-
Round brackets ()
-
Not
-
^, *, /, Div, Mod, And
-
+, -, Or, Xor
-
=, <>, <, >, <=, >=
-
&&, ||
This order of precedence is similar to that used in Pascal-type languages. Ambiguities are resolved by working from left to right. Round brackets are evaluated from inside to outside and equal levels are evaluated left to right.
It is highly advisable to use round brackets whenever there is any possibility, whatsoever, that the query might not be correctly interpreted. Generous usage of round brackets removes doubt and makes the resulting queries easier to read by others.
Global System Query Functions

Global system query functions shown in the Query Helper dialog
This section details the query language keywords available in the schematic, PCB, and library documents in Altium Designer. For help on a specific query keyword, use the following collapsible sections or highlight (or click inside) any given keyword - in the Query Helper, a Filter panel, or the Query field of a PCB design rule - and press F1 to access its section right away.
For details about query language keywords available in specific editors and tools in Altium Designer, refer to the following pages:
Arithmetic Functions
ABS
Summary
Returns a (real) number whose value is equal to the absolute value of the parameter's numeric value. If that numeric value is positive, the number returned has the same value; otherwise the number returned is equal to the parameter's numeric value multiplied by -1.
Syntax
ABS(X : Number / Numeric_String) : Number
Example Usage
ABS(2.3)
Returns 2.3.
ABS(-7.2)
Returns 7.2.
CEIL
Summary
Returns an integral number, whose value depends upon the nature of the parameter's numeric value. If that numeric value is an exact integer, the number returned has exactly the same value; otherwise the number returned is the smallest integer that is larger in value than the parameter's numeric value.
Syntax
CEIL(X : Number / Numeric_String) : Number
Example Usage
CEIL(5.0)
Returns 5.
CEIL(5.33)
Returns 6.
CEIL(-5.0)
Returns -5.
CEIL(-5.33)
Returns -5.
FLOOR
Summary
Returns an integral number, whose value depends upon the nature of the parameter's numeric value. If that numeric value is an exact integer, the number returned has exactly the same value; otherwise the number returned is the largest integer that is smaller in value than the parameter's numeric value.
Syntax
FLOOR(X : Number / Numeric_String) : Number
Example Usage
FLOOR(5.0)
Returns 5.
FLOOR(5.33)
Returns 5.
FLOOR(-5.0)
Returns -5.
FLOOR(-5.33)
Returns -6.
FRAC
Summary
Returns a (real) number, whose value depends upon the nature of the parameter's numeric value:
-
If that numeric value is positive but is not an exact integer, the number returned is the difference between the parameter's numeric value and the largest integer that is smaller in value than the parameter's numeric value.
-
If that numeric value is negative but is not an exact integer, the number returned is the difference between the parameter's numeric value and the smallest integer that is larger in value than the parameter's numeric value.
-
If the parameter's numeric value is an exact integer, the number returned is 0.
Syntax
FRAC(X : Number / Numeric_String) : Number
Example Usage
FRAC(5.0)
Returns 0.
FRAC(5.33)
Returns 0.33.
FRAC(-5.0)
Returns 0.
FRAC(-5.33)
Returns -0.33.
IIF
Summary
This is a special purpose construction which contains three queries. The value of the first query (between the opening bracket and the first comma) is evaluated. If that is True, the second query (between the commas) is returned; otherwise, the third query (between the second comma and closing bracket) is returned.
This Keyword is similar in concept to "If ... Then ... Else ..." constructions provided with many computer programming languages.
Syntax
IIF(L : Boolean Query , A : Query , B : Query)
L, A, and B are all strings which each specify some Query; L needs to be a Boolean Query (i.e. of a nature that returns either a True or False result).
IIF(L,A,B) has an identical outcome to the Query comprised of ((L = True) And A) Or ((L = False) And B). As such, it is especially useful when L is of a complex nature, as it only needs to be specified once.
Example Usage
IsArc And IIF(ArcStopAngle - ArcStartAngle >= 0 , ArcStopAngle - ArcStartAngle Between 30 And 60 , ArcStartAngle - ArcStopAngle Between 300 And 330)
Returns all arcs that have an arc length which is greater than or equal to 30 degrees and less than or equal to 60 degrees. (The arc length property of an arc is an angle that is determined by subtracting its Start Angle property from its Stop Angle property. A complicating consideration is that it is possible for an arc's Stop Angle property to be smaller than its Start Angle property, but this Query correctly evaluates the true arc length property for all possible arc objects.)
IsComponent And IIF(Layer = 'Top Layer' , Rotation <> 0 , Rotation <> 180)
Returns all components that are on the top side of the PCB whose Rotation property is not 0 degrees, and all components that are on the bottom side of the PCB whose Rotation property is not 180 degrees. (Component objects can only reside on the Top signal layer or Bottom signal layer, so any component which is not on the Top signal layer must then be on the Bottom signal layer instead.)
INT
Summary
Returns an integral number, whose value depends upon the nature of the parameter's numeric value:
-
If that numeric value is positive but is not an exact integer, the number returned is the largest integer that is smaller in value than the parameter's numeric value.
-
If that numeric value is negative but is not an exact integer, the number returned is the smallest integer that is larger in value than the parameter's numeric value.
-
If that numeric value is an exact integer, the number returned has exactly the same value.
Syntax
INT(X : Number / Numeric_String) : Number
Example Usage
INT(5.0)
Returns 5.
INT(5.33)
Returns 5.
INT(-5.0)
Returns -5.
INT(-5.33)
Returns -5.
Tips
This is an alias for the TRUNC arithmetic function.
MAX
Summary
Returns a (real) number whose value is equal to the maximum value of all of the parameters provided. Each parameter must be either a number, or a numeric string, and any number of parameters can be provided.
Syntax
MAX(N1 : Number / Numeric_String, [N2] : Number / Numeric_String, ...) : Number
Example Usage
MAX(2)
Returns 2.
MAX(7,2,3)
Returns 7.
Tips
At least one parameter must be provided.
MIN
Summary
Returns a (real) number whose value is equal to the minimum value of all of the parameters provided. Each parameter must be either a number, or a numeric string, and any number of parameters can be provided.
Syntax
MIN(N1 : Number / Numeric_String, [N2] : Number / Numeric_String, ...) : Number
Example Usage
MIN(2)
Returns 2.
MIN(7,2,3)
Returns 2.
Tips
At least one parameter must be provided.
POWER
Summary
Returns a (real) number whose value is equal to the first parameter's numeric value raised to the power of the second parameter's numeric value.
Syntax
POWER(X : Number / Numeric_String , Y : Number / Numeric_String) : Number
Example Usage
POWER(3,2)
Returns 9.
POWER(32,0.2)
Returns 2.
POWER(16,-0.5)
Returns 0.25.
ROUND
Summary
Returns an integral number, whose value depends upon the nature of the parameter's numeric value:
-
If that numeric value is an exact integer, the number returned has exactly the same value.
-
If that numeric value is not an exact integer, the number returned is the integer which is closest in value to the parameter's numeric value. Positive numbers which are exactly midway between adjacent integers are rounded upwards, while negative numbers which are exactly midway between adjacent integers are rounded downwards.
Syntax
ROUND(X : Number / Numeric_String) : Number
Example Usage
ROUND(5.0)
Returns 5.
ROUND(5.33)
Returns 5.
ROUND(5.5)
Returns 6 (Rounded upwards).
ROUND(5.66)
Returns 6.
ROUND(-5.0)
Returns -5.
ROUND(-5.33)
Returns -5.
ROUND(-5.5)
Returns -6 (Rounded downwards).
ROUND(-5.66)
Returns -6.
SIGN
Summary
Returns sign value of the supplied parameter. That is, it returns an integral number, whose value depends upon the nature of the parameter's numeric value:
-
If that numeric value is positive, the number returned is 1.
-
If that numeric value is negative, the number returned is -1.
-
If that numeric value is exactly zero, the number returned is 0.
Syntax
SIGN(X : Number / Numeric_String) : Number
Example Usage
SIGN(5.33)
Returns 1.
SIGN(-5.33)
Returns -1.
SIGN(0)
Returns 0.
SQR
Summary
Returns a (real) number whose value is equal to the square of the parameter's numeric value.
Syntax
SQR(X : Number / Numeric_String) : Number
Example Usage
SQR(2)
Returns 4.
SQR(14.1)
Returns 198.81.
SQR(-1.5)
Returns 2.25.
SQRT
Summary
Returns a (real) number whose value is equal to the (positive) square root of the parameter's numeric value.
Syntax
SQRT(X : Number / Numeric_String) : Number
Example Usage
SQRT(4)
Returns 2.
SQRT(10)
Returns 3.1623.
TRUNC
Summary
Returns an integral number, whose value depends upon the nature of the parameter's numeric value:
-
If that numeric value is positive but is not an exact integer, the number returned is the largest integer that is smaller in value than the parameter's numeric value.
-
If that numeric value is negative but is not an exact integer, the number returned is the smallest integer that is larger in value than the parameter's numeric value.
-
If that numeric value is an exact integer, the number returned has exactly the same value.
Syntax
TRUNC(X : Number / Numeric_String) : Number
Example Usage
TRUNC(5.0)
Returns 5.
TRUNC(5.33)
Returns 5.
TRUNC(-5.0)
Returns -5.
TRUNC(-5.33)
Returns -5.
Tips
This is an alias for the INT arithmetic function.
ZERO
Summary
Returns an integral number whose value is either 0 or 1, depending upon the parameter's numeric value. If that numeric value is zero, the number returned is 0; otherwise the number returned is 1.
Syntax
ZERO(X : Number / Numeric_String) : Number
Example Usage
ZERO(5.33)
Returns 1.
ZERO(-5.33)
Returns 1.
ZERO(0)
Returns 0.
Trigonometry Functions
ACOS
Summary
Returns a (real) number whose value is equal to the angle of the inverse cosine of the number specified by the parameter's numeric value; that angle is in units of radians (and not degrees).
Syntax
ACOS(X : Number / Numeric_String) : Number
Example Usage
ACOS(0)
Returns 1.5708.
ACOS(0.5)
Returns 1.0472.
ACOS(1)
Returns 0.
ASIN
Summary
Returns a (real) number whose value is equal to the angle of the inverse sine of the number specified by the parameter's numeric value; that angle is in units of radians (and not degrees).
Syntax
ASIN(X : Number / Numeric_String) : Number
Example Usage
ASIN(0)
Returns 0.
ASIN(0.5)
Returns 0.5236.
ASIN(1)
Returns 1.5708.
ATAN
Summary
Returns a (real) number whose value is equal to the angle of the inverse tangent of the number specified by the parameter's numeric value; that angle is in units of radians (and not degrees).
Syntax
ATAN(X : Number / Numeric_String) : Number
Example Usage
ATAN(0)
Returns 0.
ATAN(1)
Returns 0.7854.
ATAN(2.5)
Returns 1.1903.
COS
Summary
Returns a (real) number whose value is equal to the cosine of the angle specified by the parameter's numeric value; that angle is in units of radians (and not degrees).
Syntax
COS(X : Number / Numeric_String) : Number
Example Usage
COS(0)
Returns 1.
COS(0.8)
Returns 0.6967.
COS(1.57)
Returns 0.0008.
COSH
Summary
Returns a (real) number whose value is equal to the hyperbolic cosine of the parameter's numeric value.
Syntax
COSH(X : Number / Numeric_String) : Number
Example Usage
COSH(TextHeight / TextWidth) < 70.5
Returns objects for which the hyperbolic cosine of the ratio of their TextHeight distance to their TextWidth distance is less than 70.5. (That is equivalent to returning objects for which the ratio of their TextHeight distance to their TextWidth distance is less than 4.9487).
(TextHeight / TextWidth) >= COSH(2.3)
Returns objects for which the ratio of their TextHeight distance to their TextWidth distance is equal to, or greater than, the hyperbolic cosine of 2.3 (which is 5.0372).
COTAN
Summary
Returns a (real) number whose value is equal to the cotangent of the angle specified by the parameter's numeric value; that angle is in units of radians (and not degrees).
Syntax
COTAN(X : Number / Numeric_String) : Number
Example Usage
COTAN(0.1)
Returns 9.9666.
COTAN(0.8)
Returns 0.9712.
COTAN(1.57)
Returns 0.0008.
SIN
Summary
Returns a (real) number whose value is equal to the sine of the angle specified by the parameter's numeric value; that angle is in units of radians (and not degrees).
Syntax
SIN(X : Number / Numeric_String) : Number
Example Usage
SIN(0)
Returns 0.
SIN(0.8)
Returns 0.7174.
SIN(1.57)
Returns 1.0.
SINH
Summary
Returns a (real) number whose value is equal to the hyperbolic sine of the parameter's numeric value.
Syntax
SINH(X : Number / Numeric_String) : Number
Example Usage
SINH(TextWidth / TextHeight) < 0.17
Returns objects for which the hyperbolic sine of the ratio of their TextWidth distance to their TextHeight distance is less than 0.17. (That is equivalent to returning objects for which the ratio of their TextWidth distance to their TextHeight distance is less than 0.1692).
(TextWidth / TextHeight) >= SINH(0.2)
Returns objects for which the ratio of their TextWidth distance to their TextHeight distance is equal to, or greater than, the hyperbolic sine of 0.2 (which is 0.2013).
TAN
Summary
Returns a (real) number whose value is equal to the tangent of the angle specified by the parameter's numeric value; that angle is in units of radians (and not degrees).
Syntax
TAN(X : Number / Numeric_String) : Number)
Example Usage
TAN(0)
Returns 0.
TAN(0.8)
Returns 1.0296.
TAN(1.57)
Returns 1255.7656.
TANH
Summary
Returns a (real) number whose value is equal to the hyperbolic tangent of the parameter's numeric value.
Syntax
TANH(X : Number / Numeric_String) : Number
Example Usage
TANH(TextWidth / TextHeight) < 0.17
Returns objects for which the hyperbolic tangent of the ratio of their TextWidth distance to their TextHeight distance is less than 0.17. (That is equivalent to returning objects for which the ratio of their TextWidth distance to their TextHeight distance is less than 0.1717).
(TextWidth / TextHeight) >= TANH(0.2)
Returns objects for which the ratio of their TextWidth distance to their TextHeight distance is equal to, or greater than, the hyperbolic tangent of 0.2 (which is 0.1974).
Exponential and Logarithmic Functions
EXP
Summary
Returns a (real) number whose value is equal to e raised to the power of the parameter's numeric value. (The number e is the base of natural logarithms, and is approximately equal to 2.7183).
Syntax
EXP(X : Number / Numeric_String) : Number
Example Usage
EXP(0)
Returns 1.
EXP(1)
Returns 2.7183.
LG
Summary
Returns a (real) number whose value is equal to the base 10 logarithm of the parameter's numeric value.
Syntax
LG(X : Number / Numeric_String) : Number
Example Usage
LG(1)
Returns 0.
LG(10)
Returns 1.
LG(25)
Returns 1.3979.
LN
Summary
Returns a (real) number whose value is equal to the natural (or base e) logarithm of the parameter's numeric value. (The number e is 2.7183).
Syntax
LN(X : Number / Numeric_String) : Number
Example Usage
LN(1)
Returns 0.
LN(2)
Returns 0.6931.
LN(10)
Returns 2.3026.
LOG
Summary
Returns a (real) number whose value is equal to the base 2 logarithm of the parameter's numeric value.
Syntax
LOG(X : Number / Numeric_String) : Number
Example Usage
LOG(1)
Returns 0.
LOG(2)
Returns 1.
LOG(8)
Returns 3.
LOG(10)
Returns 3.3219.
Aggregate Functions
AVG
Summary
Returns a (real) number whose value is equal to the average value of all of the parameters provided. Each parameter must be either a number, or a numeric string, and any number of parameters can be provided.
Syntax
AVG(N1 : Number / Numeric_String, [N2] : Number / Numeric_String, ...) : Number
Example Usage
AVG(2)
Returns 2.
AVG(7,2,3)
Returns 4.
Tips
-
At least one parameter must be provided.
MAX
Summary
Returns a (real) number whose value is equal to the maximum value of all of the parameters provided. Each parameter must be either a number, or a numeric string, and any number of parameters can be provided.
Syntax
MAX(N1 : Number / Numeric_String, [N2] : Number / Numeric_String, ...) : Number
Example Usage
MAX(2)
Returns 2.
MAX(7,2,3)
Returns 7.
Tips
At least one parameter must be provided.
MIN
Summary
Returns a (real) number whose value is equal to the minimum value of all of the parameters provided. Each parameter must be either a number, or a numeric string, and any number of parameters can be provided.
Syntax
MIN(N1 : Number / Numeric_String, [N2] : Number / Numeric_String, ...) : Number
Example Usage
MIN(2)
Returns 2.
MIN(7,2,3)
Returns 2.
Tips
At least one parameter must be provided.
PROD
Summary
Returns a (real) number whose value is equal to the product of all of the parameters provided. Each parameter must be either a number, or a numeric string, and any number of parameters can be provided.
Syntax
PROD(N1 : Number / Numeric_String, [N2] : Number / Numeric_String, ...) : Number
Example Usage
PROD(2)
Returns 2.
PROD(7,2,3)
Returns 42.
Tips
At least one parameter must be provided.
SUM
Summary
Returns a (real) number whose value is equal to the sum of all of the parameters provided. Each parameter must be either a number, or a numeric string, and any number of parameters can be provided.
Syntax
SUM(N1 : Number / Numeric_String, [N2] : Number / Numeric_String, ...) : Number
Example Usage
SUM(2)
Returns 2.
SUM(7,2,3)
Returns 12.
Tips
At least one parameter must be provided.
System Functions
Copy
Summary
Returns a substring of a string. It is possible to specify how many characters will be within the substring returned, and the location within the string which will be the first character of the substring returned.
Syntax
Copy(S : String , Index : Integer , Count : Integer) : String
S is a string-type expression. Index and Count are integer-type expressions. Copy returns a substring containing Count characters starting at S[Index].
If Index is larger than the length of S, Copy returns an empty string.
If Count specifies more characters than are available, only the characters from S[Index] to the end of S are returned.
Example Usage
Copy('Cats and dogs',1,1)
Returns 'C'. (Return 1 character, from the 1st location within the string).
Copy('Cats and dogs',2,1)
Returns 'a'. (Return 1 character, from the 2nd location within the string).
Copy('Cats and dogs',13,1)
Returns 's'. (Return 1 character, from the 13th location within the string).
Copy('Cats and dogs',14,1)
Returns '' (an empty string). (Return 1 character, from the 14th location within the string; however, there are only 13 characters within the string, so an empty string is returned).
Copy('Cats and dogs',1,2)
Returns 'Ca'. (Return 2 characters, starting from the 1st location within the string).
Copy('Cats and dogs',2,2)
Returns 'at'. (Return 2 characters, starting from the 2nd location within the string).
Copy('Cats and dogs',12,2)
Returns 'gs'. (Return 2 characters, starting from the 12th location within the string).
Copy('Cats and dogs',13,2)
Returns 's'. (Return 2 characters, starting from the 13th location within the string; however, there are only 13 characters within the string, so only 1 character gets returned).
Copy('Cats and dogs',15,2)
Returns '' (an empty string). (Return 2 characters, starting from the 15th location within the string; however, there are only 13 characters within the string, so an empty string gets returned).
Copy('Cats and dogs',1,6)
Returns 'Cats a'. (Return 6 characters, starting from the 1st location within the string).
Copy('Cats and dogs',5,9)
Returns ' and dogs'. (Return 9 characters, starting from the 5th location within the string).
Copy('Cats and dogs',8,5)
Returns 'd dog'. (Return 5 characters, starting from the 8th location within the string).
Copy('Cats and dogs',8,6)
Returns 'd dogs'. (Return 6 characters, starting from the 8th location within the string).
Copy('Cats and dogs',8,7)
Returns 'd dogs'. (Return 7 characters, starting from the 8th location within the string; however, there are only 13 characters within the string, so only 6 characters get returned).
Length
Summary
Returns the number of characters contained within a string.
Syntax
Length(S : String) : Integer
S is the string whose character count is to be returned.
Example Usage
Length(Name) Between 4 And 7
Returns objects that have a Name property which contains between 4 and 7 characters.
Length('Cat')
Returns 3.
Length('Darryll')
Returns 7.
Length('Cats and dogs')
Returns 13.
Length('')
Returns 0.
Pos
Summary
Returns the index value of the first character in a specified substring that occurs in a given string.
Syntax
Pos(Substr : String , S : String) : Integer
Pos searches for a substring, Substr, within a string, S. Substr and S are string-type expressions. An integer value is returned that is the index of the first character of Substr.
Pos is case-sensitive. If Substr is not found, Pos returns zero.
Example Usage
Pos('T',Name) = 1
Returns all objects that have a Name property whose associated string first contains 'T' at its first position; 'T1' and 'Time Table' are examples of such strings. ('T' is located twice within the string 'Time Table', but the first location of this is at its first position.)
Pos('A',Name) = 2
Returns all objects that have a Name property whose associated string first contains 'A' at its second position; 'RA1' and 'CABLE CHART' are examples of such strings.
Pos('B',Name) = 0
Returns all objects that have a Name property whose associated string does not contain 'B' at any position; 'D1' and 'Time Table' are examples of such strings. (The string of 'Time Table' contains 'b' at its eighth position, but Pos is case-sensitive.)
Pos('D',Name) > 0
Returns all objects that have a Name property whose associated string contains 'D' at at least one position and at any location(s); 'Data Chart', 'U1D', and 'Install either D1 and D2 or D3 and D4, but never install all of these.' are examples of such strings.
Pos('Con',Name) = 1
Returns all objects that have a Name property whose associated string first contains 'Con' at its first, second, and third positions; 'Concatenate' is an example of a such string. (The first location of 'Con' within 'Concatenate' is the first three characters of this; the first character within 'Con' is 'C', and its location is the first character of 'Concatenate'.)
Pos('ate',Name) = 5
Returns all objects that have a Name property whose associated string first contains 'ate' at its fifth, sixth, and seventh positions; 'Concatenate' is an example of a such string. (The first location of 'ate' within 'Concatenate' is the fifth through to seventh characters of this; the first character within 'ate' is 'a', and its location is the fifth character of 'Concatenate'.)
Pos('ate',Name) = 0
Returns all objects that have a Name property whose associated string does not contain 'ate' anywhere; 'C1' and 'TIME:' are examples of such strings.
Pred
Summary
Returns a (real) number whose value is equal to parameter's numeric value less 1.0.
Syntax
Pred(X : Number / Numeric_String) : Number
Example Usage
Pred(4.1)
Returns 3.1.
Pred(41.313)
Returns 40.313.
Random
Summary
Returns a random number between 0 and X-1.
Syntax
Random(X) : Number
Example Usage
Random(10)
Returns a value between 0 and 9.
Random(100)
Returns a value between 0 and 99.
Succ
Summary
Returns a (real) number whose value is equal to parameter's numeric value plus 1.0.
Syntax
Succ(X : Number / Numeric_String) : Number
Example Usage
Succ(2.1)
Returns 3.1.
Succ(41.313)
Returns 42.313.

