
Installazione del software
Enterprise Server offre una gestione dei dati di progettazione e di prodotto intelligente e ad alta integrità, fornendo archiviazione, gestione formale delle revisioni, informazioni sulla supply chain e gestione dello stato del ciclo di vita. Inoltre facilita un'ampia gamma di tecnologie e funzionalità aggiuntive mettendo a disposizione una piattaforma centralizzata da cui possono essere erogati altri servizi correlati, tra cui: Team Configuration Management, Project Management, Network Installation e Centralized Design Collaboration. L'installazione di Enterprise Server è intuitiva e rapida, grazie alla
Questa pagina illustra la procedura per installare Enterprise Server per la prima volta su un computer.
Per informazioni sui requisiti di sistema, fare riferimento alla pagina System Requirements.
Se si sta aggiornando un'installazione esistente, fare riferimento alla sezione Updating to a Later Version.
Preparazione pre-installazione
Per accedere alla Altium On-Prem Enterprise Server <VersionNumber>.exe
Esecuzione della procedura guidata di installazione
Avviare l'installazione eseguendo il file Altium On-Prem Enterprise Server <Version Number>.exe
Verrà visualizzata la procedura guidata
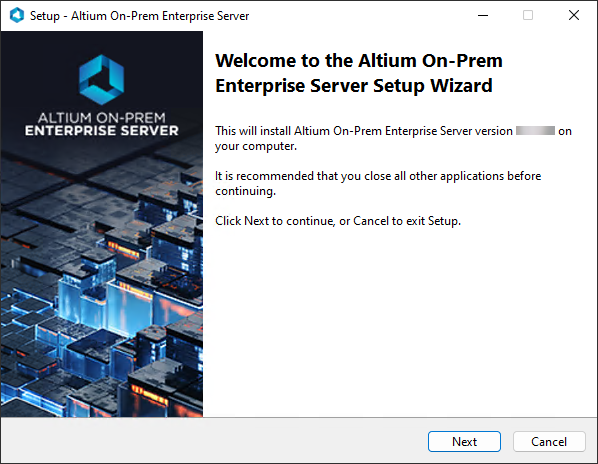 Pagina iniziale di benvenuto della procedura guidata
La procedura guidata di installazione fornisce una serie di finestre di dialogo progressive che, nel loro insieme, raccolgono le informazioni necessarie per installare Enterprise Server.
Fare clic su
Contratto di licenza
Questa pagina della procedura guidata presenta il Contratto di licenza con l'utente finale (EULA) di Altium.
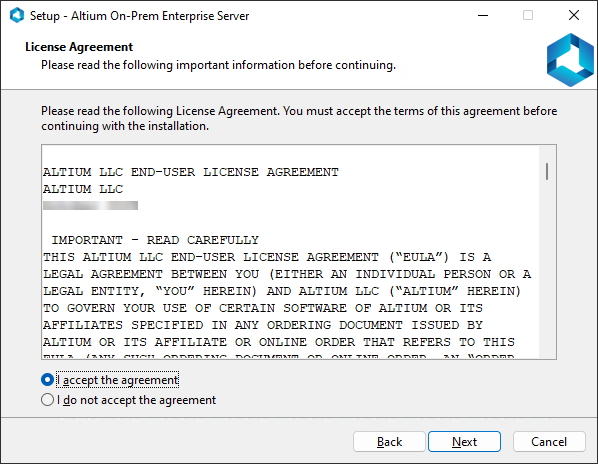
Leggere e accettare il Contratto di licenza con l'utente finale di Altium.
Dopo aver letto l'EULA, continuare con l'installazione abilitando l'opzione
Seleziona posizione di destinazione
Questa pagina successiva della procedura guidata consente di specificare la destinazione in cui installare Enterprise Server. Il percorso di installazione predefinito è \Program Files (x86)\Altium\Altium365
Per specificare un percorso alternativo, è sufficiente digitare direttamente il percorso nel campo oppure fare clic sul pulsante
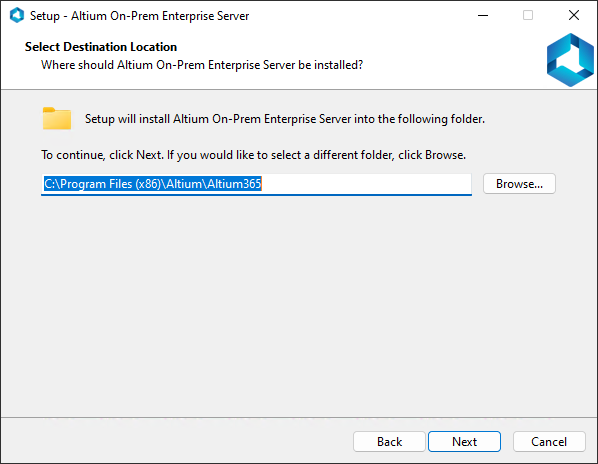
Determinare la posizione di installazione per Enterprise Server.
Una volta specificata la posizione di installazione, fare clic su
Seleziona directory dati di Altium On-Prem Enterprise Server
Utilizzare questa pagina della procedura guidata per specificare le cartelle di destinazione in cui archiviare rispettivamente il database e i file di revisione. I percorsi di installazione predefiniti sono:
-
Database Folder –\ProgramData\Altium\Altium365Data -
Revision Files Folder –\ProgramData\Altium\Altium365Data\Revisions
Per specificare un percorso alternativo, è sufficiente digitare direttamente il percorso in un campo oppure fare clic sul pulsante
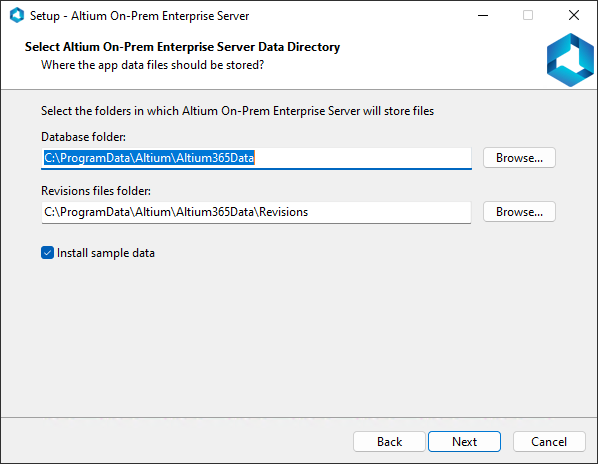
Determinare le posizioni di installazione per i dati del server.
Una volta specificate le posizioni delle cartelle dei dati, fare clic su
Configurazione di Altium On-Prem Enterprise Server
Utilizzare questa pagina successiva della procedura guidata per specificare i numeri di porta da utilizzare da Enterprise Server per le connessioni di rete. I valori predefiniti sono:
-
Porta HTTP (predefinita
9780 -
Porta HTTPS (predefinita
9785
Quando si sceglie una porta, tenere presente che non deve entrare in conflitto con le porte utilizzate da altre applicazioni – se una porta è attualmente in uso, il programma di installazione lo segnalerà.
Utilizzare il campo
Utilizzare l'opzione
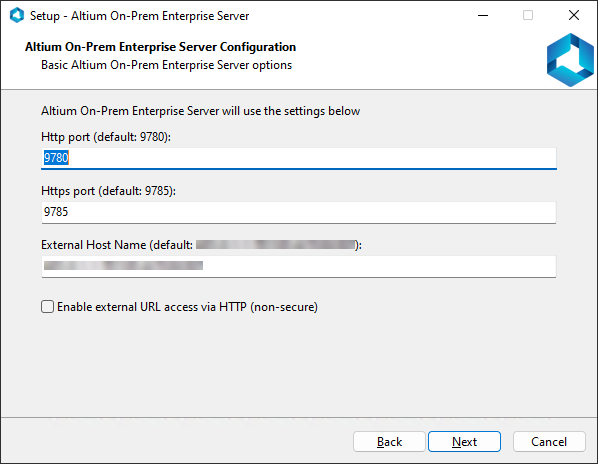
Configurare le opzioni del server per l'installazione di Enterprise Server.
Una volta configurate le opzioni come richiesto, fare clic su
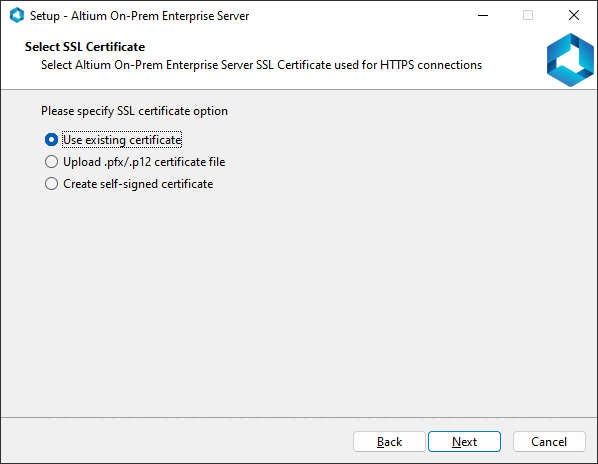
Seleziona certificato SSL
Utilizzare questa pagina successiva della procedura guidata per configurare il certificato SSL utilizzato da Enterprise Server per le connessioni HTTPS.
-
Use existing certificate – dopo aver fatto clic suNext , verrà proposto di selezionare un certificato dall'archivio certificati di Windows. -
Upload .pfx/.p12 certificate file – dopo aver fatto clic suNext , verrà proposto di individuare e selezionare un file di certificato da importare e di specificarne la password. -
Create self-signed certificate – dopo aver fatto clic suNext , verrà generato e configurato in IIS un certificato autofirmato e verrà visualizzata direttamente la pagina successivaReady to Install .
Pronto per l'installazione
Il programma di installazione ora dispone di tutte le informazioni necessarie per procedere con l'installazione. Se è necessario modificare qualcosa, fare clic sul pulsante
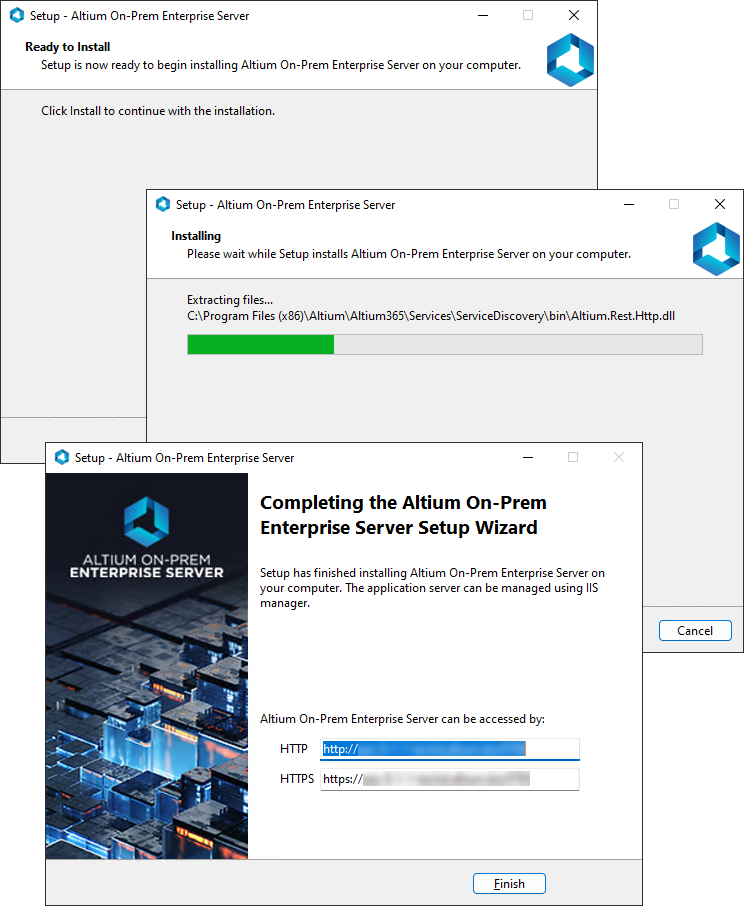
Avviare l'installazione facendo clic su
Per comodità, la pagina finale del programma di installazione presenta anche gli URL (HTTP e HTTPS) per accedere a Enterprise Server, sia quando ci si connette tramite Altium Designer, sia quando vi si accede tramite l'interfaccia basata su browser.
Verifica che Enterprise Server sia in esecuzione
La verifica che Enterprise Server sia in esecuzione può essere effettuata dal pannello Started
Installazione dalla riga di comando
Enterprise Server può anche essere installato dalla riga di comando, utilizzando le seguenti voci:
-
DatabaseName"C:\ProgramData\Altium\Altium365Data\DXPSERVER.DAT" -
DataFolder"C:\ProgramData\Altium\Altium365Data" -
DBPasswordmasterkey -
DBServerHost:Portlocalhost:3050 -
DBTypeFirebird -
DBUserNameSYSDBA -
InstallFolder"C:\Program Files (x86)\Altium\Altium365\" -
InstallSampleSnapshot -
Log\Program Files (x86)\Altium\Altium365\install.log -
Port9780 -
RevisionFolder"C:\ProgramData\Altium\Altium365Data\Revisions" -
sslCertFile"C:\Users\Admin\Documents\AltiumOnPremEnterpriseServer.pfx" -
sslCertPasswordsslCertFile -
sslCertThumbprint -
VERYSILENT
Quando si immettono le informazioni sulla riga di comando, attenersi a quanto segue:
-
Iniziare con il nome dell'eseguibile del programma di installazione, ad esempio
"Altium On-Prem Enterprise Server <VersionNumber>.exe" - Inserire ciascun parametro, seguito dal simbolo di uguale (=), quindi il relativo valore.
-
Separare le voci parametriche successive con uno spazio seguito dal carattere barra (
/ -
Per eseguire l'installazione senza che vengano visualizzate finestre di dialogo, assicurarsi di aggiungere la voce
VERYSILENT
Un esempio di voce della riga di comando potrebbe quindi essere:
"Altium On-Prem Enterprise Server <VersionNumber>.exe" /InstallFolder="C:\Program Files (x86)\Altium\Altium365\" /Port=9780 /DBType=Firebird /DBServer=localhost:3050 /DBUserName=SYSDBA /DBPassword=masterkey /DatabaseName="C:\ProgramData\Altium\Altium365Data\DXPSERVER.DAT" /DataFolder="C:\ProgramData\Altium\Altium365Data" /RevisionFolder="C:\ProgramData\Altium\Altium365Data\Revisions" /BackupFile="C:\ProgramData\Altium365\Altium365Data\AESbackup.zip" /VERYSILENT
Gestione post-installazione
Per informazioni su come gestire la propria istanza di Enterprise Server dopo l'installazione iniziale, utilizzare i seguenti collegamenti:
Licenza del tuo Enterprise Server
Aggiornamento a una versione successiva di Enterprise Server
Backup e ripristino del tuo Enterprise Server
 Localizzato tramite A