
Maintenance of Altium NEXUS Server
This document is no longer available beyond version 5.0. Information can now be found here: Maintenance of Altium On-Prem Enterprise Server for version 6.0
Health Monitor
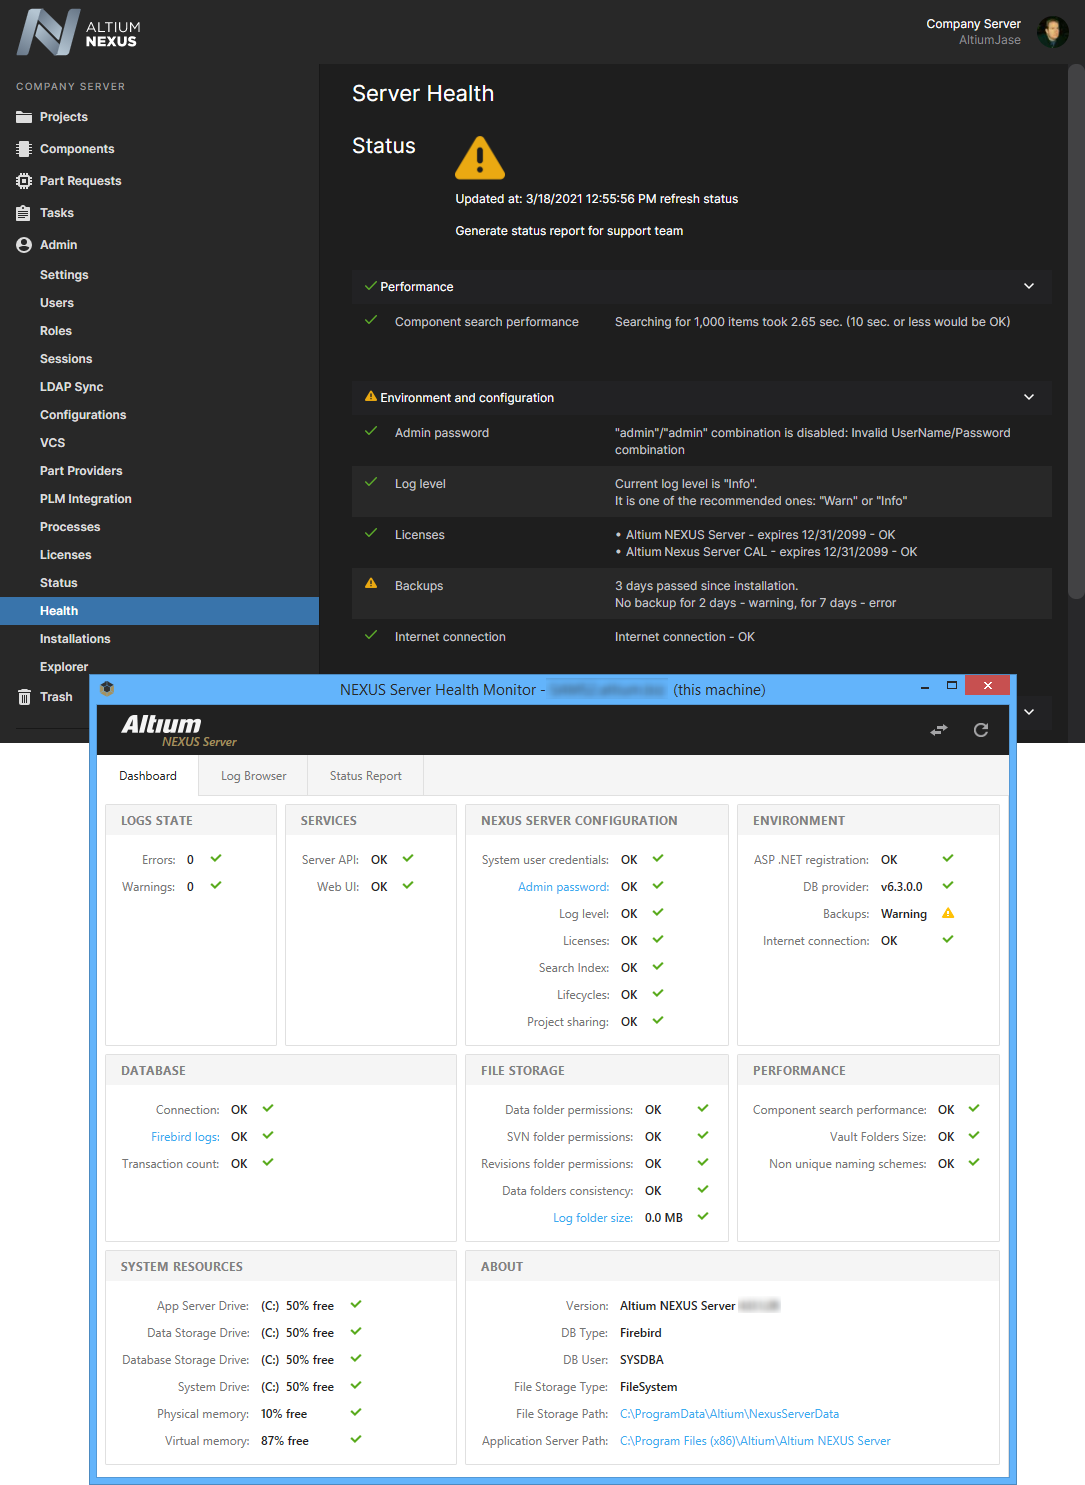
An Altium NEXUS Server installation includes a web-based Health Monitor. Accessed by an administrator through the Health page of the NEXUS Server's browser interface, it delivers a visual summary of the state of the host machine and the NEXUS Server storage system.
As well as the quick visual summary of the server's health, the page also provides the ability to download all log files in a single Zip archive, as well as facilitating the creation of a status report – again, conveniently archived into a Zip file – that can be passed to Altium's Support, and thereafter to the Developers.
The Altium NEXUS Server installation also includes a standalone Health Monitor tool that can be launched on the computer hosting the NEXUS Server, using the desktop shortcut that is created when the NEXUS Server is installed. Alternatively, the Health Monitor tool can be found in the \Program Files (x86)\Altium\Altium NEXUS Server\Tools\HealthMonitor folder as the avhealth.exe executable. Note that the folder also includes a simplified command-line tool: avConsoleHealth.exe. In this standalone variant, the Health Monitor operates as an independent entity that queries the NEXUS Server and its host system, and is therefore able to deliver crucial data and information even in the unlikely event that the NEXUS Server is not fully functioning. It provides additional features beyond those available in the web-based Health Monitor.
The standalone Health Monitor is aimed at IT departments and covers, in general terms, the following critical areas:
- NEXUS Server Environment – the state of the hosts PC’s hardware, such as its hard disks, memory, CPU and the adequacy of its performance.
- NEXUS Server Backend – the state of the server’s supporting database, file storage and repository.
- NEXUS Server Services – the state the server’s range of services, hosted as IIS Application Pools, such as the Identity, Authorization and License Manager services.
Backup and Recovery
Over time, your NEXUS Server will accommodate a growing, and impressive amount of data. The value of this data cannot be overstated, for it is a mixture of source data that can be re-used in future design projects, as well as data from which past, current, and future products are fabricated and assembled. It is data that has been released and ratified under the highest scrutiny, and stored securely with the utmost integrity. And as with all valuable data, longevity of its integrity is ensured by being able to perform a backup.
The NEXUS Server installation caters for the archival of your server data through the provision of a command-line-driven Backup & Restore tool. The tool's executable – avbackup.exe – is located in the \Program Files (x86)\Altium\Altium NEXUS Server\Tools\BackupTool folder, for a default installation of the NEXUS Server.
Proxy Server Support
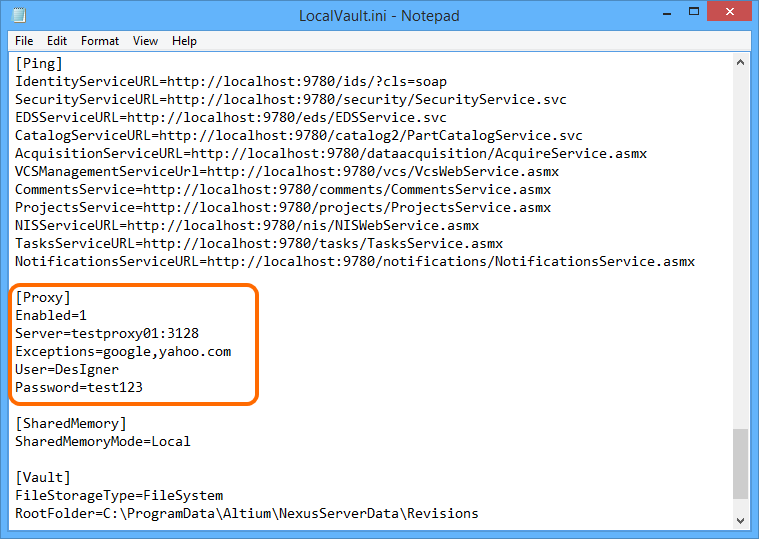
For a company that accesses the internet through a proxy server, proxy configuration information can be defined for an Altium NEXUS Server - post installation. This enables NEXUS Server Services to successfully connect with internet-based services through the company's proxy server, as and when required.
Proxy configuration information is entered into the [Proxy] section of the LocalVault.ini file. For a default installation of the Altium NEXUS Server, this file can be found in the following location: \Program Files (x86)\Altium\Altium NEXUS Server.
Command Line Server Management Tool

The Altium NEXUS Server provides a Command Line tool to cater for the following aspects of NEXUS Server Configuration:
- User Management – allowing the NEXUS Server to be preloaded with bulk user and role configurations derived from company systems or records, thereby avoiding a need to individually create the entries through the NEXUS Server's browser interface. The tool supports the import of Users, Roles, and user-role membership data from standard comma-delimited *.csv files.
- Part Choice Indexing – allowing you to manually perform a re-indexing of the Part Choices for your managed components, sourced through user-defined Part Sources (connections to local parts databases).
The tool – avconfiguration.exe – is included with your NEXUS Server installation and can be found in the \Program Files (x86)\Altium\Altium NEXUS Server\Tools\VaultConfigurationTool folder.
CSV Component Database Importer Tool
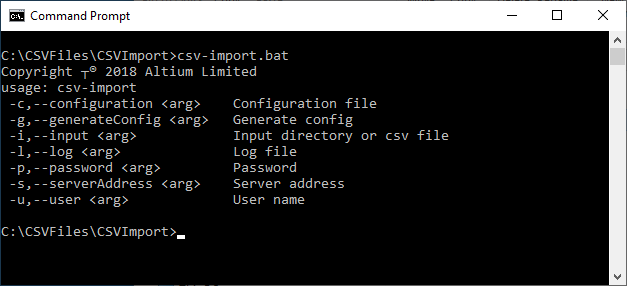
The Altium NEXUS Server installation includes a CSV Component database importer tool that can be used to bring component data into the NEXUS Server from a file exported from an enterprise system, such as a company ERP or PLM system. Implemented as a configurable batch (*.bat) file, the desktop tool imports component data from a target spreadsheet file (*.csv) into the server as determined by existing server templates or a dedicated configuration file.
The command line tool can be found in the \Program Files (x86)\Altium\Altium NEXUS Server\Tools\CSVImport folder of the NEXUS Server installation. See the csv-import.bat for information on the command line syntax used with the tool, or simply execute the batch file without attributes for more detailed information.