Reusing Design Elements using the Snippets Panel in Altium Designer

The Snippets panel is the central point for saving, reusing, and managing design Snippets.
Summary
The Snippets panel provides a simple and easy way to save and reuse sections of design circuitry or code. Saved Snippets can be added into any design without having to start from scratch each time. The Snippets system lets you save any selection of:
- Circuitry on a single schematic sheet.
- Circuitry in a PCB design, including the components and the routing.
- Code from within one of Altium Designer's code-aware editors.
Panel Access
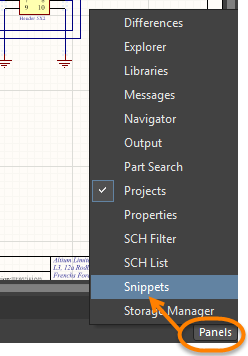
The Snippets panel is accessed by clicking the Panels tab (located on the bottom right-hand side of the main design window), then selecting Snippets from the pop-up menu. You can also access the panel by clicking View » Panels » Snippets.
Snippet Organization
The Snippets panel allows snippets to be organized into folders so that related snippets can be grouped together, making it easier for you to find. There are two types of folders in the Snippets system:
- Snippets Folders – these are existing Windows folders that can contain both Snippets and one or more sub-folders of Snippets. These top-level folders cannot be created from within the Snippets panel. Instead, they are 'opened' or 'closed' with respect to browsing the Snippets they contain. These folders can only be created directly on your hard disk or network outside of Altium Designer.
- Sub-Folders – these are lower-level folders used to organize snippets in a more logical and structured way. They can be readily created (and deleted) from within the Snippets panel or directly within an existing folder on your hard disk or network.
Adding and Removing Snippets Folders
Top-level snippets folders are opened and closed from the Available Snippets Folders dialog. This dialog is accessed by clicking the Snippets Folders button at the top-right of the Snippets panel or by right-clicking within the panel and choosing Add » Snippets Folder.
Click Open Folder to browse to the required folder on your hard disk or network. The selected folder will be added to the list in the dialog and subsequently appear within the Snippets panel.

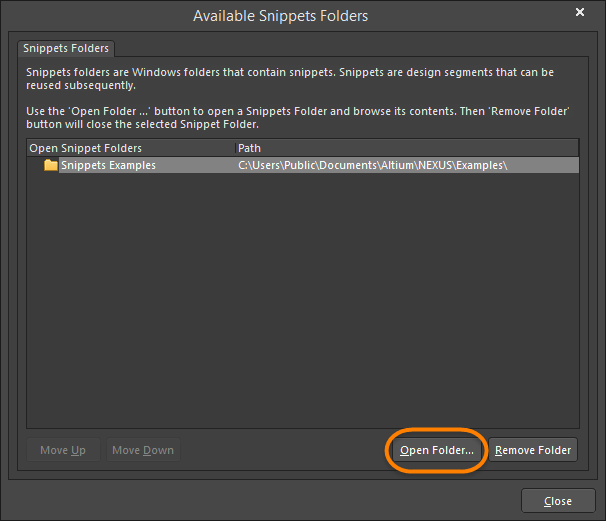
To remove a top-level snippets folder from the list (which is essentially closing it from a browsing perspective), select the folder in the list then click Remove Folder. You also can right-click on the folder in the Snippets panel then choose Remove » Close Snippets Folder. Use the Move Up and Move Down buttons to change the order in which the top-level folders will be presented in the Snippets panel.
Adding and Removing Sub-Folders
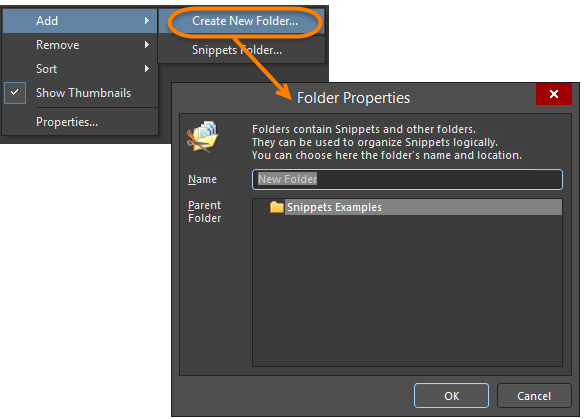
To add a new sub-folder to the overall Snippets structure, right-click within the Snippets panel then choose Add » Create New Folder. The Folder Properties dialog opens in which you can specify a name for the new folder and determine under which parent folder it is to be created.
A sub-folder can be renamed and moved under a different 'parent' folder at any time by right-clicking on the folder in the Snippets panel then selecting Properties. To delete a sub-folder, right-click on its entry in the panel then choose Remove » Delete Folder.
Creating Snippets
To store a Snippet in the Snippets panel, select the required circuitry on the schematic or PCB editor or code within a code-aware editor, then right-click and choose Snippets » Create Snippet from selected objects from the context menu. A Snippet can also be created from within the Snippets panel in the following way: with the object(s)/code selected in the editor, right-click in the Snippets panel then choose Create Snippet From Selection.

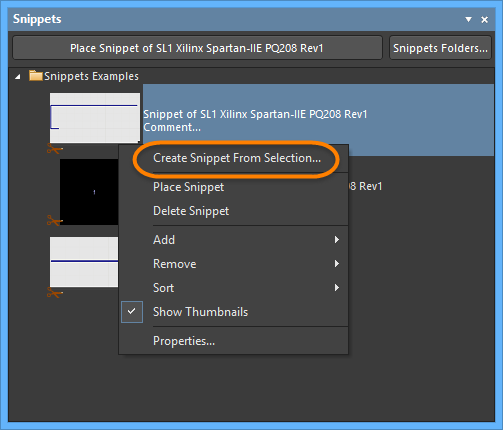 Examples of creating a snippet from a schematic and from the Snippets panel.
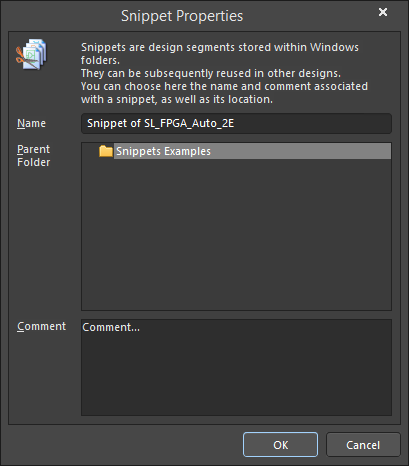
The Add New Snippet dialog opens in which you can define a name for the snippet, in which folder it should be stored, as well as any descriptive comment that describes the circuit or code fragment.

Define properties of the new snippet as required.
Once saved, the snippet will be created and will be displayed in the Snippets panel. Note that the name, folder location, and comment for a snippet can be changed at any time from the Snippet Properties dialog, which is accessed by right-clicking on the Snippet entry in the panel then choosing Properties from the context menu.
Placing Snippets
To place a Snippet in a design, select its entry in the Snippets panel and click the Place Snippet button at the top of the panel. You also can right-click on the entry for the Snippet and choose Place Snippet from the context menu.
 Placing a Snippet from the Snippets panel.
Deleting Snippets
To delete a Snippet, right-click on its entry in the Snippets panel then choose Delete Snippet.
To delete all Snippets in a particular folder, right-click on that folder then choose Remove » Clear Folder.
Right-click Menu
Right-click in the Snippets panel to access the following options and commands:
- Create Snippet From Selection (available when a desired object(s) is selected) - use to store a Snippet in the panel.
- Place Snippet (available when a snippet is selected) - place the selected snippet in the design workspace.
- Delete Snippet (available when a snippet is selected) - delete the selected snippet.
- Add - create a new folder under the parent folder or add an existing Snippets folder to those available in the panel.
- Remove - clear the contents of a folder or delete the folder itself.
- Sort - sort the panel's folder/snippet listing By Date, By Document Type, or By Document. Use Show Details and Show Folders to toggle the visibility of the Snippet folders and details.
- Show Thumbnails - select Snippets to be displayed in thumbnail or icon form. In the icon state, Snippet comments are not displayed in the panel.
- Properties - opens the Snippet Properties dialog to view or edit the properties of the selected snippet.