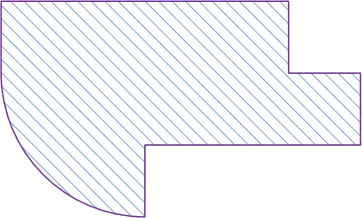
A Region is a closed shape object that can be placed on a Draftsman document sheet to indicate a specific area in a drawing. The Region object shape can include angle-based curved lines, and a solid color or ANSI pattern fill.

A placed Region shape with ANSI fill
To place a Region, select Place » Region or click the  button from the graphic tools drop-down of the Active Bar.
After launching the command, the cursor will change to a cross-hair and the editor will enter Region placement mode. Placement is made by performing the following sequence of actions:
- Click to place the first vertex of the Region shape.
- Move the cursor then click to place the second vertex of the Region shape.
- Continue to place further region vertices to complete the Region shape.
- After the final vertex is placed, right-click or press Esc to complete the Region shape back to the first-placed vertex.
Straight lines will be drawn between each vertex as they are placed, however, the Shift+Spacebar shortcut can be used to cycle through other line options such as a 90° corner, 45° corner, curved 90° corner, or curved 45° corner. Once an option is selected, use the Spacebar to toggle the direction of the corner.
![]() ► Region placement options demonstration.
► Region placement options demonstration.
This method of editing allows a placed Region object to be selected in the design space and graphically edit its size, shape or location.
Select a Region by clicking on its fill or outline. Once selected, editing handles/nodes are available at each of the shape's vertices:

A selected Region shape is edited by dragging line or vertex nodes.
- Drag (click+hold+move) any part of the Region, but not a node, to reposition it on the document.
- Drag a corner vertex node to move it to a new location and alter the Region shape.
- Drag the center mark of a line to move that line in the perpendicular (maintaining its angle), to a new location.
- Ctrl+drag a node to delete it from the shape or press Delete while dragging a node to delete it from the shape.
- Ctrl+drag on a line, but not its center mark, to add a new node.