
ワークスペースの設定と管理

Altium Essentials: Workspace Folder Structure
This content is part of the official Altium Professional Training Program. For full courses, materials and certification, visit Altium Training.

接続されたWorkspaceは、設計チーム全体の生産性と作業の一貫性を最大化できるように設定できます。Workspaceの設定項目の一部は、Altium Designerから直接セットアップできます。たとえば次のとおりです。
- Workspaceのフォルダ構成の管理
- Workspaceコンテンツの作成と管理
- グローバルレベルの操作権限の管理
- Workspaceコンテンツへのアクセス管理
- リビジョン命名スキームの管理
- ライフサイクル定義の管理など。
Explorerパネル は、接続されたWorkspaceへの直接的なインターフェースを提供します。Explorerパネルからは、次のような多くの作業を実行できます。
- Workspaceで使用する組織構造の作成と管理。
- 設計オブジェクトを表す任意数のItemの作成。
- Item Revisionの直接編集と配置。
- Itemリビジョンのライフサイクルの確認と管理。
- 特定のItemリビジョンの使用状況(Where-Used)の調査。
- Workspace ComponentsのPart Choice情報の参照と管理。
- 保存されているデータのダウンロード(基板設計プロジェクトのリリースによって生成されたデータを含む)。

Explorerパネルは、Workspaceに保存されたデータへのアクセスを提供します。
Explorerパネルは信頼できる右腕となり、Altium Designerを通じてWorkspaceで作業する際の生産性を大きく高める機能群を提示します。
Explorerパネルで作業する際の注意事項:
-
Workspaceでの日常的な作業の大半はComponentsパネルまたはExplorerパネルを通じて行いますが、Workspaceのブラウザインターフェースを介して操作する必要がある場面もあります。特に管理目的の場合です。詳しくはExploring the Browser-based Interface(Altium 365 Workspace、 Enterprise Server Workspace)を参照してください。
-
ExplorerおよびComponentsパネルでWorkspaceコンポーネントを扱う際は、次の点に注意してください。
-
Explorerパネル内のComponent Foldersの内容は、そのフォルダにコピー/インポートされたものによって決まります。
-
Components panel内のコンポーネントCategoriesの内容は、各コンポーネントのComponent Typeパラメータ設定によって決まります。
-
-
パネルへアクセスする標準的な方法(設計スペース右下のPanelsボタン、または View » Panels メニュー)に加えて、Explorerパネルは、Workspaceにアクティブに接続しているとき(例: Altium 365 Workspaceの場合は
 、Enterprise Server Workspaceの場合は
 )に、設計スペース右上のActive Workspaceコントロールをクリックし、関連メニュー内で現在接続中のWorkspaceのエントリ(ハイライト表示され、
 /
/  アイコンで区別される)をクリックしても開けます。
-
Explorerパネルのバリエーションとして、実質的に「簡易版」で、タイトルがChoose Itemとなっているものが、モデルやテンプレートを選択する必要がある場合などに開くことがあります。例:Schematicエディタで、Item Manager dialogの右クリックメニューからChoose manuallyコマンドを使用する場合。
-
パネルで検索を実行すると、結果は既定で最新バージョンのみが表示されます。
Choosing the Browsable Workspace
Explorerパネルは、一度に1つのWorkspaceにのみ接続できます。パネル左上のフィールドには、現在アクティブなWorkspace(参照および変更が可能なコンテンツを持つWorkspace)が表示されます。別のWorkspaceを選択するには、Workspace名をクリックし、現在接続されているWorkspaceの中から別のWorkspaceを選択します。

参照対象Workspaceを変更するためのアクセス制御。
Altiumアカウントにサインインしていて、Explorerパネルを開こうとしているものの、現在Workspaceに接続していない場合、パネルには既知のWorkspaceの一覧が表示され、そこから接続先を選択して、最終的にパネルの内容を表示できます。
Altiumアカウントにサインインしておらず、Workspaceにも接続していない場合は、パネルの内容を表示するために、Altiumアカウントでサインインするか、アカウントを登録するよう求められます。Sign inを選択するとSign In dialogが開き、Altiumアカウントにサインインできます。registerを選択するとAltium 365 registration pageにリダイレクトされ、そこで登録またはAltiumアカウント資格情報でサインインできます。
Looking for Altium Content Vault?ウィンドウ左上のLearn moreからContent Vault replaced with Manufacturer Part Searchを選択すると、Content Vault replaced with Manufacturer Part Searchダイアログが開きます。
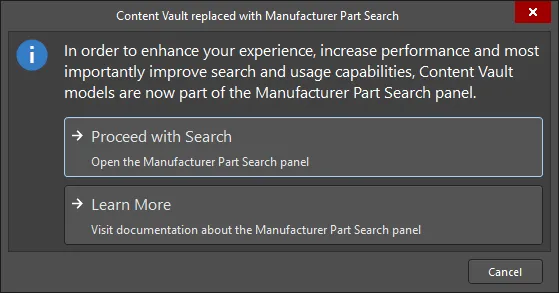
ダイアログの記載のとおり、Content Vault内のアイテムは現在、Manufacturer Part Search panelの一部になっています。Proceed with Search をクリックしてパネルを開き、必要なアイテムを検索してください。Manufacturer Part Searchパネルについては、Learn Moreをクリックすると確認できます。
 AI で翻訳