Altium Designer 与已连接的 Workspace 配合使用时,可将现有板级设计中的元器件更新为该 Workspace 中的元器件。来自数据库库和基于文件的库的元器件,可以逐个更新为 Workspace 元器件,或通过 Altium Designer Item Manager 中的自动参数匹配进行批量更新。
通过一套高度可配置的规则系统来定位 Workspace 中合适的元器件,Item Manager 对话框提供了一种快速且高效的方法,可将当前 PCB 项目转换为使用 Workspace Components 的项目。
Item Manager 针对板级设计项目中的元器件以及可复用的原理图电路页(sheet),提供两项关键能力:
-
Migration – 首先,它允许将设计项目从传统方式(使用元器件与原理图页)转换为使用 Workspace 实体(元器件与受管页)。从这个角度看,它相当于提供了“转换为使用 Workspace 数据”的功能。
-
Synchronization – 其次,当设计已转换为使用 Workspace 内容后,Item Manager 提供一种简单方式,将设计中使用的内容与 Workspace 中已更新的对应源内容进行同步。从这个角度看,它相当于提供了“从 Workspace 数据更新”的功能。
作为背景说明,请注意:在设计中,单个元器件可以在原理图编辑器中直接通过 Properties panel 更新为 Workspace 元器件。操作方法是:在原理图页上选中该元器件,然后使用面板的 Source 下拉菜单选择一个 Workspace 作为元器件数据源——你需要连接到该 Workspace 才能访问。随后出现的 Component source 对话框提供选项:从 Workspace 中选择目标元器件,或仅将该元器件链接到 Workspace,同时保留或替换元器件标识符(Design Item ID)。
如果已选择 Workspace 元器件,则访问到的元器件数据将替换现有元器件及其模型,并更新元器件参数。面板还会指示该元器件当前的生命周期状态与修订版本状态,如下所示。

本地元器件可以逐个转换为 Workspace 元器件,也可以使用 Item Manager 批量转换。这里你可以看到原始元器件。将鼠标悬停在图像上可查看元器件切换为其 Workspace 对应项后的效果。
或者,也可以通过项目的 ActiveBOM 文档(BomDoc)来替换元器件。
虽然在即使是小规模的板级设计中,逐个将设计的所有本地元器件更新为 Workspace 元器件会非常费力,但 Item Manager 提供了一种简单且自动化的转换方法:利用高级参数匹配(Automatching)并采用批量更新方式。Item Manager 的典型用途是:将现有板级设计更新为使用已从公司库迁移到 Workspace 的 Workspace 元器件与受管原理图页。
访问 Item Manager
Item Manager 对话框可从活动原理图文档(Tools » Item Manager)的主 Tools menu 打开,并会呈现活动板级设计项目中找到的所有元器件与页符号(sheet symbol)。
要将设计元器件与潜在的 Workspace 元器件进行匹配,你需要连接到 Workspace。如果未连接,则 Automatch 功能不可用,手动匹配将使用缓存的 Workspace 元器件数据。
选择对话框底部的 Unmanaged 或 Components 选项卡,以填充当前设计中的元器件列表。总体而言,对话框左侧区域显示活动项目的元器件设置(Current Settings),右侧区域列出当从 Workspace 分配了合适的 Workspace 元器件后它们将如何变化(New Settings)。New Settings 区域与 Current Settings 区域具有相同字段。要查看并访问页符号,请选择 Sheet Symbols 选项卡。
。")
在原理图编辑器的主 Tools menu 中打开 Item Manager。对话框将自动填充当前设计元器件(以及原理图页)。
Item Manager 对话框中元器件数据的呈现方式高度可配置,取决于启用和/或分组的数据列。这使得设计内容列表及其关联的系统/用户参数能够以符合特定元器件标识方式的形式显示——例如,可按需显示所有条目参数(如公司自定义料号等)。
要在设计文档中定位列表中的元器件,请在 Item Manager 中右键单击其条目,并从相关的上下文菜单中选择 Cross Probe。
列
要配置 Item Manager 中显示哪些列,请在对话框的列标题区域右键单击,并从上下文菜单中选择 Columns » Select Columns。Select columns 对话框将提供所有可用参数,包括本地设计特有的参数([Current Settings])以及 Workspace 内容中的参数([New Settings])。使用条目左侧的“眼睛”控件来决定显示该列( )或不显示(
 )。
)。

可根据你的 Workspace/库系统与偏好来配置显示的列及其顺序。
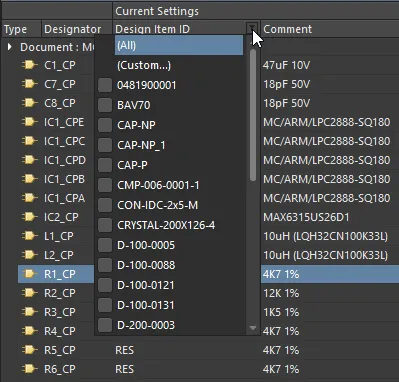
将鼠标悬停在列标题上会显示其筛选图标,单击后可将 Item Manager 中的列表限定为特定条目类型或自定义筛选条件。
分组
要按某个参数列(例如元器件类型类别或原理图文档等)对列表内容数据进行分组,将所需的列标题拖到对话框上方的标题行(提示文字所示位置)。内容列表将重新配置,按所分配的参数列对条目进行分组。

任何数据列标题都可以拖到对话框顶部行,以按该参数对列出的条目进行分组。
Options and Controls of the Item Manager Dialog
-
Type – 显示实体的图标。
-
Designator – 显示条目的位号(designator)。
-
Item – 显示 Item-Revision ID 与条目名称(针对 Workspace 实体)、Design Item ID(针对非 Workspace 元器件),或文件名(针对非 Workspace 页符号)。
-
Document – 显示条目所在的文档。
对话框中间区域显示活动项目的元器件设置(Current Settings),右侧区域列出当分配了合适的 Workspace 元器件或受管页后它们将如何变化(New Settings)。下文将对这些区域进行详细说明。
当前设置
对于每个设计实体(按其位号列出),该网格区域会显示以下信息:
-
Design Item ID – 显示 Item-Revision ID(针对 Workspace 实体)或 Design Item ID(针对非 Workspace 元器件)。对于非 Workspace 页符号,该字段为空。
-
Name – 显示注释(针对元器件)或文件名(针对页符号)。
-
Lifecycle State – 修订后的元器件或受管原理图页修订版本的当前生命周期状态。已被软删除的条目将处于 Deleted 状态。非 Workspace 条目将处于 [Not Managed] 状态。
-
Revision Status – 如果该修订版本处于适用状态(允许在设计中使用),此字段反映该修订版本是否为最新(Up to date)或不是(Out of date)。已被软删除的条目将具有 Deleted 状态。对于非 Workspace 条目,该字段为空。
-
From – 设计中该实体放置时所来源的 Workspace 或库。对于非 Workspace 页符号,该字段为空。
新设置
该区域显示拟议更改的信息。它与 Current Settings 区域具有相同字段,但在处理 Workspace 内容时,这些字段的含义略有不同:
-
Revision HRID – 显示 Item-Revision ID。
-
Name – 条目名称。
-
Lifecycle State – 所选元器件或受管原理图页修订版本的当前生命周期状态。
-
Revision Status – 所选元器件或受管原理图页修订版本的当前修订版本状态。
-
From – 所选元器件或受管原理图页所在源 Workspace 的名称。
-
Footprint – 关联封装(footprint)的名称。对于页符号,该字段为空。
对于设计中同一元器件的多个实例,你可以选择一组元器件并手动选择所需的 Workspace。该选择将应用于所选的所有元器件。可使用标准的多选功能(Ctrl+Click 和 Shift+Click)来选择分组。
网格区域附加命令
右键菜单
– 用于打开
替换元件对话框 或
Choose Managed Sheet 对话框,该对话框可直接访问可用的 Workspace 内容。
你也可以在网格中双击某个条目来手动选择一个条目(Item)。
-
当对多分部件(multipart component)选择此命令且未选中该元件的所有分部时,系统会提示你更新所有分部。单击在打开的 Confirm 对话框中的 Yes 以继续。
-
当对受管原理图页(managed schematic sheet)选择此命令,且原理图中放置了多个引用同一“受管原理图页条目(Managed Schematic Sheet Item)修订版”的实例时,如果未选中所有实例,系统会提示你更新所有这些实例。单击在打开的 Confirmation 对话框中的 Yes 以继续。
Refresh – 用于刷新网格区域中的信息。
Cross Probe – 用于交叉探测并在相应原理图中定位该条目(Item)。
Show in Explorer – 用于在 Explorer 面板中显示该条目(Item)。
Export – 用于通过 Export for 对话框导出条目报告。
选项卡
使用网格区域底部的选项卡,将该区域填充(“筛选”)为当前设计中的以下特定内容:
其他控件
迁移到 Workspace 设计内容
假设已连接的 Workspace 中包含 元件 和 受管原理图页 的集合,则当前板级设计项目可以在存在合适匹配项时转换为使用这些内容。本地到 Workspace 的匹配可以手动执行,也可以通过 Item Manager 基于可配置的参数匹配来自动执行。完成后,本地元件定义将更新为其对应的 Workspace 版本。
作为 Workspace 内容来源而被访问的 Workspace,在 Item Manager Options 对话框中指定;该对话框可通过单击 Item Manager 左下角的  按钮打开。使用该对话框的 Source Server 下拉菜单选择一个可用的 Workspace——你必须已连接到某个 Workspace,它才会作为来源可用。
有关 Item Manager Options 对话框的更多信息,请参见下方的 更新选项 部分。
手动选择 Workspace 内容
要手动用 Workspace 版本替换本地元件(或原理图),请在 Item Manager 列表中选择其条目,然后在其右键上下文选项中选择 Choose manually。你也可以在网格中双击某个条目来手动选择一个条目。 在随后出现的 替换元件对话框 中,浏览并在 Workspace 中选择一个合适匹配的条目(将使用该条目的最新修订版)。

在某个设计中,手动选择一个 Workspace 元件作为现有设计元件来源的示例。

在某个设计中,手动选择一个 Workspace 元件作为现有设计元件来源的示例。
当对话框关闭(OK)后,所选 Workspace 元件信息将填充到列表中该条目的 New Settings 区域。请注意,由于该条目现在是一个待处理的 Workspace 实体,更新后的条目会从 Unmanaged 选项卡下的列表转移到 Managed 选项卡下的列表。

所选 Workspace 条目的详细信息会显示在网格的 New Settings 区域中,并列在 Managed 选项卡下。
New Settings 区域仅用于呈现关于
proposed 更改的信息。该过程通过执行工程变更单(ECO)来完成——参见
应用更新。
对于设计中同一元件的多个实例,你可以选择一组元件并手动选择所需的 Workspace 条目——该选择将应用到所选的所有元件。可使用标准的多选功能(Ctrl+Click、Shift+Click)来选择该组。
-
当对多分部件选择 Choose manually 命令且未选中该元件的所有分部时,系统会提示你更新所有分部。单击在打开的 Confirm 对话框中的 Yes 以继续。
-
当对 受管原理图页选择 Choose manually 命令,且原理图中放置了多个引用同一“受管原理图页条目(Managed Schematic Sheet Item)修订版”的实例时,如果未选中所有实例,系统会提示你更新所有这些实例。单击在打开的 Confirmation 对话框中的 Yes 以继续。
自动匹配元件
要自动化选择匹配的 Workspace 内容流程,Item Manager 提供了可配置的自动匹配能力,尝试将每个本地设计元件与已连接 Workspace 中的元件进行匹配。找到匹配项后,将提议使用该 Workspace 元件进行更新。
Item Manager 自动参数匹配能力的关键在于 Item Manager Options 对话框中提供的更新规则与选项;该对话框可从 Item Manager 对话框的 按钮进入。可配置规则决定活动(本地)设计中的哪些元件参数会与所选 Source server 中所有 Workspace 元件的参数进行匹配。

创建简单或复杂的规则,以将本地元件准确匹配到 Workspace 中合适的元件。
这些规则在实现本地到 Workspace 元件匹配方面的效果,取决于可用的元件参数,而这些参数会因公司系统或个人偏好而异。在最简单但也许不太可能的情况下,本地与等效 Workspace 元件之间的 Comment 或 Component Name 参数条目可能一致。然而在理想情况下,本地与 Workspace 元件会共享公司参考号或制造商料号参数。
例如,要创建这样的料号规则,可选择并修改现有规则(也可重命名),或使用  按钮创建新规则——必须选中(勾选)某条规则才能编辑。请注意,Local Parameter 和 Server Parameter 选择下拉列表彼此独立,这允许指定名称不同的参数——在下面示例中,本地
 Libray Reference 参数与 Workspace Part Number 参数表示公司内部的物料参考编号。

复杂的多参数规则要求所有指定的元件参数都与某个 Workspace 元件中的参数匹配。
运行如上所示的料号/参考号匹配规则,很可能在本地与 Workspace 元件之间建立近乎完整的匹配。规则建立后,可通过 Item Manager 对话框中的  按钮启动匹配过程。
要对单个元件启动自动匹配流程,请在 Item Manager 对话框中右键单击该元件条目,并从上下文菜单中选择 Automatch。或者,使用 Choose Manually 选项浏览并在 Workspace 中选择一个特定元件作为匹配项。
随后出现的 Automatching items 对话框将用  状态图标指示成功匹配,并包含对成功规则名称的引用。

使用基于通用料号的单条规则,为大量元件成功实现本地到 Workspace 匹配的示例。
当无法找到匹配项时,该条目将显示为带有  状态图标、红色文本,并包含一条参考信息,用于说明错误或匹配失败的原因——需要创建一条 不同或额外的 Rule,才能使这些元件成功匹配。另请注意,一条规则可能会检测到多个 Workspace 元件作为匹配项,这被视为成功结果,但需要手动介入来解决。这种冲突被视为“ambiguous(歧义)”结果,可在 Item Manager 对话框中解决——见下文。
当自动匹配过程完成后,关闭 Automatching items 对话框(OK),以便用建议的新元件设置填充 Items Manager 对话框。将要应用到已匹配条目的待处理 Workspace 内容,会列在对话框 Managed 选项卡下的 New Settings 区域中;或在 Components 选项卡下与尚未匹配的内容一起列出。
如果你在 Automatching items 对话框中启用了 Auto apply if all success 选项,那么当所有元件都找到匹配项时,对话框将自动关闭,并且 Items Manager 对话框会直接填充建议的新元件设置。

对 Workspace 内容的待处理更改会在对话框的 New Settings 区域中详细列出。
要解决任何歧义内容(通常由多个匹配项导致),请选择 Ambiguous Items(或 Ambiguous Footprints)选项卡,并在对话框 New Settings 区域的 Revision HRID 单元格下拉菜单中做出合适选择(默认显示为 <Not selected>)。请注意,多个匹配项(以及因此可用的选择)实际上可能引用的是同一元件的不同修订版。当问题解决后(不再被归类为歧义),该元件条目将移动到 Managed/Components 选项卡列表中。

当一条规则检测到多个匹配项时,Ambiguous Items 选项卡提供了指定选择的能力。超过六个匹配项将导致规则错误。
-
自动匹配也可以应用于特定列表条目或条目组。选择多个条目(使用标准 Shift+Click/Ctrl+Click 技巧),然后从右键上下文菜单中选择 Automatch,仅匹配这些条目;或者当列表按 Groups 方式排列时,右键单击某个组标题条目并选择 Automatch 命令,将该过程仅应用于该组。
-
使用元件自动匹配功能时,如果某个 Component Item 具有多个修订版,将使用检测到的第一个修订版。这意味着建议的 Item Revision 一开始就可能是过期的。该情况会在 Item Manager 中通过 New Settings 区域的 Lifecycle State 字段反映出来。因此,如果建议的 Item Revision 不合适,并且未通过 Automatching items 对话框处理,仍然可以回到 Item Manager 中通过手动选择流程进行修改。
高级匹配规则
如上所述,Item Manager 规则用于在本地项目元件与 Workspace 元件之间建立参数匹配。可以创建任意数量的规则,并按优先级从高到低运行。如果第一条(最上方)规则失败,则应用下一条规则——本质上是顺序的布尔 OR 关系。只有当规则对应的复选框被启用时,该规则才处于激活状态。
运行自动匹配过程时,Automatching items 对话框中的 State Notes 列会指示哪些规则未能找到匹配项。在这种情况下,需要不同或新的规则,才能令人满意地匹配可用参数。

基础规则可能无法为所有元件找到匹配项,但可以创建更具体的参数化规则,以实现完全匹配的结果。
使用 Item Manager Options 对话框中的 Add Rule 按钮创建新规则,并使用关联的  来应用多个参数匹配条件。单击
  可移除所选值。随着每个参数条件的添加,规则会变得越来越具体,并且在规则匹配成功之前必须满足所有条件——本质上是布尔 AND 条件。单击 Remove 按钮可移除所选匹配规则。
以此处所示示例为例,如果(比如)元件无法通过料号/参考编号参数进行匹配,则可以创建一条新规则,用于匹配上方所列未匹配电容的合适规格参数。

规则按从上到下的顺序运行,直到找到匹配项。多参数规则必须满足所有条件才能匹配。
当某条规则成功找到匹配项时,自动匹配过程会立即转到列表中的下一个元件。只有在上一条规则失败时,才会尝试下一条可用规则。
更新选项
Item Manager Options 对话框提供了一系列内容更新选项,可用于进一步细化如何将自动匹配到的 Workspace 元件应用到当前板级设计中。
Matching rules 区域显示当前为匹配而定义的规则。更多信息请参阅 Automatching Components 部分。

Item Manager 的 Update options 提供了一种灵活方式,用于确定更新哪些参数,以及在什么条件下更新。
这些选项通过 ECO 过程应用到当前设计,其行为如下:
-
Update ‘Lock Designator’ field – 勾选后,本地元件在 Designator 字段的 Locked 状态将被其所链接的 Workspace 元件中的状态覆盖。
-
Update ‘Lock Part-ID’ field – 勾选后,本地元件的多分部器件 ID 选择器的 Locked 状态将采用所链接的 Workspace 元件的状态。
-
Update Parameters – 勾选以允许将元件参数更新为所链接 Workspace 元件中的参数。启用下方选项。
-
 button – 打开 Library Update Settings 对话框(见下文)。
-
Preserve parameter location – 勾选后,原理图页上可见参数的位置保持不变,而不是重置为所链接 Workspace 元件的默认位置。
-
Preserve parameter visibility – 勾选后,参数的 Visible 状态保持不变,而不是采用所链接 Workspace 元件的状态。
Library Update Settings 对话框包含当前板级项目中所有元件的全部可用参数列表(右键可访问批量开/关功能)。列表中被勾选的参数将在本地元件被替换为/更新为 Workspace 元件时更新——更新行为由下方所述选项决定。

可精确指定要更新哪些元件参数。右键可进行勾选选项。
参数替换(或添加)行为由对话框中最下方的两个选项决定:
-
Library parameters not in sheet – 当 Workspace 元件(Library)参数在本地(Sheet)元件中不存在时,设置更新行为。
-
Add – 在更新期间将该参数添加到元件中。
-
Do not add – 在更新期间不将该参数添加到元件中。
-
Add if not blank – 仅当该参数具有有效数据(其 Value 条目不为空)时,才在更新期间将其添加到元件中。
-
Sheet parameters not in library – 当本地(Sheet)元件参数在所链接的 Workspace 元件(Library)中不存在时,设置更新行为。
-
Remove – 在更新期间从元件中删除现有(本地)参数。
-
Do not remove – 在更新期间不从元件中删除现有参数。
-
Remove if blank – 仅当现有参数没有有效数据(其 Value 条目为空)时,才在更新期间将其从元件中删除。
应用更新
在 Item Manager 中设置好的建议更改,将通过生成并执行 Engineering Change Order(ECO)应用到当前板级设计。选择你希望更新的已列出元件范围,然后从  按钮菜单中选择所需的 ECO 选项——选项包括:
-
Generate ECO – 使用此命令通过 Engineering Change Order 对话框生成并执行 ECO。在该对话框中,你可以浏览将要执行的操作以实现这些更改,并按需禁用任何操作。确认无误后,执行 ECO,即可应用更改。
-
Apply ECO – 使用此命令直接“静默”创建并执行 ECO(不显示 Engineering Change Order 对话框)。
实现,ECO 可静默运行,或通过对话框运行(如图所示)。")
更改通过 Engineering Change Order(ECO)实现,ECO 可静默运行,或通过对话框运行(如图所示)。
已执行的 ECO 过程将相应更新项目元件,随后这些元件会在 Item Manager 对话框中列为当前最新的 Workspace 元件。请注意,每个条目的先前图标( )已更改,以指示其引用了某个 Workspace 元件(
 )。
)。

Item Manager 显示了 PCB 项目中设计内容的新当前设置。先前的本地设计元件已被 Workspace 元件完全替换。
在原理图编辑器中,更新后的元件会链接到 Workspace 中与之匹配的元件——当 Workspace 元件的修订状态在之后被更新时/如果被更新,活动链接信息将检测到该变化。在设计空间中选择一个元件,并在 Properties panel 中查看其 Source 及相关信息。

示例展示了本地元件被成功替换,其中 Properties 面板显示了替换元件的 Workspace 来源与修订状态。
与已更改的 Workspace 内容同步
在产品开发过程中,设计所引用的源组件或受管原理图页很可能会发生变更。例如,组件模型可能会更新为新的制图标准,或者组件定义可能已更新以添加新参数。对设计中使用的 Workspace 组件和受管原理图页所做的任何此类更改,都需要被检测出来,并将这些更改传递到所有受影响的原理图页中。
检测何时需要更新
对于单个选中的组件或页符号,Properties面板中相应的 Component 或 Sheet Symbol 模式会立即指示该对象相对于其 Workspace 源数据是否已过期。使用关联的  或
或  按钮,可从其源 Workspace 更新该对象的数据。

当选中对象时,组件或受管原理图页的“过期”状态会在 Properties面板 中显示。并提供一个按钮,用于将所选对象更新到其最新修订版。
除了用于检测和管理当前为非 Workspace 实体的组件与原理图页(显示为 [Not Managed],且并非来自 Workspace)之外,Item Manager 也用于检测和管理所有已过期的内容。
打开 Item Manager 后,它会自动检测并列出所有组件和受管原理图页(并指示它们是否来自 Workspace),然后将原理图中每个 Workspace 内容的 Item-Revision 与 Workspace 中该内容的可用修订版进行比较。如果 Workspace 中存在更新的修订版,则会在 Item Manager 的 Revision Status 列中将其标记为 Out of date。

请注意那些被检测为 Out of Date 的组件和受管原理图页,选中它们,然后右键执行 Update。
有多种控件可用于帮助在 Item Manager 中组织和排序内容。对于 Workspace 组件,选择对话框的 Managed 或 Components 选项卡,并禁用任何已应用的列分组,以便在单一列表中显示所有过期组件。另外,单击 Revision Status 列标题按该列排序,这会使所有 Out of Date 的内容聚集在一起,便于更新。
更新内容
要将过期内容更新到最新,需要先选中它,然后在右键上下文菜单中执行 Update to latest revision 命令。随后,对话框的 New Settings 区域将显示每个新 Item-Revision 的详细信息。
当按需设置好更改后,需要将这些更改落实实施。这通过 Engineering Change Order (ECO) 来完成。位于 Item Manager 底部、与 ECO 按钮关联的下拉菜单提供两种执行更新的方式:
-
Generate ECO - 使用此命令通过 Engineering Change Order 对话框生成并执行 ECO。通过该对话框,你可以浏览为实施这些更改将要执行的操作。你可以按需禁用任何操作——你始终对哪些内容会被更改拥有完全控制权。准备就绪后,执行 ECO,更改将被应用。
-
Apply ECO - 使用此命令可直接静默创建并执行 ECO——不会弹出 Engineering Change Order 对话框。

选择过期内容并使用 Update to latest revision 右键命令,将更新后的修订版详细信息加载到 New Settings 区域。然后通过 ECO 将更新应用回设计中的组件和受管原理图页。
请注意,在修订版更新(同步)期间,Item Parameters 将按照
Item Manager Options 对话框(通过 Item Manager 的
按钮访问)中当前
Update Options 设置进行更新——参见上文
Update Options。
-
当更新多分部件组件且未选中该组件的所有分部件时,系统会提示你更新所有分部件。在弹出的 Confirm 对话框中单击 Yes 以继续。
-
当更新受管原理图页,且原理图中放置了多个引用同一 Managed Schematic Sheet Item 修订版的实例时,如果未选中所有实例,系统会提示你更新所有这些实例。在弹出的 Confirmation 对话框中单击 Yes 以继续。
可以在板级设计项目的原理图页中,在单个组件/页符号层级验证替换是否确实成功。对所选条目打开 Properties面板,此时会显示一个链接,指向对应的源受管 Item。或者,也可以在 Item Manager 中快速完成验证;它会在网格的 Current Settings 区域中更新,以反映板级设计项目中这些条目的新设置。
Item Manager 报告
在 Item Manager 中提交组件更新或更改流程之前,使用对话框的 Export 功能生成当前列表信息的快照可能更为稳妥。操作方法:在 Item Manager 任意位置右键并从上下文菜单选择 Export,然后导航到合适的位置并按需命名报告。报告将以 HTML 文件形式生成,并以与当前 Item Manager 显示相同的布局呈现。

从右键菜单选择 Export ,即可从 Item Manager 生成报告。报告以 HTML 格式生成,代表完整 Item Manager 列表的快照。

 AI 翻译
AI 翻译