Document Commenting in Managed Projects_AD
Parent page: Managed Projects and Releasing a Design
Altium Designer, in conjunction with your managed content server, supports Managed Projects – enabling a dispersed design team to collaboratively work on projects that are centrally stored and managed through that Server. Related to this, comments added to an area or object in a Managed Project's schematic or PCB document do not modify the document itself. This allows all working on a document to comment and review the design (or part thereof) in real-time – analogous to the Comments feature of Google Docs.
This commenting feature facilitates strong review and collaboration processes. Due to the server nature of comments (they are stored on the Server and do not touch the design document in any way) they become invaluable when:
- You want to point out some issues in a document, without physically merging and getting conflicts.
- You want to add a comment which will became visible to everybody instantly, prior to committing your working copy.
- You want to have a list of notes for you current design, that are attached to areas of the document and could be closed as the design matures (similar to a to-do list).
Adding a Comment
There are three commands available for adding a comment:
- Place » Comment for Area (Ctrl+Alt+A) – allows you to make a comment that relates to a defined rectangular area on the active document.
- Place » Comment for Point (Ctrl+Alt+P) – allows you to make a comment related to a particular point on the active document.
- Place » Comment (Ctrl+Alt+C) – allows you to make a comment that relates to a single selected component on the active document.
- Place » Freehand comment (Ctrl+Alt+R) – allows you to make a comment that relates to a custom, free-hand area drawn on the document. This command features automatic context identification, so that if you draw a shape around a component, the comment will be bound to that component.
► Use these links to access the corresponding command documentation pages for Schematic, or for PCB, respectively.
Launch one of these commands, and define the point, rectangular, or free-hand area for the comment where applicable. The Comments panel will appear, ready to enter a new comment. Type your comment, then click the  control beneath. The comment will be committed, appearing in the panel. For point, area and component type comments, the comment will also appear in the document editor, linked to the point, area, or component, by a reference line.
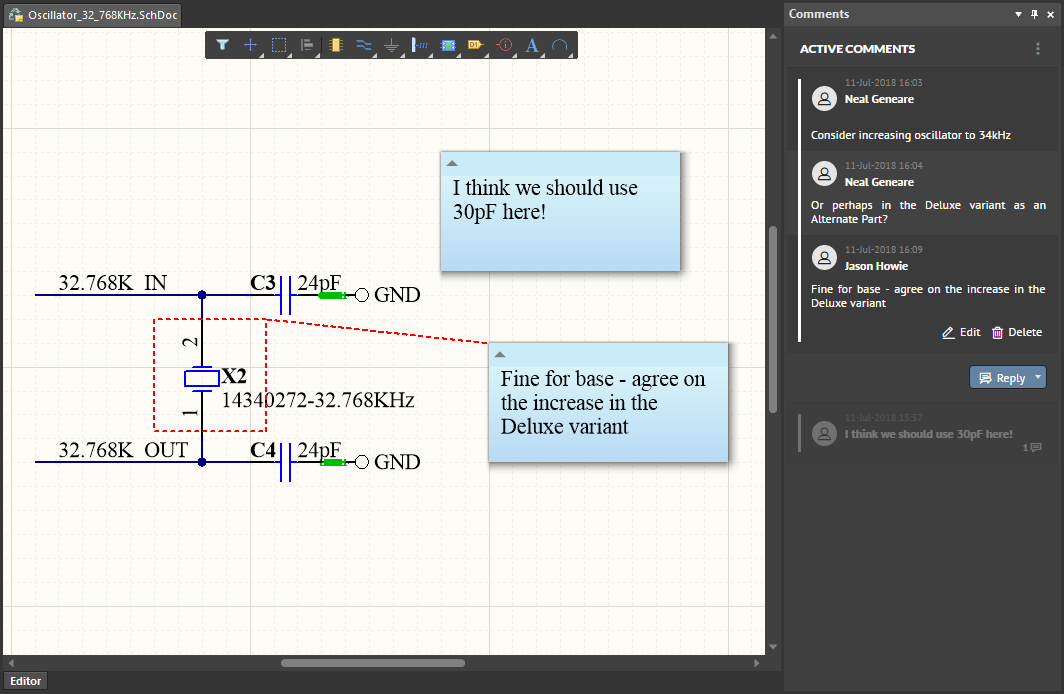 Example comments overlayed on a child schematic sheet of a Managed Project. The Comments panel reflects all comments for the sheet.
Using Freehand comment Mode
When using the Freehand comment feature (Place » Freehand comment, Ctrl+Alt+R) – that allows you to add comments to a document by freehand drawing – the comment entry is automatically added to the Comments panel, which will contain context information as follows:
- If you draw a freehand shape around a component, the comment will be tagged with the string <UserName> commented on <ComponentDesignator>.
- If you draw a freehand shape anywhere else on the document, the comment will be tagged with the string <UserName> commented on <DocumentName>.
Click on the entry for the comment in the panel to access the standard field for editing the comment (Edit).
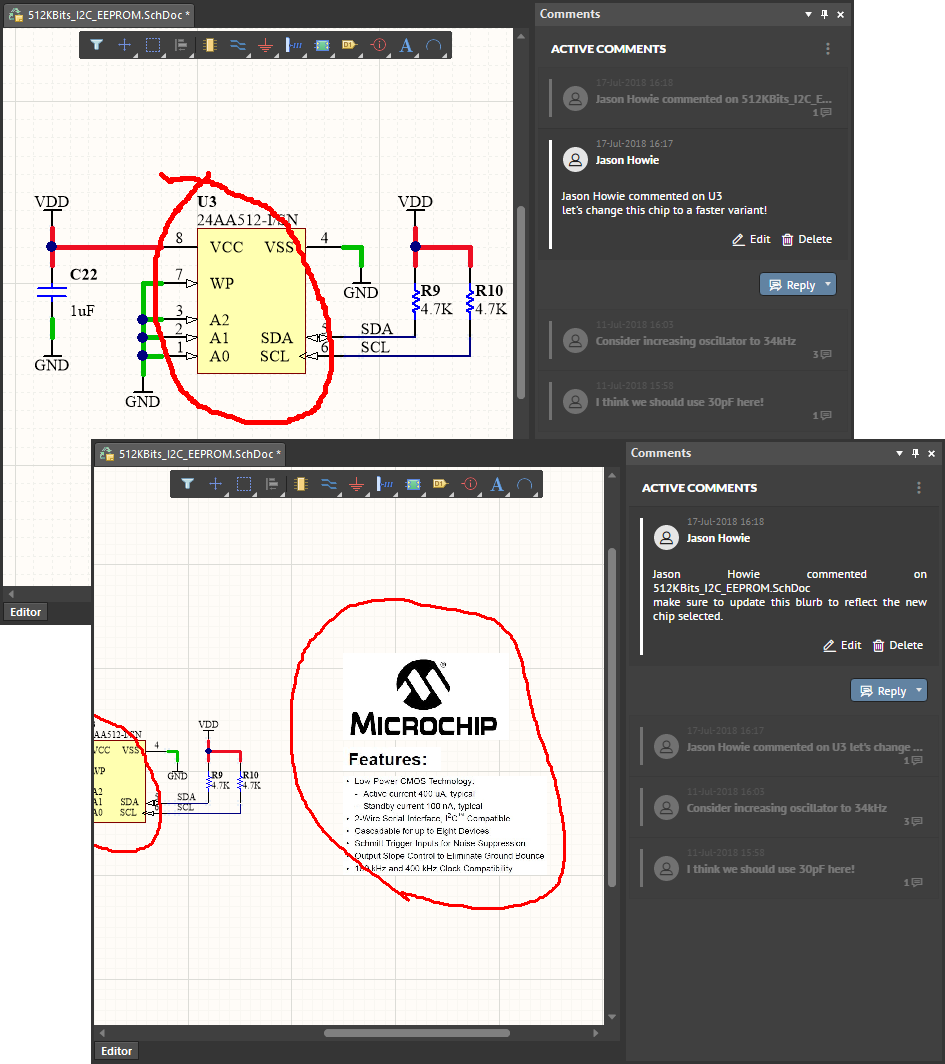 Example of using the Review Mode commenting feature.
Working with Comments
The following points relate to working with comments and the Comments panel:
- When a comment is added, it is seen instantly by all other users that have that same Managed Project and document open.
- The Comments panel will track the entire thread of a specific comment, whereas only the latest comment in that thread is displayed in the document view.
- Within a comment thread on the Comments panel, the latest reply is always added to the bottom of that thread. Where multiple comment threads are present in a document, the latest thread is presented at the top of the panel.
- The active/selected comment on the Comments panel is highlighted. In the document editor, the area/point/component that is the focus of the active/selected comment is zoomed and centered in the main design window (where applicable). For a point, area or component type comment, its associated reference line is also displayed.
- You can move a comment around in the document editor, only in terms of the location in which the text is displayed. The initial defined point or area cannot be modified. The reference line extends from that point/area to the text area.
- You can collapse a comment in the document view by clicking on the small triangle at the top-left of the textual area.
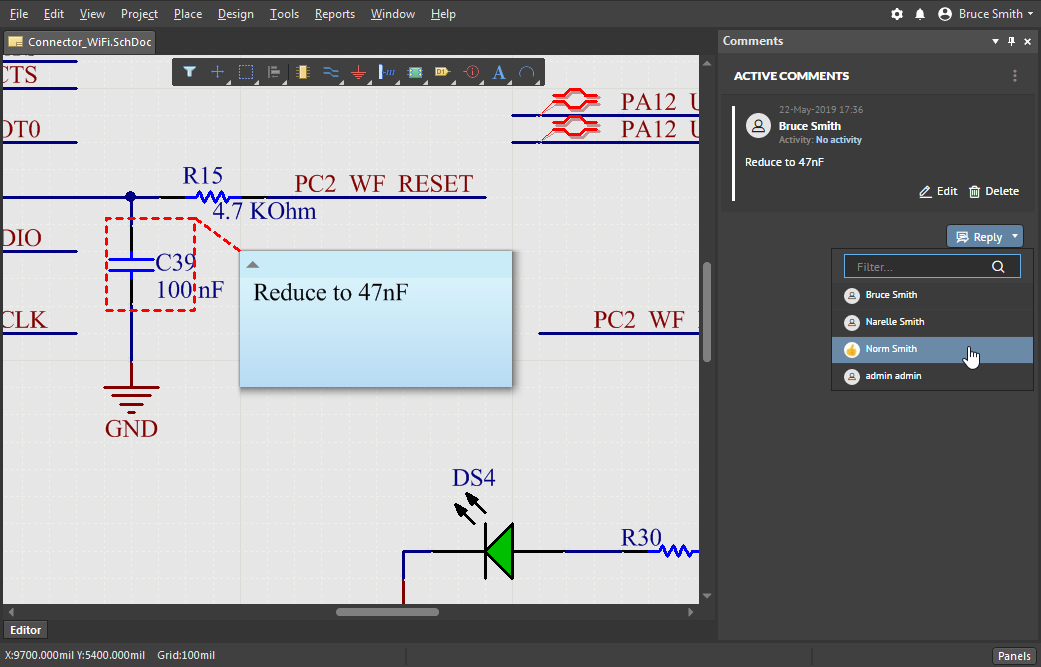
- To reply to a comment, select that comment in the Comments panel and click the
 button. Type your text in the field provided, then click the Reply control to commit. To exit without replying, either click the Cancel control, or click away from the thread. In the latter case, a warning dialog will appear, alerting you that all unsaved data will be lost. If you are sure you want to stop editing, click Yes.
 - A comment can be edited or deleted, through the panel only, using the Edit and Delete controls respectively, that present once the comment is selected. Note that these controls will only be available for a comment that you yourself have made – you cannot edit or remove a comment made by another user. If you edit an existing comment, type your text in the field provided, then click the Update control to commit. To exit without replying, either click the Cancel control, or click away from the thread. In the latter case, a warning dialog will appear, alerting you that all unsaved data will be lost. If you are sure you want to stop editing, click Yes.
Assigning a Comment to a User
Comments added to a project document may be assigned to a specific User in the Comments panel by choosing the Assign option from the comment's  button drop down menu, and then selecting an available User.
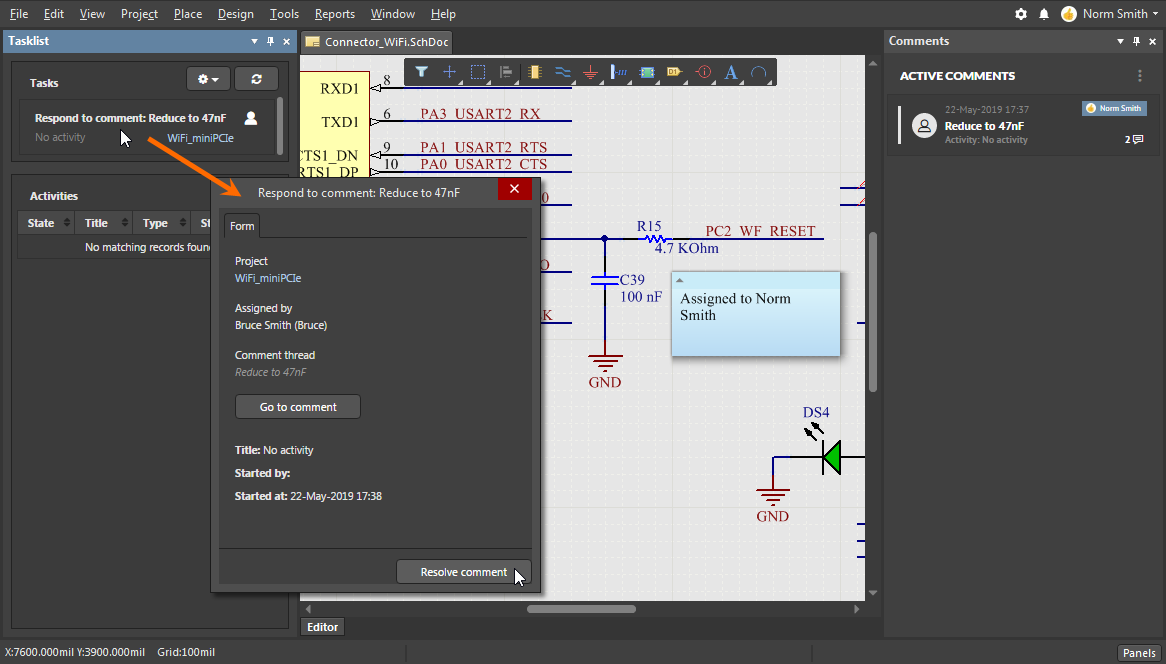
The Comment entry in the panel will indicate the assigned User, and the Comment text in the document will change to reflect the User Assignment, in place of the comment text itself.
An associated Task is automatically created for the assigned User, as presented in the Tasklist panel when the User (the task assignee) is signed in.
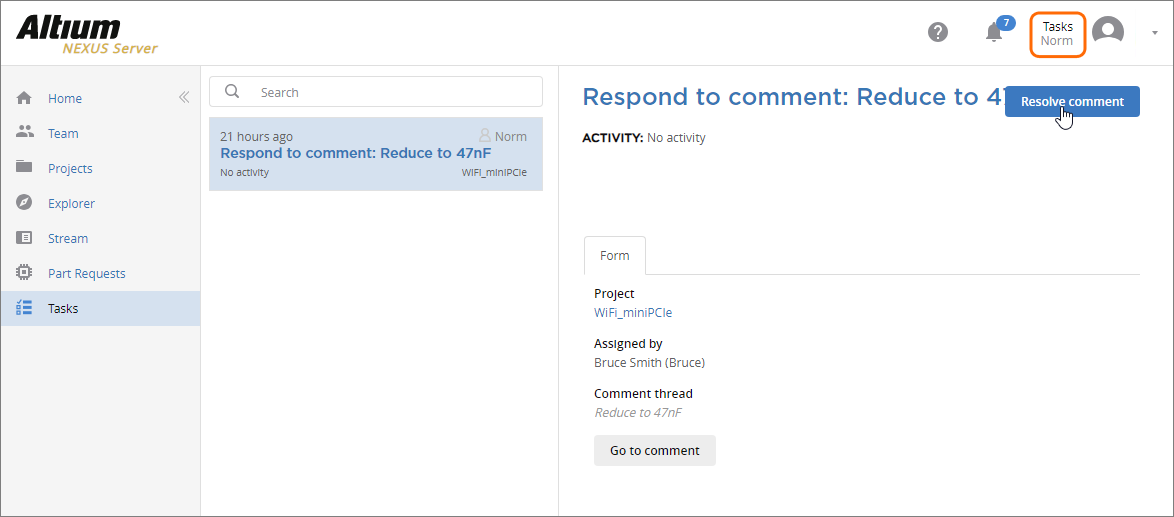
On the server side, a signed-in User can access a task that is assigned to them on the Task Management page of the server’s browser interface – select the Tasks menu item. Server Administrators can see, but not act on, a User's task by selecting the All tasks view option on the Task Management page.
Resolving and Reopening Comments
To resolve a comment, select it, then click the drop-down arrow of the  button, and choose the Resolve option from the menu. The comment will be removed from the panel and the document view.
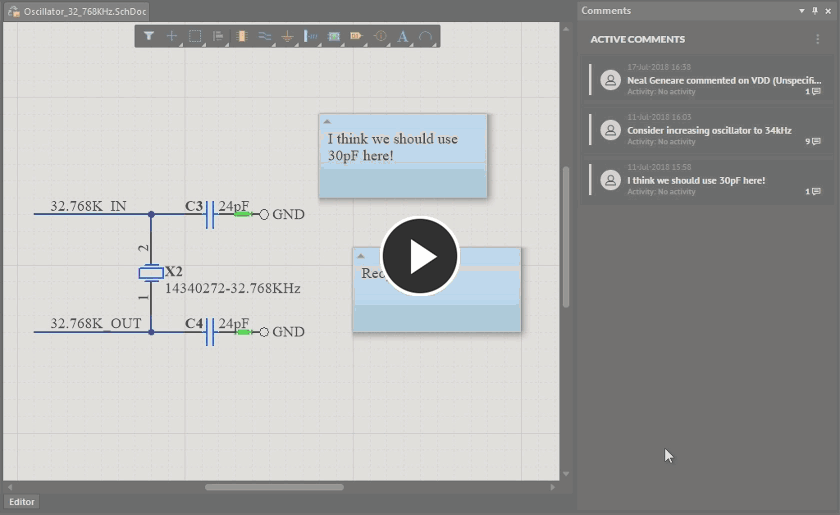 Resolving a comment essentially closes it, removing it from both panel and document view.
Resolved comments can still be displayed on the Comments panel. To do so, click the  control at the top-right of the panel, and switch from Active to Resolved in the Comments section. All comments that have previously been resolved will be displayed on the panel. You also have the ability to resurrect comments that have been resolved. To do so, click the
  button associated to a resolved comment you want to bring back. The comment will be reinstated, both on the panel and in the document editor.
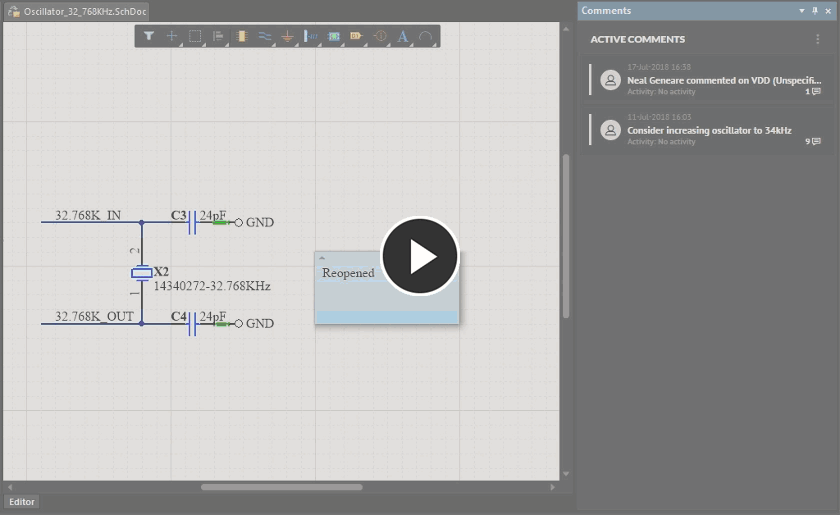 Accessing previously resolved comments, and reinstating (re-opening) a resolved comment.
Viewing Context
The Comments panel can display only the comments associated with the active document, or all comments, across all schematic and PCB documents in the Managed Project. To do so, click the  control at the top-right of the panel, and switch between Project and Document in the Context section.
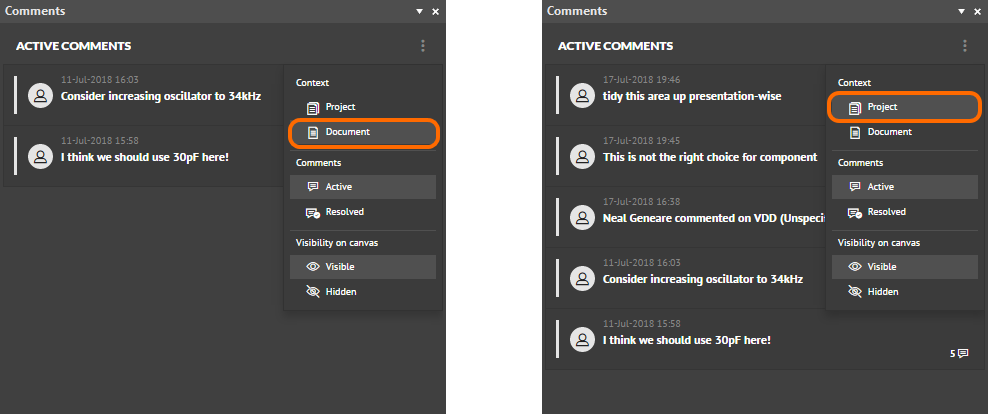 Switch context between viewing comments for the active document only, and all comments across the source documents in the project.
Associating a Comment to an Activity
When you have activities running for a managed project – typically design review related processes – you have the ability to associate your comments to a specific activity. This ability to essentially 'tag' a comment as belonging to a specific activity can be very useful if multiple comments are present on a source document and specific comments will apply to particular reviewing activities. The association can be made in either a Web Review session or in the Altium NEXUS Comments panel.
When there are active review-based processes for the managed project, the field to the right of the Activity entry for a comment will become active – click this to access a listing of all available activities. Choose an entry to associate the comment to that specific activity, as shown for the Web Review comments pane below.
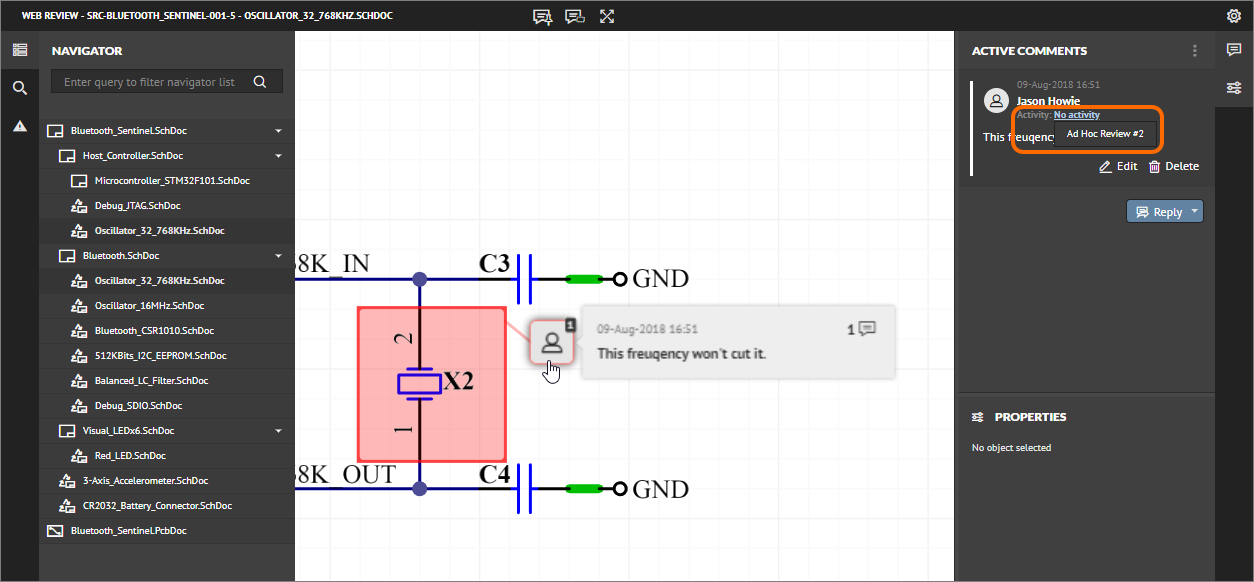 Choose which active design review activity the comment should be associated to.
The associated activity for a comment will be reflected from the Web Review interface back in the Comments panel within Altium NEXUS, or if established in the Comments panel, back to the Web Review – note that you may need to refresh the browser to pick up a change. If you do not see an update in the Comments panel, sign out and back in to Altium NEXUS.
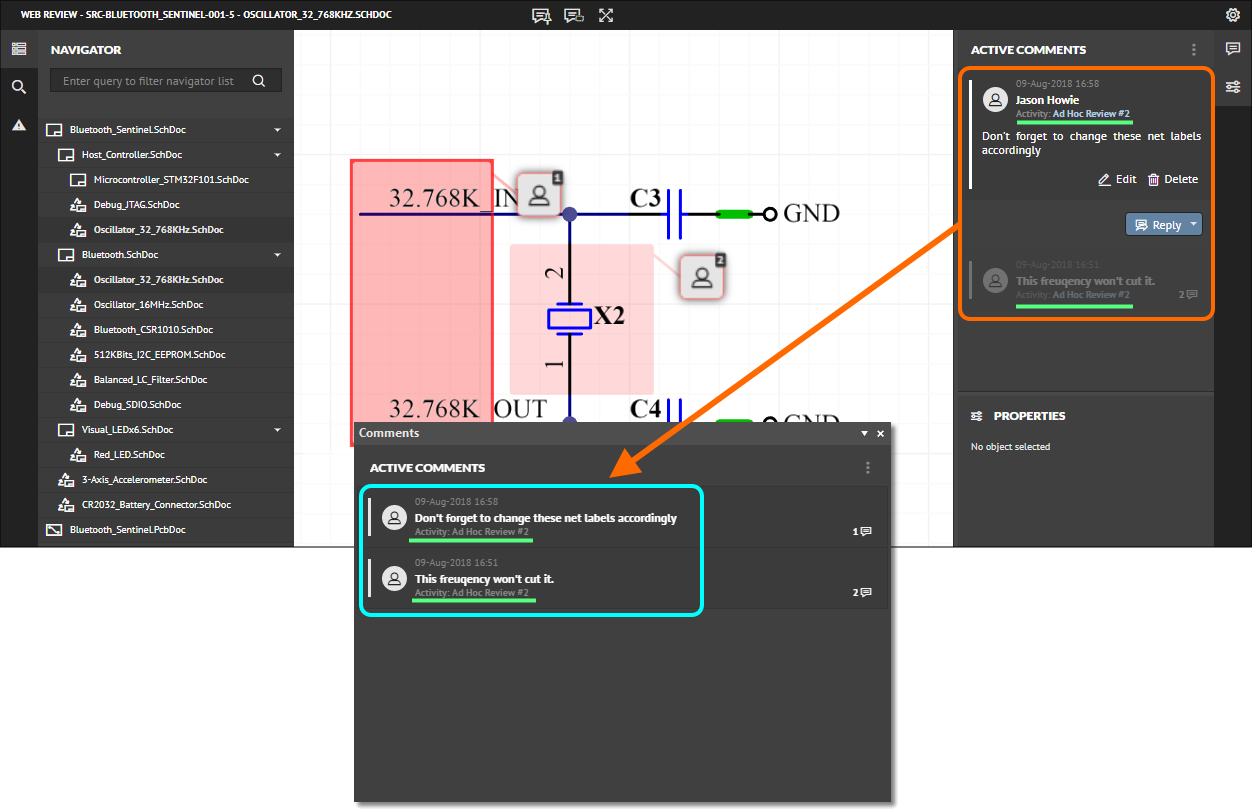 Back in Altium NEXUS, the activity tagging for each comment is reflected in the Comments panel. Above: Activities are underlined in green for highlighting.
Controlling Comments Display in the Editor
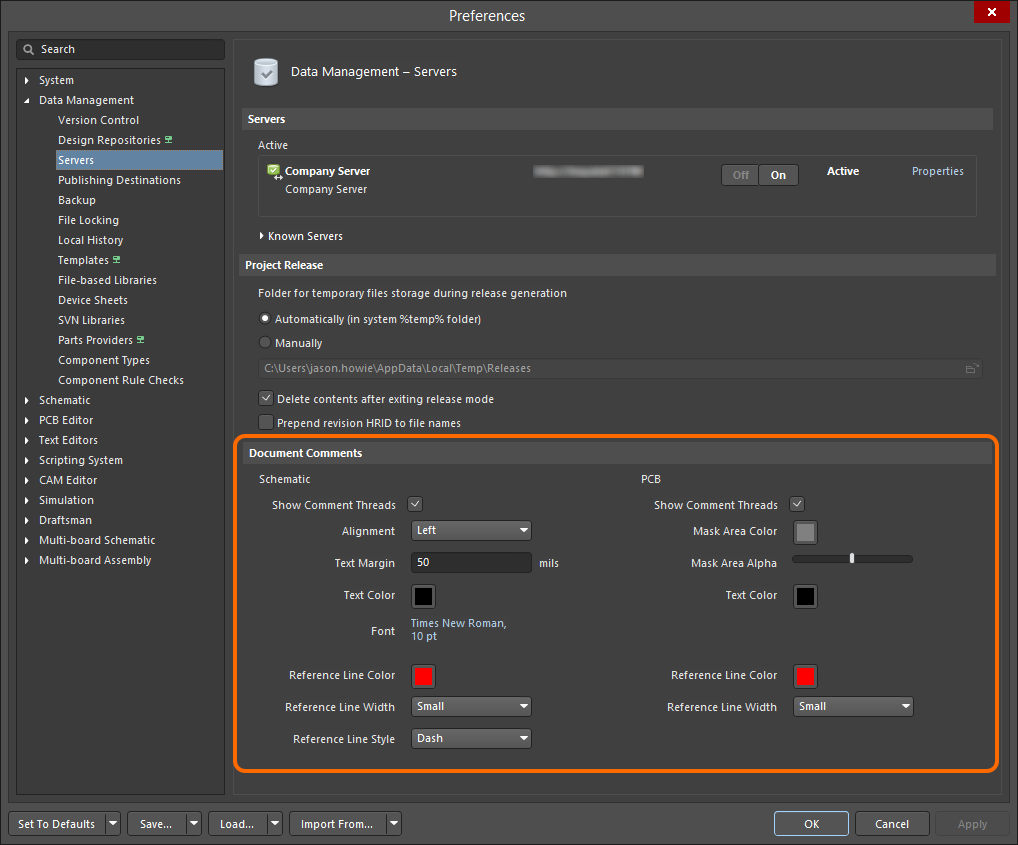
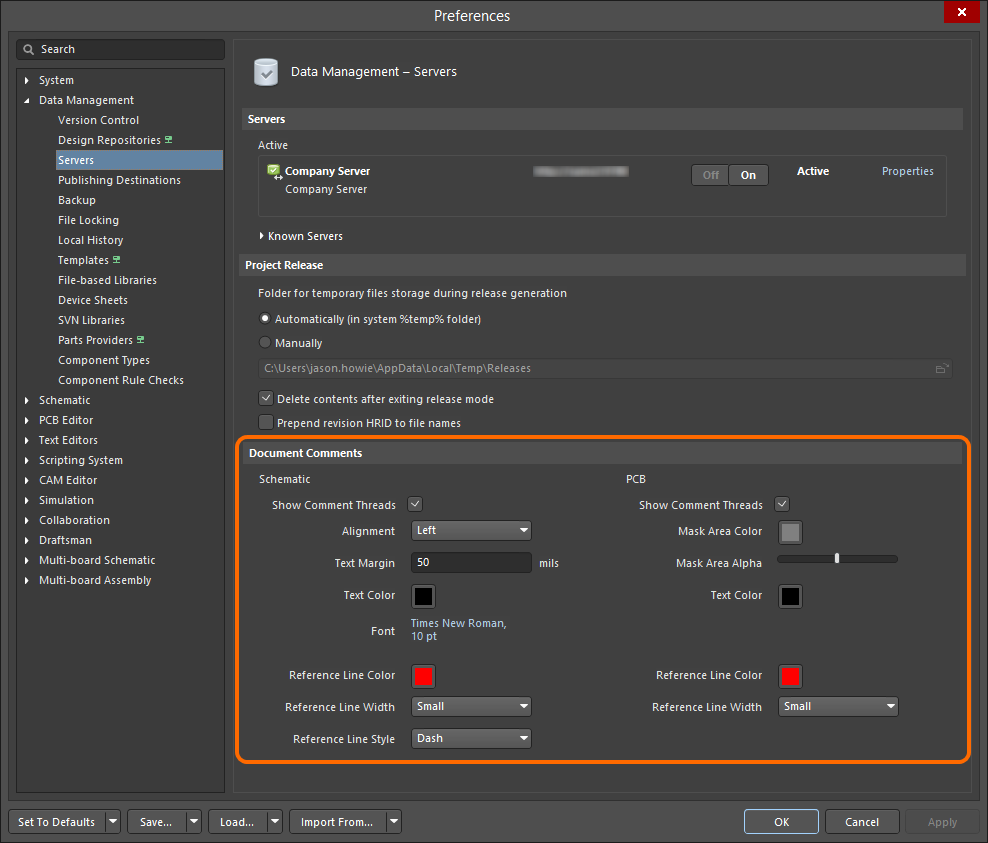
The display and appearance of comments is controlled from the Document Comments region, on the Data Management – Servers page of the Preferences dialog. Controls are provided independently for comments displayed on schematic and PCB. To turn off display of comments in the document editor – relying on just the Comments panel – disable the respective Show Comment Threads option.
Other controls in the region relate to the look and feel of the comment, and its reference line respectively.

